
作者:看不盡的塵埃
本文為作者投稿,Seebug Paper 期待你的分享,凡經采用即有禮品相送!
投稿郵箱:paper@seebug.org
前言
以前覺得 sqlmap 自己玩得挺溜了,結果最近有一個任務,需要調用 sqlmap api 接口來驗證存在 sql 注入漏洞的站點,一開始聽到這個任務覺得完了,可能完成不了了,后來我去網上搜了搜相關的資料,發現關于這方面的資料確實挺少的,于是參觀了一下sqlmap 的源碼,大致摸清楚了如何調用 api 接口。因此,筆者打算寫一篇完整些的文章,才有了本文。
筆者技術有限,有錯誤或者寫的不好的地方敬請諒解!
為什么要使用sqlmap API?
由于SQLMAP每檢測一個站點都需要開啟一個新的命令行窗口或者結束掉上一個檢測任務。雖然 -m 參數可以批量掃描URL,但是模式也是一個結束掃描后才開始另一個掃描任務。 通過 api 接口,下發掃描任務就簡單了,無需開啟一個新的命令行窗口。
下載與安裝
如果您需要使用 sqlmap api接口或者沒安裝 sqlmap 工具的,您需要下載安裝sqlmap程序。而sqlmap是基于Python 2.7.x 開發的,因此您需要下載Python 2.7.x。
- Python 2.7.x 下載地址:https://www.python.org/downloads/release/python-2715/
- sqlmap 下載地址:https://github.com/sqlmapproject/sqlmap/zipball/master
安裝過程我這里就不詳細說了,不會的話可以問問度娘(https://www.baidu.com/s?wd=sqlmap%E5%AE%89%E8%A3%85%E6%95%99%E7%A8%8B)
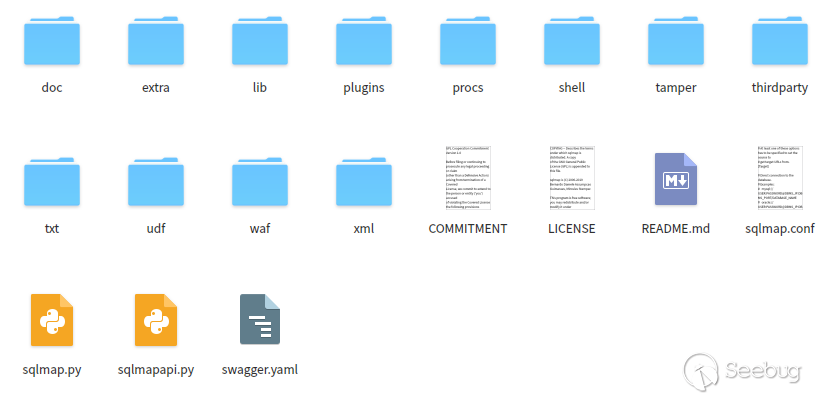
sqlmap的目錄結構圖如下:
sqlmap 安裝完成后,輸入以下命令,返回內容如下圖一樣,意味著安裝成功:
python sqlmap.py -h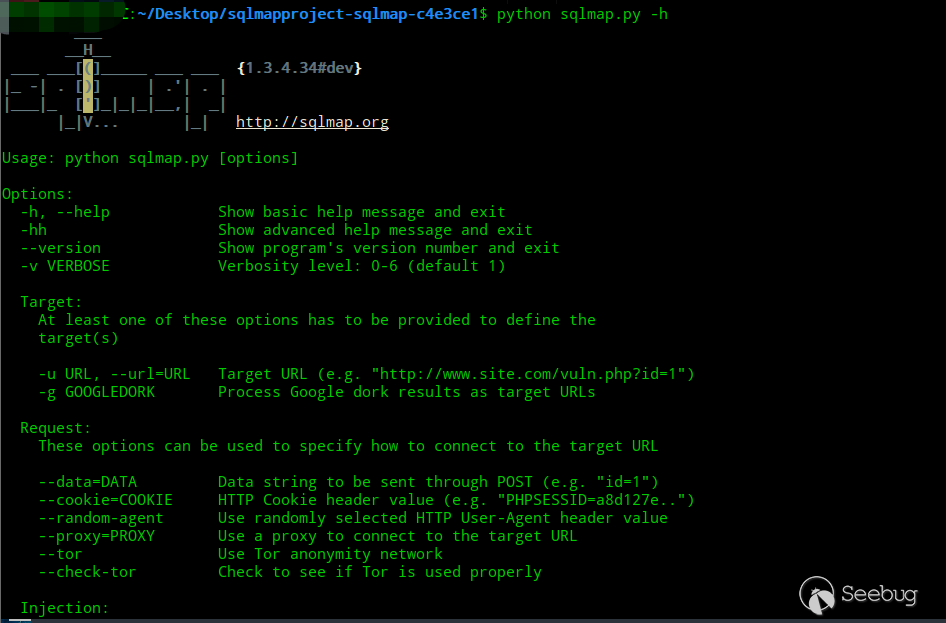
sqlmap api
說了那么多,到底 api 如何使用呢?在下載安裝 SQLMAP 后,你會在 sqlmap 安裝目錄中找到一個 sqlmapapi.py 的文件,這個 sqlmapapi.py 文件就是 sqlmmap api。 sqlmap api 分為服務端和客戶端,sqlmap api 有兩種模式,一種是基于 HTTP 協議的接口模式,一種是基于命令行的接口模式。
sqlmapapi.py 的使用幫助
通過以下命令獲取 sqlmapapi.py 的使用幫助:
python sqlmapapi.py -h返回的信息:
Usage: sqlmapapi.py [options]

Options:
? -h, --help? ? ? ? ? ? 顯示幫助信息并退出
? -s, --server? ? ? ? ? 做為api服務端運行
? -c, --client? ? ? ? ? 做為api客戶端運行
? -H HOST, --host=HOST? 指定服務端IP地址 (默認IP是 "127.0.0.1")
? -p PORT, --port=PORT? 指定服務端端口 (默認端口8775)
? --adapter=ADAPTER? ? ?服務端標準接口 (默認是 "wsgiref")
? --username=USERNAME? ?可空,設置用戶名
? --password=PASSWORD? ?可空,設置密碼
開啟api服務端
無論是基于 HTTP 協議的接口模式還是基于命令行的接口模式,首先都是需要開啟 api 服務端的。 通過輸入以下命令即可開啟 api 服務端:
python sqlmapapi.py -s命令成功后,在命令行中會返回一些信息。以下命令大概的意思是 api 服務端在本地 8775 端口上運行,admin token 為1acac56427f272e316fceabe5ddff5a5,IPC 數據庫的位置在/tmp/sqlmapipc-zOIGm_,api 服務端已經和 IPC 數據庫連接上了,正在使用 bottle 框架 wsgiref 標準接口。
[19:53:57] [INFO] Running REST-JSON API server at '127.0.0.1:8775'..
[19:53:57] [INFO] Admin (secret) token: 1acac56427f272e316fceabe5ddff5a5
[19:53:57] [DEBUG] IPC database: '/tmp/sqlmapipc-zOIGm_'
[19:53:57] [DEBUG] REST-JSON API server connected to IPC database
[19:53:57] [DEBUG] Using adapter 'wsgiref' to run bottle
但是通過上面的這種方式開啟 api 服務端有一個缺點,當服務端和客戶端不是一臺主機會連接不上,因此如果要解決這個問題,可以通過輸入以下命令來開啟 api 服務端:
python sqlmapapi.py -s -H "0.0.0.0" -p 8775命令成功后,遠程客戶端就可以通過指定遠程主機 IP 和端口來連接到 API 服務端。
固定 admin token
如果您有特殊的需求需要固定 admin token 的話,可以修改文件 api.py,該文件在 sqlmap 目錄下的/lib/utils/中,修改該文件的第 661 行代碼,以下是源代碼:
DataStore.admin_token = hexencode(os.urandom(16))sqlmap api 的兩種模式
命令行接口模式
輸入以下命令,可連接 api 服務端,進行后期的指令發送操作:
python sqlmapapi.py -c如果是客戶端和服務端不是同一臺計算機的話,輸入以下命令:
python sqlmapapi.py -c -H "192.168.1.101" -p 8775輸入以上命令后,會進入交互模式,如下圖所示:

命令行接口模式的相關命令
通過在交互模式下輸入 help 命令,獲取所有命令,以下是該接口模式的所有命令:
api> help
help? ? ? ? ? ?顯示幫助信息
new ARGS? ? ? ?開啟一個新的掃描任務
use TASKID? ? ?切換taskid
data? ? ? ? ? ?獲取當前任務返回的數據
log? ? ? ? ? ? 獲取當前任務的掃描日志
status? ? ? ? ?獲取當前任務的掃描狀態
option OPTION? 獲取當前任務的選項
options? ? ? ? 獲取當前任務的所有配置信息
stop? ? ? ? ? ?停止當前任務
kill? ? ? ? ? ?殺死當前任務
list? ? ? ? ? ?顯示所有任務列表
flush? ? ? ? ? 清空所有任務
exit           退出客戶端        t? ? ? ? ? ?
既然了解了命令行接口模式中所有命令,那么下面就通過一個 sql 注入來演示該模式接口下檢測 sql 注入的流程。
檢測 GET 型注入
通過輸入以下命令可以檢測 GET 注入
new -u "url"雖然我們僅僅只指定了-u參數,但是從返回的信息中可以看出,輸入 new 命令后,首先先請求了/task/new,來創建一個新的taskid,后又發起了一個請求去開始任務,因此可以發現該模式實質也是基于 HTTP 協議的。

通過輸入 status 命令,來獲取該任務的掃描狀態,若返回內容中的 status 字段為terminated,說明掃描完成,若返回內容中的 status 字段為 run,說明掃描還在進行中。
下圖是掃描完成的截圖:

通過輸入 data 命令,來獲取掃描完成后注入出來的信息,若返回的內容中 data 字段不為空就說明存在注入。
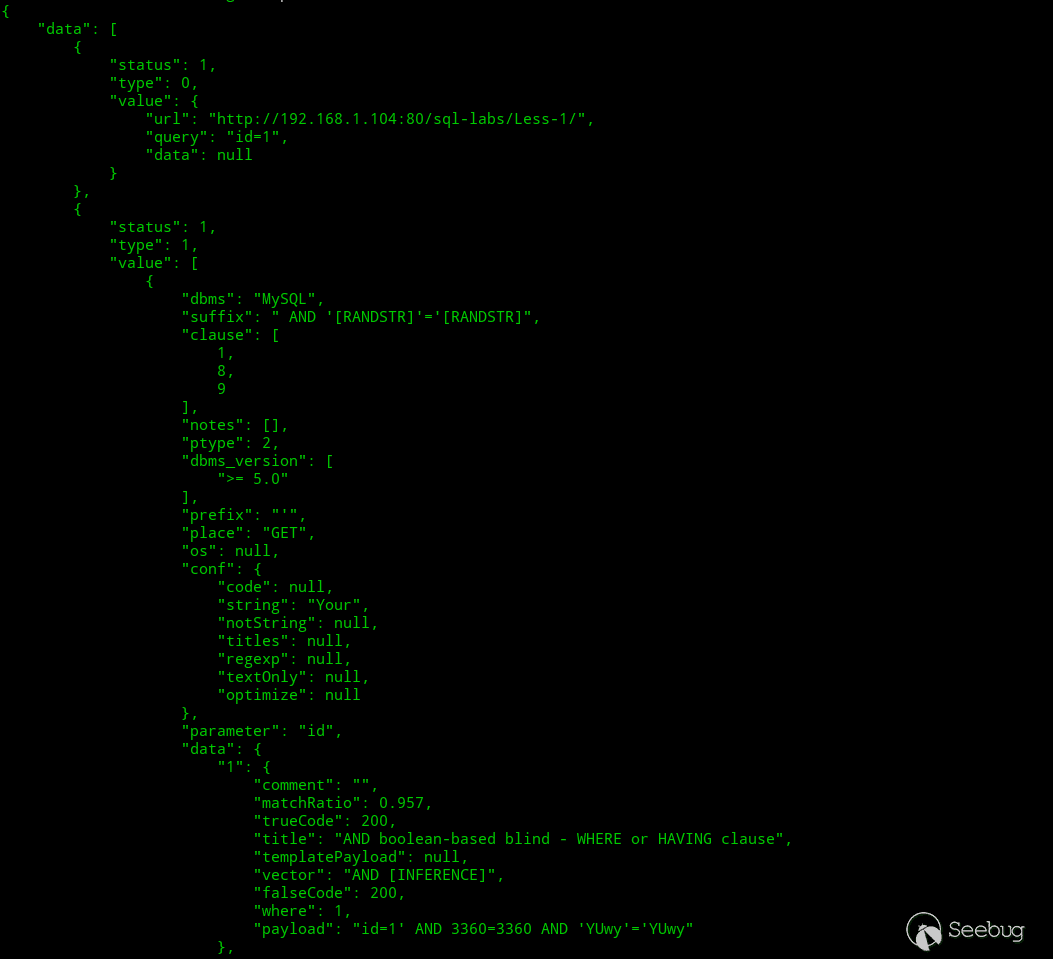
下圖是存在 SQL 注入返回的內容,可以看到返回的內容有數據庫類型、payload、注入的參數等等。
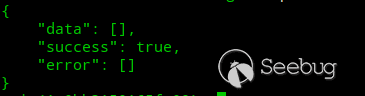
下圖是不存在注入返回的內容,data 字段為空:
檢測 POST 型、cookie、UA 等注入
通過輸入以下命令,在 data.txt 中加入星號,指定注入的位置,來達到檢測 POST、cookie、UA 等注入的目的:
new -r data.txt
總結
基于命令行的接口模式用起來還是比較方便的,我們只需要通過 new 命令就可以自動創建 taskid 并開始該任務,但是如果寫程序調用的話可能就不是那么友善了,因此筆者會重點介紹下面的一種接口模式,基于 HTTP 協議的接口模式。
基于HTTP協議的接口模式
下列都是基于 HTTP 協議 API 交互的所有方法:
提示:“@get” 就說明需要通過 GET 請求的,“@post” 就說明需要通過 POST 請求的;POST 請求需要修改 HTTP 頭中的 Content-Type 字段為application/json。
#輔助
@get('/error/401')
@get("/task/new")
@get("/task/<taskid>/delete")

#Admin 命令
@get("/admin/list")
@get("/admin/<token>/list")
@get("/admin/flush")
@get("/admin/<token>/flush")

#sqlmap 核心交互命令
@get("/option/<taskid>/list")
@post("/option/<taskid>/get")
@post("/option/<taskid>/set")
@post("/scan/<taskid>/start")
@get("/scan/<taskid>/stop")
@get("/scan/<taskid>/kill")
@get("/scan/<taskid>/status")
@get("/scan/<taskid>/data")
@get("/scan/<taskid>/log/<start>/<end>")
@get("/scan/<taskid>/log")
@get("/download/<taskid>/<target>/<filename:path>")
@get('/error/401')
該接口在我的理解表明首先需要登錄(Admin token),不然會返回狀態碼 401。 具體代碼如下:
? ? response.status = 401
? ? return response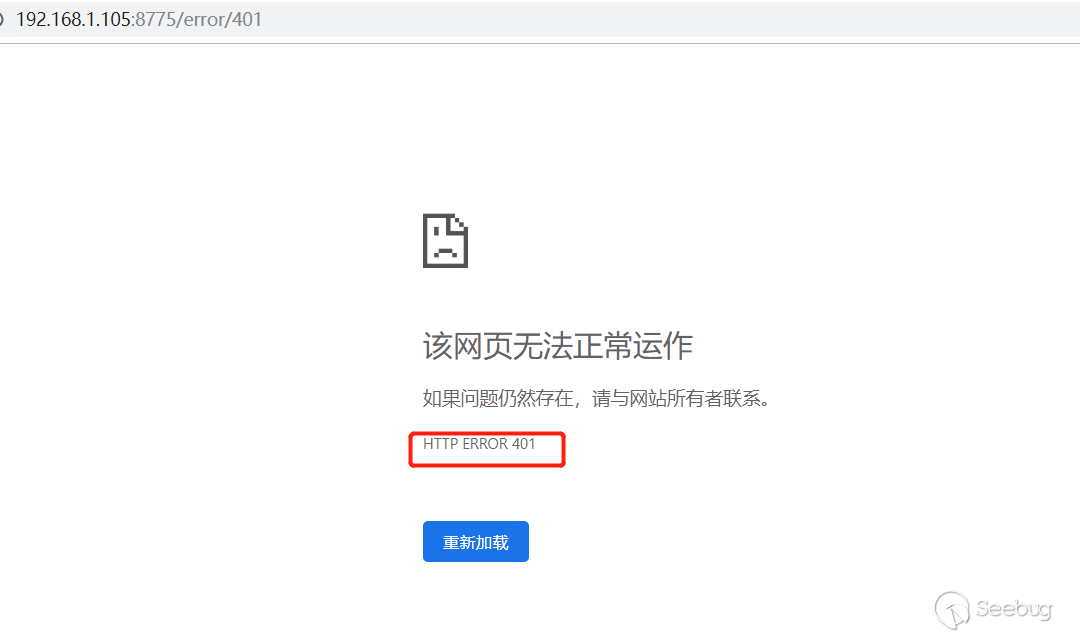
@get("/task/new")
該接口用于創建一個新的任務,使用后會返回一個隨機的 taskid。 具體代碼如下:
def task_new():
? ? """
? ? Create a new task
? ? """
? ? taskid = hexencode(os.urandom(8))
? ? remote_addr = request.remote_addr
? ? DataStore.tasks[taskid] = Task(taskid, remote_addr)
? ? logger.debug("Created new task: '%s'" % taskid)
? ? return jsonize({"success": True, "taskid": taskid})
下圖是調用該接口的截圖:

@get("/task//delete")
該接口用于刪除 taskid。在調用時指定 taskid,不指定 taskid 會有問題。 具體代碼如下:
def task_delete(taskid):
? ? """
? ? Delete an existing task
? ? """
? ? if taskid in DataStore.tasks:
? ? ? ? DataStore.tasks.pop(taskid)
? ? ? ? logger.debug("(%s) Deleted task" % taskid)
? ? ? ? return jsonize({"success": True})
? ? else:
? ? ? ? response.status = 404
? ? ? ? logger.warning("[%s] Non-existing task ID provided to task_delete()" % taskid)
? ? ? ? return jsonize({"success": False, "message": "Non-existing task ID"})
下圖是調用該接口的截圖:

@get("/admin/list")/@get("/admin//list")
該接口用于返回所有 taskid。在調用時指定 taskid,不指定 taskid 會有問題。 具體代碼如下:
def task_list(token=None):? ?
    """
? ? Pull task list
? ? """
? ? tasks = {}
? ? for key in DataStore.tasks:
? ? ? ? if is_admin(token) or DataStore.tasks[key].remote_addr == request.remote_addr:
? ? ? ? ? ? tasks[key] = dejsonize(scan_status(key))["status"]
? ? logger.debug("(%s) Listed task pool (%s)" % (token, "admin" if is_admin(token) else request.remote_addr))
? ? return jsonize({"success": True, "tasks": tasks, "tasks_num": len(tasks)})
下圖是調用該接口的截圖:

@get("/admin/flush")/@get("/admin//flush")
該接口用于刪除所有任務。在調用時指定admin token,不指定admin token可能會有問題。 具體代碼如下:
def task_flush(token=None):
? ? """
? ? Flush task spool (delete all tasks)
? ? """
? ? for key in list(DataStore.tasks):
? ? ? ? if is_admin(token) or DataStore.tasks[key].remote_addr == request.remote_addr:
? ? ? ? ? ? DataStore.tasks[key].engine_kill()
? ? ? ? ? ? del DataStore.tasks[key]
? ? logger.debug("(%s) Flushed task pool (%s)" % (token, "admin" if is_admin(token) else request.remote_addr))
? ? return jsonize({"success": True})
下圖是調用該接口的截圖:

@get("/option//list")
該接口可獲取特定任務ID的列表選項,調用時請指定taskid,不然會出現問題。 具體代碼如下:
def option_list(taskid):
? ? """
? ? List options for a certain task ID
? ? """
? ? if taskid not in DataStore.tasks:
? ? ? ? logger.warning("[%s] Invalid task ID provided to option_list()" % taskid)
? ? ? ? return jsonize({"success": False, "message": "Invalid task ID"})
? ? logger.debug("(%s) Listed task options" % taskid)
? ? return jsonize({"success": True, "options": DataStore.tasks[taskid].get_options()})
下圖是調用該接口的截圖:

@post("/option//get")
該接口可獲取特定任務ID的選項值,調用時請指定taskid,不然會出現問題。 具體代碼如下:
def option_get(taskid):
? ? """
? ? Get value of option(s) for a certain task ID
? ? """
? ? if taskid not in DataStore.tasks:
? ? ? ? logger.warning("[%s] Invalid task ID provided to option_get()" % taskid)
? ? ? ? return jsonize({"success": False, "message": "Invalid task ID"})
? ? options = request.json or []
? ? results = {}
? ? for option in options:
? ? ? ? if option in DataStore.tasks[taskid].options:
? ? ? ? ? ? results[option] = DataStore.tasks[taskid].options[option]
? ? ? ? else:
? ? ? ? ? ? logger.debug("(%s) Requested value for unknown option '%s'" % (taskid, option))
? ? ? ? ? ? return jsonize({"success": False, "message": "Unknown option '%s'" % option})
? ? logger.debug("(%s) Retrieved values for option(s) '%s'" % (taskid, ",".join(options)))
? ? return jsonize({"success": True, "options": results})
下圖是調用該接口的截圖:

@post("/option//set")
該接口為特定任務 ID 設置選項值,調用時請指定 taskid,不然會出現問題。 具體代碼如下:
def option_set(taskid):
? ? """
? ? Set value of option(s) for a certain task ID
? ? """
? ? if taskid not in DataStore.tasks:
? ? ? ? logger.warning("[%s] Invalid task ID provided to option_set()" % taskid)
? ? ? ? return jsonize({"success": False, "message": "Invalid task ID"})
? ? if request.json is None:
? ? ? ? logger.warning("[%s] Invalid JSON options provided to option_set()" % taskid)
? ? ? ? return jsonize({"success": False, "message": "Invalid JSON options"})
? ? for option, value in request.json.items():
? ? ? ? DataStore.tasks[taskid].set_option(option, value)
? ? logger.debug("(%s) Requested to set options" % taskid)
? ? return jsonize({"success": True})
下圖是調用該接口的截圖:

@post("/scan//start")
該接口定義開始掃描特定任務,調用時請指定 taskid,不然會出現問題。 具體代碼如下:
def scan_start(taskid):
? ? """
? ? Launch a scan
? ? """
? ? if taskid not in DataStore.tasks:
? ? ? ? logger.warning("[%s] Invalid task ID provided to scan_start()" % taskid)
? ? ? ? return jsonize({"success": False, "message": "Invalid task ID"})
? ? if request.json is None:
? ? ? ? logger.warning("[%s] Invalid JSON options provided to scan_start()" % taskid)
? ? ? ? return jsonize({"success": False, "message": "Invalid JSON options"})
? ? # Initialize sqlmap engine's options with user's provided options, if any
? ? for option, value in request.json.items():
? ? ? ? DataStore.tasks[taskid].set_option(option, value)
? ? # Launch sqlmap engine in a separate process
? ? DataStore.tasks[taskid].engine_start()
? ? logger.debug("(%s) Started scan" % taskid)
? ? return jsonize({"success": True, "engineid": DataStore.tasks[taskid].engine_get_id()})
下圖是調用該接口的截圖:

@get("/scan//stop")
該接口定義停止掃描特定任務,調用時請指定 taskid,不然會出現問題。 具體代碼如下:
def scan_stop(taskid):
? ? """
? ? Stop a scan
? ? """
? ? if (taskid not in DataStore.tasks or DataStore.tasks[taskid].engine_process() is None or DataStore.tasks[taskid].engine_has_terminated()):
? ? ? ? logger.warning("[%s] Invalid task ID provided to scan_stop()" % taskid)
? ? ? ? return jsonize({"success": False, "message": "Invalid task ID"})
? ? DataStore.tasks[taskid].engine_stop()
? ? logger.debug("(%s) Stopped scan" % taskid)
? ? return jsonize({"success": True})
下圖是調用該接口的截圖:

@get("/scan//kill")
該接口可殺死特定任務,需要指定 taskid,不然會出現問題。 具體代碼如下:
def scan_kill(taskid):
? ? """
? ? Kill a scan
? ? """
? ? if (taskid not in DataStore.tasks or DataStore.tasks[taskid].engine_process() is None or DataStore.tasks[taskid].engine_has_terminated()):
? ? ? ? logger.warning("[%s] Invalid task ID provided to scan_kill()" % taskid)
? ? ? ? return jsonize({"success": False, "message": "Invalid task ID"})
? ? DataStore.tasks[taskid].engine_kill()
? ? logger.debug("(%s) Killed scan" % taskid)
? ? return jsonize({"success": True})@get("/scan//status")
該接口可查詢掃描狀態,調用時請指定 taskid,不然會出現問題。 具體代碼如下:
def scan_status(taskid):
? ? """
? ? Returns status of a scan
? ? """
? ? if taskid not in DataStore.tasks:
? ? ? ? logger.warning("[%s] Invalid task ID provided to scan_status()" % taskid)
? ? ? ? return jsonize({"success": False, "message": "Invalid task ID"})
? ? if DataStore.tasks[taskid].engine_process() is None:
? ? ? ? status = "not running"
? ? else:
? ? ? ? status = "terminated" if DataStore.tasks[taskid].engine_has_terminated() is True else "running"
? ? logger.debug("(%s) Retrieved scan status" % taskid)
? ? return jsonize({
? ? ? ? "success": True,
? ? ? ? "status": status,
? ? ? ? "returncode": DataStore.tasks[taskid].engine_get_returncode()
? ? })
下圖是調用該接口的截圖:

@get("/scan//data")
該接口可獲得到掃描結果,調用時請指定 taskid,不然會出現問題。 具體代碼如下:
def scan_data(taskid):
? ? """
? ? Retrieve the data of a scan
? ? """
? ? json_data_message = list()
? ? json_errors_message = list()
? ? if taskid not in DataStore.tasks:
? ? ? ? logger.warning("[%s] Invalid task ID provided to scan_data()" % taskid)
? ? ? ? return jsonize({"success": False, "message": "Invalid task ID"})
? ? # Read all data from the IPC database for the taskid
? ? for status, content_type, value in DataStore.current_db.execute("SELECT status, content_type, value FROM data WHERE taskid = ? ORDER BY id ASC", (taskid,)):
? ? ? ? json_data_message.append({"status": status, "type": content_type, "value": dejsonize(value)})
? ? # Read all error messages from the IPC database
? ? for error in DataStore.current_db.execute("SELECT error FROM errors WHERE taskid = ? ORDER BY id ASC", (taskid,)):
? ? ? ? json_errors_message.append(error)
? ? logger.debug("(%s) Retrieved scan data and error messages" % taskid)
? ? return jsonize({"success": True, "data": json_data_message, "error": json_errors_message})
下圖是調用該接口的截圖:
存在 SQL 注入的返回結果,返回的內容包括 payload、數據庫類型等等。

不存在注入的返回結果
@get("/scan//log")
/@get("/scan/
該接口可查詢特定任務的掃描的日志,調用時請指定 taskid,不然會出現問題。 具體代碼如下:
def scan_log(taskid):
? ? """
? ? Retrieve the log messages
? ? """
? ? json_log_messages = list()
? ? if taskid not in DataStore.tasks:
? ? ? ? logger.warning("[%s] Invalid task ID provided to scan_log()" % taskid)
? ? ? ? return jsonize({"success": False, "message": "Invalid task ID"})
? ? # Read all log messages from the IPC database
? ? for time_, level, message in DataStore.current_db.execute("SELECT time, level, message FROM logs WHERE taskid = ? ORDER BY id ASC", (taskid,)):
? ? ? ? json_log_messages.append({"time": time_, "level": level, "message": message})
? ? logger.debug("(%s) Retrieved scan log messages" % taskid)
? ? return jsonize({"success": True, "log": json_log_messages})


def scan_log_limited(taskid, start, end):
? ? """
? ? Retrieve a subset of log messages
? ? """
? ? json_log_messages = list()
? ? if taskid not in DataStore.tasks:
? ? ? ? logger.warning("[%s] Invalid task ID provided to scan_log_limited()" % taskid)
? ? ? ? return jsonize({"success": False, "message": "Invalid task ID"})
? ? if not start.isdigit() or not end.isdigit() or end < start:
? ? ? ? logger.warning("[%s] Invalid start or end value provided to scan_log_limited()" % taskid)
? ? ? ? return jsonize({"success": False, "message": "Invalid start or end value, must be digits"})
? ? start = max(1, int(start))
? ? end = max(1, int(end))
? ? # Read a subset of log messages from the IPC database
? ? for time_, level, message in DataStore.current_db.execute("SELECT time, level, message FROM logs WHERE taskid = ? AND id >= ? AND id <= ? ORDER BY id ASC", (taskid, start, end)):
? ? ? ? json_log_messages.append({"time": time_, "level": level, "message": message})
? ? logger.debug("(%s) Retrieved scan log messages subset" % taskid)
? ? return jsonize({"success": True, "log": json_log_messages})
下圖是調用該接口的截圖:

@get("/download///")
下載服務端指定任務的文件。 具體代碼如下:
def download(taskid, target, filename):
? ? """
? ? Download a certain file from the file system
? ? """
? ? if taskid not in DataStore.tasks:
? ? ? ? logger.warning("[%s] Invalid task ID provided to download()" % taskid)
? ? ? ? return jsonize({"success": False, "message": "Invalid task ID"})
? ? path = os.path.abspath(os.path.join(paths.SQLMAP_OUTPUT_PATH, target, filename))
? ? # Prevent file path traversal
? ? if not path.startswith(paths.SQLMAP_OUTPUT_PATH):
? ? ? ? logger.warning("[%s] Forbidden path (%s)" % (taskid, target))
? ? ? ? return jsonize({"success": False, "message": "Forbidden path"})
? ? if os.path.isfile(path):
? ? ? ? logger.debug("(%s) Retrieved content of file %s" % (taskid, target))
? ? ? ? with open(path, 'rb') as inf:
? ? ? ? ? ? file_content = inf.read()
? ? ? ? return jsonize({"success": True, "file": base64encode(file_content)})
? ? else:
? ? ? ? logger.warning("[%s] File does not exist %s" % (taskid, target))
? ? ? ? return jsonize({"success": False, "message": "File does not exist"})
看完了以上的接口代碼,我相信您一定會使用了吧,那么下面就通過一個 sql 注入來演示該模式接口下檢測 sql 注入的流程。
準備
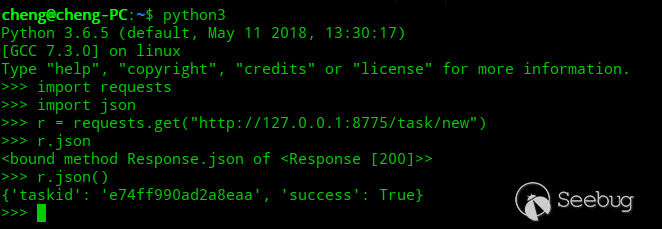
使用該模式接口需要用到 python 的兩個庫文件,一個是 requests 庫,一個是 json 庫。
下圖是導入庫的操作:
檢測 GET 型注入
下面是完整的一次 API 接口訪問,"從創建任務 ID,到發送掃描指令,再到查詢掃描狀態,最后查詢結果”的過程。

具體輸入輸出代碼如下:
>>> r = requests.get("http://127.0.0.1:8775/task/new")  創建一個新的掃描任務
>>> r.json()
{'taskid': 'c87dbb00644ed7b7', 'success': True} 獲取響應的返回內容
>>> r = requests.post('http://127.0.0.1:8775/scan/c87dbb00644ed7b7/start', data=json.dumps({'url':'http://192.168.1.104/sql-labs/Less-2/?id=1'}), headers={'Content-Type':'application/json'})  開啟一個掃描任務
>>> r = requests.get("http://127.0.0.1:8775/scan/c87dbb00644ed7b7/status")  查詢任務的掃描狀態
>>> r.json()
{'status': 'terminated', 'returncode': 0, 'success': True}
>>> r = requests.get("http://127.0.0.1:8775/scan/c87dbb00644ed7b7/data")
獲取掃描的結果
>>> r.json()
{'data': [{'status': 1, 'type': 0, 'value': {'url': 'http://192.168.1.104:80/sql-labs/Less-2/', 'query': 'id=1', 'data': None}}, {'status': 1, 'type': 1, 'value': [{'dbms': 'MySQL', 'suffix': '', 'clause': [1, 8, 9], 'notes': [], 'ptype': 1, 'dbms_version': ['>= 5.0'], 'prefix': '', 'place': 'GET', 'data': {'1': {'comment': '', 'matchRatio': 0.957, 'title': 'AND boolean-based blind - WHERE or HAVING clause', 'trueCode': 200, 'templatePayload': None, 'vector': 'AND [INFERENCE]', 'falseCode': 200, 'where': 1, 'payload': 'id=1 AND 8693=8693'}..., 'success': True, 'error': []}
可能您會被最后返回的結果好奇,ptype、suffix、clause等等都是什么意思呢? 下面我給出部分字段的含義:
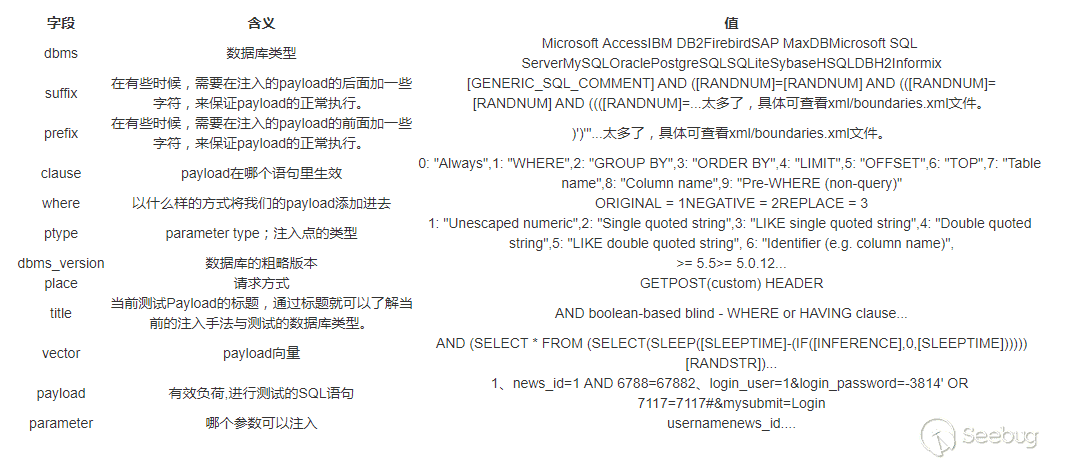
檢測 POST注入、COOKIE、UA等注入
檢測 POST 注入和檢測 GET 注入類似,但是還是有一定區別的,與 GET 注入檢測區別如下,流程上是一樣的,不同的是開啟掃描任務的時候,多提交一個 data 字段。
requests.post('http://127.0.0.1:8775/scan/cb9c4b4e4f1996b5/start', data=json.dumps({'url':'http://192.168.1.104/sql/sql/post.php','data':'keyword=1'}), headers={'Content-Type':'application/json'})下面是一次完整的 POST 注入檢測過程

具體輸入輸出代碼如下:
>>> r = requests.get("http://127.0.0.1:8775/task/new")
>>> r.json()
{'taskid': 'cb9c4b4e4f1996b5', 'success': True}
>>> r = requests.post('http://127.0.0.1:8775/scan/cb9c4b4e4f1996b5/start', data=json.dumps({'url':'http://192.168.1.104/sql/sql/post.php','data':'keyword=1'}), headers={'Content-Type':'application/json'})
>>> r.json()
{'engineid': 9682, 'success': True}
>>> r = requests.get("http://127.0.0.1:8775/scan/cb9c4b4e4f1996b5/status")
>>> r.json()
{'status': 'terminated', 'returncode': 0, 'success': True}
>>> r = requests.get("http://127.0.0.1:8775/scan/cb9c4b4e4f1996b5/data")
>>> r.json()
{'data': [{'status': 1, 'type': 0, 'value': {'url': 'http://192.168.1.104:80/sql/sql/post.php', 'query': None, 'data': 'keyword=1'}}, {'status': 1, 'type': 1, 'value': [{'dbms': 'MySQL', 'suffix': '', 'clause': [1, 8, 9], 'notes': [], 'ptype': 1, 'dbms_version': ['>= 5.0.12'], 'prefix': '', 'place': 'POST', 'os': None, 'conf': {'code': None, 'string': 'Title=FiveAourThe??', 'notString': None, 'titles': None, 'regexp': None, 'textOnly': None, 'optimize': None}, 'parameter': 'keyword', 'data': {'1': {'comment': '', 'matchRatio': 0.863, 'trueCode': 200, 'title': 'AND boolean-based blind - WHERE or HAVING clause', 'templatePayload': None, 'vector': 'AND [INFERENCE]', 'falseCode': 200, 'where': 1, 'payload': 'keyword=1 AND 3424=3424'}...], 'success': True, 'error': []}
那么如何檢測 COOKIE 注入、UA 注入這些呢?下面筆者將列出 api 接口可接收的所有字段,若要檢測 COOKIE 注入的話,我們只要在@post("/scan/<taskid>/start")接口中,傳入 cookie 字段;若要檢測 referer 注入的話,我們只要在@post("/scan/<taskid>/start")接口中,傳入 referer 字段。
若要從注入點中獲取數據庫的版本、數據庫的用戶名這些,只要在@post("/scan/<taskid>/start")接口中,傳入 getBanner 字段,并設置為 True,傳入 getUsers 字段,并設置為 True。
crawlDepth: None
osShell: False
getUsers: False
getPasswordHashes: False
excludeSysDbs: True
ignoreTimeouts: False
regData: None
fileDest: None
prefix: None
code: None
googlePage: 1
skip: None
query: None
randomAgent: False
osPwn: False
authType: None
safeUrl: None
requestFile: None
predictOutput: False
wizard: False
stopFail: False
forms: False
uChar: None
secondReq: None
taskid: 630f50607ebf91dc
pivotColumn: None
preprocess: None
dropSetCookie: False
smart: False
paramExclude: None
risk: 1
sqlFile: None
rParam: None
getCurrentUser: False
notString: None
getRoles: False
getPrivileges: False
testParameter: None
tbl: None
charset: None
trafficFile: None
osSmb: False
level: 1
dnsDomain: None
outputDir: None
skipWaf: False
timeout: 30
firstChar: None
torPort: None
getComments: False
binaryFields: None
checkTor: False
commonTables: False
direct: None
tmpPath: None
titles: False
getSchema: False
identifyWaf: False
paramDel: None
safeReqFile: None
regKey: None
murphyRate: None
limitStart: None
crawlExclude: None
flushSession: False
loadCookies: None
csvDel: ,
offline: False
method: None
tmpDir: None
fileWrite: None
disablePrecon: False
osBof: False
testSkip: None
invalidLogical: False
getCurrentDb: False
hexConvert: False
proxyFile: None
answers: None
host: None
dependencies: False
cookie: None
proxy: None
updateAll: False
regType: None
repair: False
optimize: False
limitStop: None
search: False
shLib: None
uFrom: None
noCast: False
testFilter: None
ignoreCode: None
eta: False
csrfToken: None
threads: 1
logFile: None
os: None
col: None
skipStatic: False
proxyCred: None
verbose: 1
isDba: False
encoding: None
privEsc: False
forceDns: False
getAll: False
api: True
url: http://10.20.40.95/sql-labs/Less-4/?id=1
invalidBignum: False
regexp: None
getDbs: False
freshQueries: False
uCols: None
smokeTest: False
udfInject: False
invalidString: False
tor: False
forceSSL: False
beep: False
noEscape: False
configFile: None
scope: None
authFile: None
torType: SOCKS5
regVal: None
dummy: False
checkInternet: False
safePost: None
safeFreq: None
skipUrlEncode: False
referer: None
liveTest: False
retries: 3
extensiveFp: False
dumpTable: False
getColumns: False
batch: True
purge: False
headers: None
authCred: None
osCmd: None
suffix: None
dbmsCred: None
regDel: False
chunked: False
sitemapUrl: None
timeSec: 5
msfPath: None
dumpAll: False
fileRead: None
getHostname: False
sessionFile: None
disableColoring: True
getTables: False
listTampers: False
agent: None
webRoot: None
exclude: None
lastChar: None
string: None
dbms: None
dumpWhere: None
tamper: None
ignoreRedirects: False
hpp: False
runCase: None
delay: 0
evalCode: None
cleanup: False
csrfUrl: None
secondUrl: None
getBanner: False
profile: False
regRead: False
bulkFile: None
db: None
dumpFormat: CSV
alert: None
harFile: None
nullConnection: False
user: None
parseErrors: False
getCount: False
data: None
regAdd: False
ignoreProxy: False
database: /tmp/sqlmapipc-lI97N8
mobile: False
googleDork: None
saveConfig: None
sqlShell: False
tech: BEUSTQ
textOnly: False
cookieDel: None
commonColumns: False
keepAlive: False
總結
基于 HTTP 的接口模式用起來可能比較繁瑣,但是對于程序調用接口還是很友善的。總之該模式的流程是:
1、通過GET請求 http://ip:port/task/new 這個地址,創建一個新的掃描任務;
2、通過POST請求 http://ip:port/scan/
3、掃描完成后獲取掃描的結果。
使用 Python3 編寫 sqlmapapi 調用程序
下面就來編寫一個 sqlmapapi 調用程序,首先我們得再次明確一下流程:
1、通過 sqlmapapi.py -s -H "0.0.0.0" 開啟sqlmap api的服務端。服務端啟動后,在服務端命令行中會返回一個隨機的admin token值,這個token值用于管理taskid(獲取、清空操作),在這個流程中不需要amin token這個值,可以忽略。之后,服務端會處于一個等待客戶端的狀態。
2、通過GET請求 http://ip:port/task/new 這個地址,即可創建一個新的掃描任務,在響應中會返回一個隨機的taskid。這個taskid在這個流程中尤為重要,因此需要通過變量存儲下來,方便后面程序的調用。
3、通過POST請求 http://ip:port/scan/
4、通過GET請求 http://ip:port/scan/
5、判斷掃描狀態,如果掃描未完成,再次請求 http://ip:port/scan/
6、掃描完成后獲取掃描的結果,是否是SQL注入,若不存在SQL注入,data字段為空,若存在SQL注入,則會返回數據庫類型、payload等等。
明確了流程后,為了可維護性好和 main.py 文件代碼量少,筆者首先是寫了一個類,代碼如下:
#!/usr/bin/python
# -*- coding:utf-8 -*-
# wirter:En_dust
import requests
import json
import time

class Client():
    def __init__(self,server_ip,server_port,admin_token="",taskid="",filepath=None):
        self.server = "http://" + server_ip + ":" + server_port
        self.admin_token = admin_token
        self.taskid = taskid
        self.filepath = ""
        self.status = ""
        self.scan_start_time = ""
        self.scan_end_time = ""
        self.engineid=""
        self.headers = {'Content-Type': 'application/json'}


    def create_new_task(self):
        '''創建一個新的任務,創建成功返回taskid'''
        r = requests.get("%s/task/new"%(self.server))
        self.taskid = r.json()['taskid']
        if self.taskid != "":
            return self.taskid
        else:
            print("創建任務失敗!")
            return None

    def set_task_options(self,url):
        '''設置任務掃描的url等'''
        self.filepath = url


    def start_target_scan(self,url):
        '''開始掃描的方法,成功開啟掃描返回True,開始掃描失敗返回False'''
        r = requests.post(self.server + '/scan/' + self.taskid + '/start',
                      data=json.dumps({'url':url,'getCurrentUser':True,'getBanner':True,'getCurrentDb':True}),
                      headers=self.headers)
        if r.json()['success']:
            self.scan_start_time = time.time()
            #print(r.json())
            #print(r.json()['engineid'])
            return r.json()['engineid']
        else:
            #print(r.json())
            return None

    def get_scan_status(self):
        '''獲取掃描狀態的方法,掃描完成返回True,正在掃描返回False'''
        self.status = json.loads(requests.get(self.server + '/scan/' + self.taskid + '/status').text)['status']
        if self.status == 'terminated':
            self.scan_end_time = time.time()
            #print("掃描完成!")
            return True
        elif self.status == 'running':
            #print("Running")
            return False
        else:
            #print("未知錯誤!")
            self.status = False


    def get_result(self):
        '''獲取掃描結果的方法,存在SQL注入返回payload和注入類型等,不存在SQL注入返回空'''
        if(self.status):
            r = requests.get(self.server + '/scan/' + self.taskid + '/data')
            if (r.json()['data']):
                return r.json()['data']
            else:
                return None

    def get_all_task_list(self):
        '''獲取所有任務列表'''
        r = requests.get(self.server + '/admin/' + self.admin_token + "/list")
        if r.json()['success']:
            #print(r.json()['tasks'])
            return r.json()['tasks']
        else:
            return None

    def del_a_task(self,taskid):
        '''刪除一個任務'''
        r = requests.get(self.server + '/task/' + taskid + '/delete')
        if r.json()['success']:
            return True
        else:
            return False

    def stop_a_scan(self,taskid):
        '''停止一個掃描任務'''
        r = requests.get(self.server + '/scan/' + taskid + '/stop')
        if r.json()['success']:
            return True
        else:
            return False

    def flush_all_tasks(self):
        '''清空所有任務'''
        r =requests.get(self.server + '/admin/' + self.admin_token + "/flush")
        if r.json()['success']:
            return True
        else:
            return False

    def get_scan_log(self):
        '''獲取log'''
        r = requests.get(self.server + '/scan/' + self.taskid + '/log')
        return r.json()
main.py
#!/usr/bin/python
# -*- coding:utf-8 -*-
# wirter:En_dust
from Service import Client
import time
from threading import Thread

def main():
    '''實例化Client對象時需要傳遞sqlmap api 服務端的ip、port、admin_token和HTTP包的絕對路徑'''
    print("————————————————Start Working!—————————————————")
    target = input("url:")
    task1 = Thread(target=set_start_get_result,args=(target,))
    task1.start()


def time_deal(mytime):
     first_deal_time = time.localtime(mytime)
     second_deal_time = time.strftime("%Y-%m-%d %H:%M:%S", first_deal_time)
     return  second_deal_time


def set_start_get_result(url):
    #/home/cheng/Desktop/sqldump/1.txt
    current_taskid =  my_scan.create_new_task()
    print("taskid: " + str(current_taskid))
    my_scan.set_task_options(url=url)
    print("掃描id:" + str(my_scan.start_target_scan(url=url)))
    print("掃描開始時間:" + str(time_deal(my_scan.scan_start_time)))
    while True:
        if my_scan.get_scan_status() == True:
            print(my_scan.get_result())
            print("當前數據庫:" + str(my_scan.get_result()[-1]['value']))
            print("當前數據庫用戶名:" + str(my_scan.get_result()[-2]['value']))
            print("數據庫版本:" + str(my_scan.get_result()[-3]['value']))
            print("掃描結束時間:" + str(time_deal(my_scan.scan_end_time)))
            print("掃描日志:\n" + str(my_scan.get_scan_log()))
            break


if __name__ == '__main__':
    my_scan = Client("127.0.0.1", "8775", "c88927c30abb1ef6ea78cb81ac7ac6b0")
    main()
Github 地址:https://github.com/FiveAourThe/sqlmap_api_demo
 本文由 Seebug Paper 發布,如需轉載請注明來源。本文地址:http://www.bjnorthway.com/940/
暫無評論