
作者:w7ay@知道創宇404實驗室
English version: http://www.bjnorthway.com/914/
相關閱讀:如何打造自己的PoC框架-Pocsuite3-使用篇
本節筆者將按照Pocsuite框架結構以及工程化實踐,來實現一款自己的PoC框架。為了開一個好頭,我們先取一個好聽的名字,想威武霸氣一些可以取上古神器之類的,諸如軒轅夏禹赤霄干將,若懷著對游戲的熱愛也可以有山丘之王(Mountain King)劍圣(BladeMaster)月之女神(Priess Of the moon)。由于筆者比較懶,我們就取一個樸素的名字:AirPoc,中文名叫它"空氣炮"吧。
名稱取好了,我們還要幻想一下大餅。這里請充分發揮想象力,幻想它的功能,你要記住,沒有我們實現不了的功能,如果有,打死產品manager即可。
這里不妨開下腦洞,為了組建兔子安全聯盟,我們計劃開發一款基于區塊鏈的PoC驗證框架AirPoc,限定只對"兔子安全聯盟”范圍內的網站進行安全檢查,由一個AirPoc節點檢查出了存在漏洞的地址,將URL和PoC共享到區塊中,再由隨機的其他節點驗證,驗證成功則獲得"空氣幣",而被檢測到的網站所有者則需要支付"空氣幣"作為報酬。
雖然只是暫時的幻想,但是產品小哥哥也略帶激動整理出了我們需要的功能。
- 使用簡單,不要有太多的命令,可以跨平臺使用
- 人多力量大,能讓更多人參與進來的
- 能簡單操作就能內置到其他產品上
- 驗證速度與驗證準確率極高!
- 我也不知道什么好,總之你跑起來能出東西就行!
當然,這位產品小哥哥可能怕被打,沒有將分布式,區塊鏈的概念加入進來。
具體細節
下面就由筆者來具體實現由筆者兼職的產品manager隨便一想(挖坑)的東西。我們逐一分析問題,并給出最后的解決方案。
說到使用簡單,我們就任性的選擇使用Python了,不信你看看Python之父的頭發。在安裝了Python之后,也可以一份代碼多處使用,但為了足夠的簡單與原生,我們決定盡量少使用Python的第三方包。而目前Python最新版為3.7,我們就以此為例。
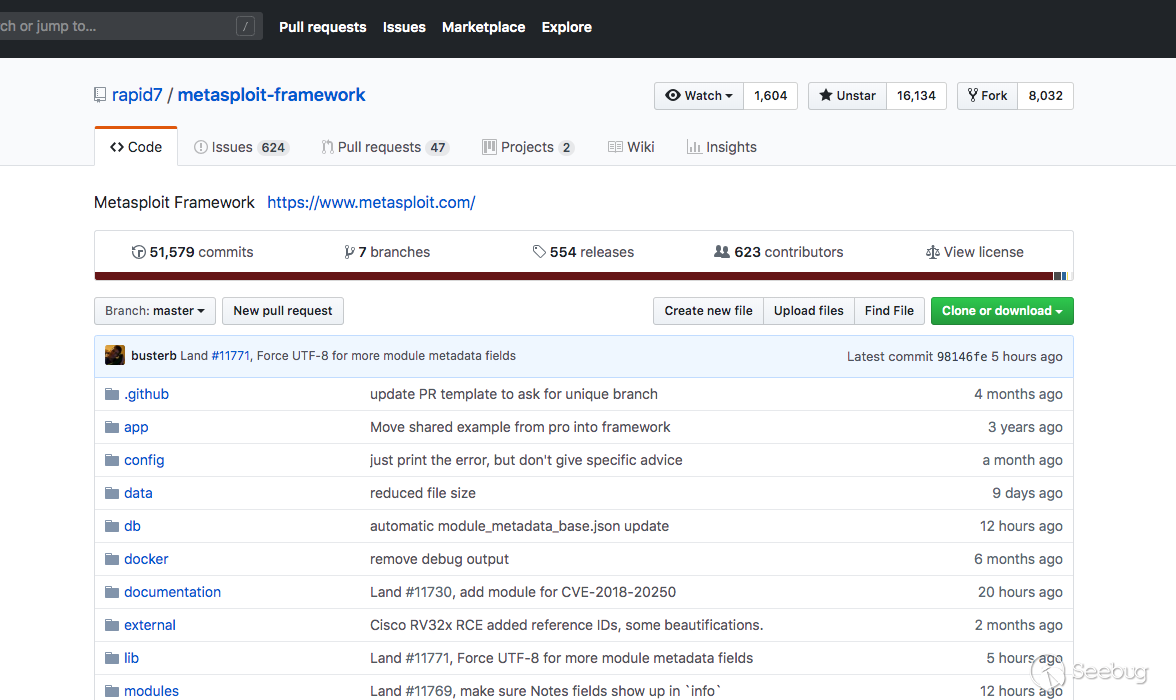
國外的眾多開源安全項目都有不少人參與,像Metasploit
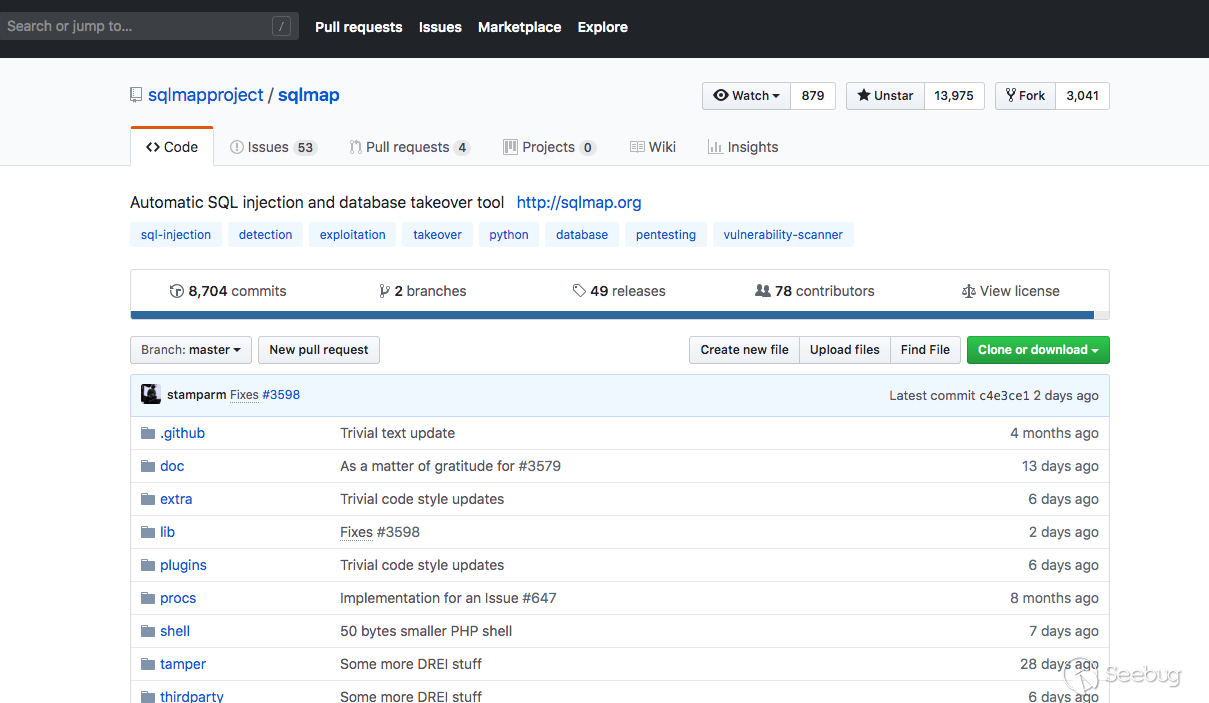
Sqlmap
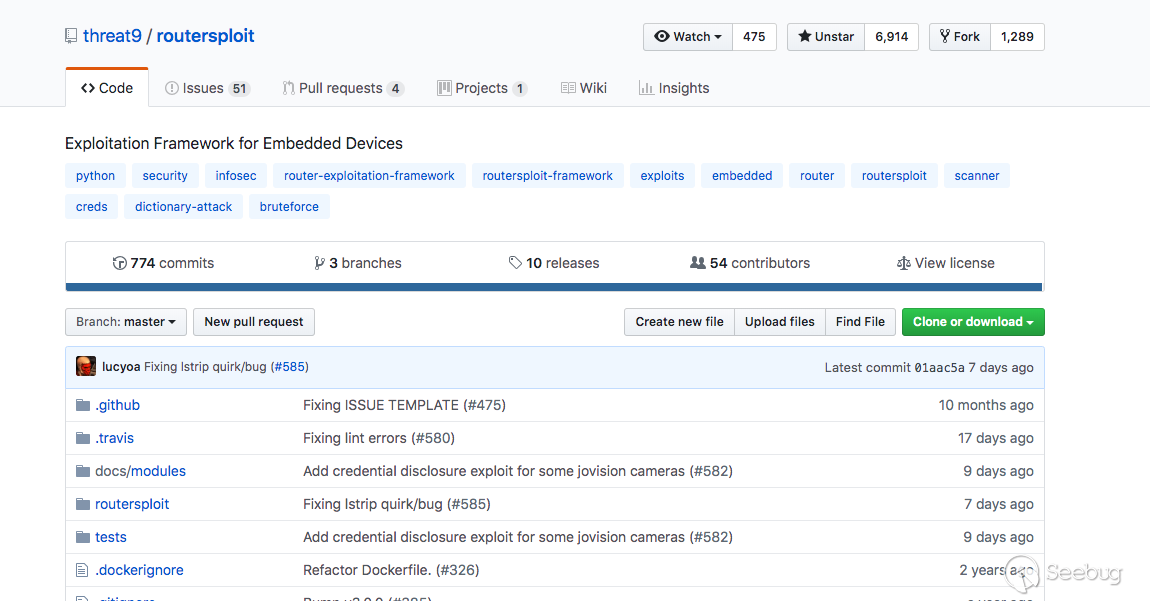
Routersploit
能貢獻一份代碼到上面可能是安全研究人員最想做的事情吧。
所以筆者有個想法是AirPoc的PoC倉庫可以開源到GitHub,并且能夠在線調用上面的PoC,這樣也不會為了PoC的更新而煩惱了。
內置到其他產品也更是容易,如果是Python類的軟件,可以直接把AirPoc當做包來調用,如果其他軟件,AirPoc可以開放一個RPC接口提供使用,如果不想要Python的環境,也可以通過pyinstaller之類的工具打包,我們的設計原則是盡量不依賴其他第三方庫,所以也會避免很多奇奇怪怪的問題。
想要實現驗證速度與驗證準確率極高,我們要做好多線程或協程的并發模型,這里我們會在后面在詳細敘述。
最后,"我也不知道什么好,總之你跑起來能出東西就行!",如果上面的事情我們都做好了,這個應該就是水到渠成的了~
AirPoc的框架

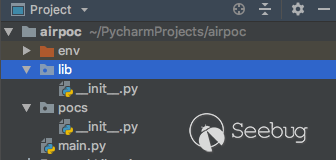
在完成這個"宏偉計劃"之前,我們也需要設計一下整體的代碼框架。作為一名代碼潔癖患者,一個良好的代碼結構,是萬里長征的第一步。我們建立如下的目錄結構,env是虛擬環境,建立兩個目錄lib、pocs,lib用于存儲之后的相關核心文件,pocs用于存儲poc文件,和一個文件main.py用作初始入口。
就像蓋大樓需要打好地基,接下來完成基礎框架,我們可以先不用寫具體的功能,但是了解作為"地基"的函數的意義。如下,在main.py文件中如下代碼,一個初始的框架就完成了。
import os
import time

def banner():
    msg = '''
         ___   _   _____    _____   _____   _____
    /   | | | |  _  \  |  _  \ /  _  \ /  ___|
   / /| | | | | |_| |  | |_| | | | | | | |
  / / | | | | |  _  /  |  ___/ | | | | | |
 / /  | | | | | | \ \  | |     | |_| | | |___
/_/   |_| |_| |_|  \_\ |_|     \_____/ \_____|   {}
    '''.format(version)
    print(msg)


def init(config: dict):
    print("[*] target:{}".format(config["url"]))


def end():
    print("[*] shutting down at {0}".format(time.strftime("%X")))


def start():
    pass


def main():
    banner()
    config = {
        "url": "https://www.seebug.org/"
    }
    init(config)
    start()
    end()


if __name__ == '__main__':
    version = "v0.00000001"
    main()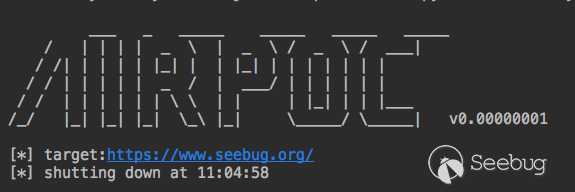
但是,正如你所見,版本號和我的比特幣錢包的數字竟然差不多,我們還要給它加些料。
單例模式
在我們軟件的初始化的工程中,我們需要得到很多環境相關的信息。比如當前執行的路徑是哪?poc目錄在哪?我們輸出結果文件輸出到哪個路徑等等。
它們有一個共同的特定是,它們只需要加載一次,在后面使用中直接拿來用就行了。這種模式在軟件設計模式中有一個單獨的名詞,"單例模式"。
幸運的是python的模塊就是天然的單例模式,因為模塊在第一次導入時,會生成 .pyc 文件,當第二次導入時,就會直接加載 .pyc 文件,而不會再次執行模塊代碼。因此,我們只需把相關的函數和數據定義在一個模塊中,就可以獲得一個單例對象了。
我們在lib目錄里面新建一個data.py用于存儲這些信息。同時將版本信息也放到這里來。
import os

PATHS_ROOT = os.path.join(os.path.dirname(os.path.realpath(__file__)), "../")
PATHS_POCS = os.path.join(PATHS_ROOT, "pocs")
PATHS_OUTPUT = os.path.join(PATHS_ROOT, "output")
VERSION = "v0.0000001"
為了更好的來表示這些常量,我們用PEP8標準里的規范,統一約定用大寫和下劃線來表示常量。為了說明與之前的區別,我們象征性的將VERSION減一個0,來表達我們的比特幣又增長了10倍。
動態加載
在解決完我們相關的環境問題后,我們在看看如何動態加載模塊。在具體細節里我們說過,我們期望PoC能夠從本地或者遠程網站(如GitHub)上加載。
這里又得分成兩種情況,如果是通過文件路徑加載動態加載的模塊,可以直接用__import__()來加載,但是如果要遠程加載,可能就又會復雜一點,根據python的相關文檔,我們要自己實現"查找器"與"加載器" https://docs.python.org/zh-cn/3/reference/import.html。
當然,你也可以從遠程保存到本地后,按照本地加載模式進行加載。但是Pocsuite已經有完整的加載器代碼了,我們可以直接拿來用。
新建lib/loader.py文件
import hashlib
import importlib
from importlib.abc import Loader


def get_md5(value):
    if isinstance(value, str):
        value = value.encode(encoding='UTF-8')
    return hashlib.md5(value).hexdigest()


def load_string_to_module(code_string, fullname=None):
    try:
        module_name = 'pocs_{0}'.format(get_md5(code_string)) if fullname is None else fullname
        file_path = 'airpoc://{0}'.format(module_name)
        poc_loader = PocLoader(module_name, file_path)
        poc_loader.set_data(code_string)
        spec = importlib.util.spec_from_file_location(module_name, file_path, loader=poc_loader)
        mod = importlib.util.module_from_spec(spec)
        spec.loader.exec_module(mod)
        return mod

    except ImportError:
        error_msg = "load module '{0}' failed!".format(fullname)
        print(error_msg)
        raise


class PocLoader(Loader):
    def __init__(self, fullname, path):
        self.fullname = fullname
        self.path = path
        self.data = None

    def set_data(self, data):
        self.data = data

    def get_filename(self, fullname):
        return self.path

    def get_data(self, filename):
        if filename.startswith('airpoc://') and self.data:
            data = self.data
        else:
            with open(filename, encoding='utf-8') as f:
                data = f.read()
        return data

    def exec_module(self, module):
        filename = self.get_filename(self.fullname)
        poc_code = self.get_data(filename)
        obj = compile(poc_code, filename, 'exec', dont_inherit=True, optimize=-1)
exec(obj, module.__dict__)具體如何實現的我們可以不用關心,我們只需要知道,其中我們可以用load_string_to_module來從源碼中加載模塊了。如果你有興趣了解具體的實現,可以參考上面的python官方文檔。
規則的制定
從文件或者遠程加載好模塊后,就可以準備運行的相關事宜了。我們需要對PoC做一個規則的統一約定,讓程序更好的調用它們。
你可以將規則定義的詳細,也可以一切從簡,主要是看使用場景。而前面也提到,為了保護"安全聯盟"的安全問題,所以我們需要PoC更夠比較簡單的快速編寫。
同時我們還需要考慮如果PoC需要多個參數如何處理?筆者的規則是這樣定義的。
def verify(arg, **kwargs):
    result = {}
    if requests.get(arg).status_code == 200:
        result = {
        "name":"漏洞名稱",
        "url":arg
      }
return result在PoC文件中定義一個verify函數用作驗證使用,arg作為普通的參數傳遞,當需要傳遞較多的參數時,從kwargs中接收。在PoC驗證成功后,也只需要返回一個字典即可,如果驗證失敗,返回False或None即可。字典內容由PoC編寫者制定,給予編寫者最大的靈活空間。
但是注意!PoC的質量就需要依靠編寫者的維護。
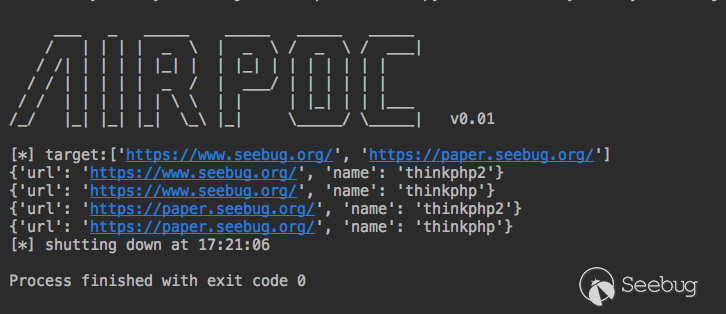
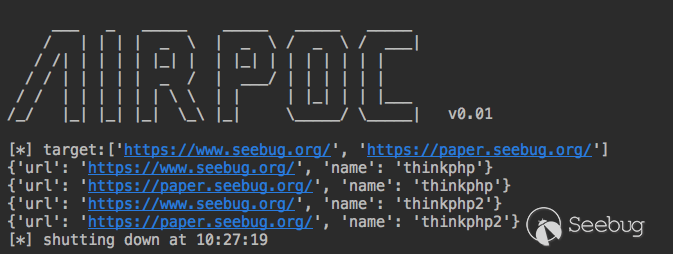
V0.01
我們最終要實現的目標是,設置好目標,程序自動加載指定的一個或多個PoC或全部的PoC,逐個檢測目標。剩下的部分就是怎樣將這些功能串聯在一起了。
前面我們已經實現了AirPoc的基礎框架,現在只需要在其基礎上具體實現功能即可。
為了測試的方便,我們先在pocs目錄下按照之前定義的規則建立兩個簡陋的PoC。
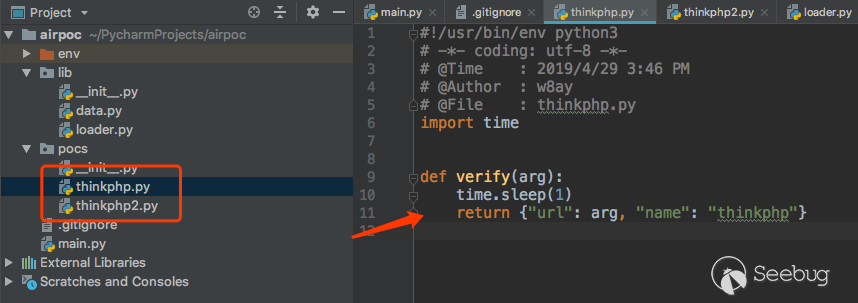
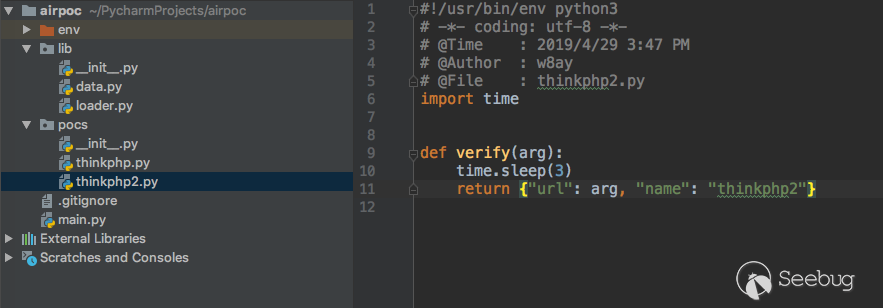
現在,main.py中的代碼如下
#!/usr/bin/env python3
# -*- coding: utf-8 -*-
# @Time : 2019/4/25 3:13 PM
# @Author : w7ay
# @File : main.py
import os
import time
from lib.data import VERSION, PATHS_POCS, POCS
from lib.loader import load_string_to_module
def banner():
msg = '''
___ _ _____ _____ _____ _____
/ | | | | _ \ | _ \ / _ \ / ___|
/ /| | | | | |_| | | |_| | | | | | | |
/ / | | | | | _ / | ___/ | | | | | |
/ / | | | | | | \ \ | | | |_| | | |___
/_/ |_| |_| |_| \_\ |_| \_____/ \_____| {}
'''.format(VERSION)
print(msg)
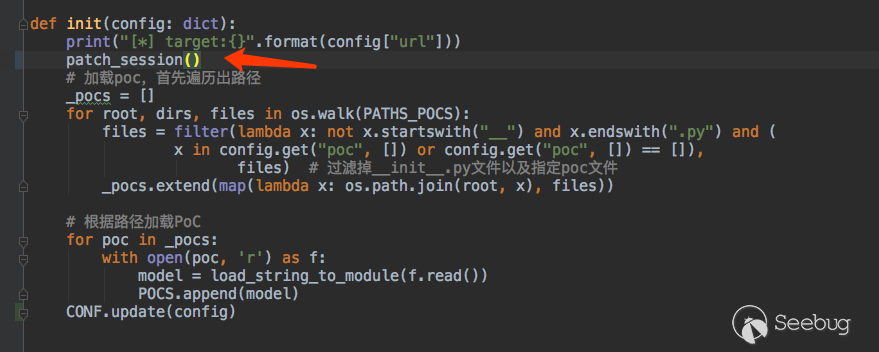
def init(config: dict):
print("[*] target:{}".format(config["url"]))
# 加載poc,首先遍歷出路徑
_pocs = []
for root, dirs, files in os.walk(PATHS_POCS):
files = filter(lambda x: not x.startswith("__") and x.endswith(".py") and x not in config.get("poc", []),
files) # 過濾掉__init__.py文件以及指定poc文件
_pocs.extend(map(lambda x: os.path.join(root, x), files))
# 根據路徑加載PoC
for poc in _pocs:
with open(poc, 'r') as f:
model = load_string_to_module(f.read())
POCS.append(model)
def end():
print("[*] shutting down at {0}".format(time.strftime("%X")))
def start(config: dict):
url_list = config.get("url", [])
# 循環url_list與pocs,逐一對應執行。
for i in url_list:
for poc in POCS:
try:
ret = poc.verify(i)
except Exception as e:
ret = None
print(e)
if ret:
print(ret)
def main():
banner()
config = {
"url": ["https://www.seebug.org/", "http://www.bjnorthway.com/"],
"poc": []
}
init(config)
start(config)
end()
if __name__ == '__main__':
main()我們的版本也來到了0.01,它已經是一個"成熟的”能自己跑PoC的框架了。
多線程模型
為了讓我們的框架運行得更快一點,我們使用多線程來處理每個PoC,因為我們處理的任務大多是I/O密集型任務,所以我們也不用太糾結python是不是偽線程這個問題。
多線程模型中最簡單的一種是生產者/消費者的模型,啟動多個線程來共同消費一個隊列就行了。新建lib/threads.py
import threading
import time


def exception_handled_function(thread_function, args=()):
    try:
        thread_function(*args)
    except KeyboardInterrupt:
        raise
    except Exception as ex:
        print("thread {0}: {1}".format(threading.currentThread().getName(), str(ex)))


def run_threads(num_threads, thread_function, args: tuple = ()):
    threads = []

    # 啟動多個線程
    for num_threads in range(num_threads):
        thread = threading.Thread(target=exception_handled_function, name=str(num_threads),
                                  args=(thread_function, args))
        thread.setDaemon(True)
        try:
            thread.start()
        except Exception as ex:
            err_msg = "error occurred while starting new thread ('{0}')".format(str(ex))
            print(err_msg)
            break

        threads.append(thread)

    # 等待所有線程完畢
    alive = True
    while alive:
        alive = False
        for thread in threads:
            if thread.isAlive():
                alive = True
time.sleep(0.1)值得注意的一點是,我們并沒有使用Python線程中推薦的join()來阻塞線程,因為使用join()的話,python將無法響應用戶輸入的消息了,會導致Ctrl+C退出時沒有任何響應,所以以while循環的方式來阻塞線程。
接著將主程序改造成多線程的模式,將原start()中的"消費者"提取出來,單獨用作一個函數,用隊列接收數據即可。如下
def worker():
    if not WORKER.empty():
        arg, poc = WORKER.get()
        try:
            ret = poc.verify(arg)
        except Exception as e:
            ret = None
            print(e)
        if ret:
            print(ret)


def start(config: dict):
    url_list = config.get("url", [])

    # 生產
    for arg in url_list:
        for poc in POCS:
            WORKER.put((arg, poc))

    # 消費
    run_threads(10, worker)
另外,線程數量是我們可配置的,我們將它改成從配置中讀取。
run_threads(config.get("thread_num", 10), worker)再次運行,會發現比以前快很多!
統一網絡請求
這是我們整個框架的最后一個部分,如何來統一網絡請求。有時我們需要讓我們的PoC框架發出的網絡請求中統一一下代理,UA頭等等的設置,這需要我們框架進行統一的處理。在實現我們的目的之前,我們還需要在框架里做一個約定,約定我們的網絡請求都需要統一使用requests來進行發包。開始時我們說到,我們會盡量不使用第三方模塊,但是requests模塊實在太好用了,我們將它排除在外...
Python語言動態的機制,我們可以很容易在使用一個函數之前Hook它,將它原始的方法重定向到我們自定義的方法中,這是我們能夠統一網絡請求的一個前提。
def hello(arg):
    return "hello " + arg


def hook(arg):
    arg = arg.upper()
    return "hello " + arg


hello = hook

print(hello("aa"))
通過hook一個函數來達到我們自己的目的。
像sqlmap這類工具,基于python內置的urllib模塊,但是有大量的代碼都在處理在了網絡請求方面,甚至為了處理chunked發包的問題,hook重寫了更底層的httplib庫。
pocsuite為了統一調度網絡請求,hook了requests模塊的相關方法。我們可以具體參考其中的代碼。
pocsuite3/lib/request/patch/__init__.py代碼很清晰的說明了hook的函數
from .remove_ssl_verify import remove_ssl_verify
from .remove_warnings import disable_warnings
from .hook_request import patch_session
from .add_httpraw import patch_addraw
from .hook_request_redirect import patch_redirect

def patch_all():
    disable_warnings() # 禁用了warning提示
    remove_ssl_verify() # 禁用ssl驗證
    patch_session() # hook seesion函數
    patch_addraw() # 添加raw原生發包支持
    patch_redirect() # hook 重定向函數
如果你看過requests的源碼,會知道這里面的重點是看它如何hook seesion函數的。
pocsuite3/lib/request/patch/hook_request.py
from pocsuite3.lib.core.data import conf
from requests.models import Request
from requests.sessions import Session
from requests.sessions import merge_setting, merge_cookies
from requests.cookies import RequestsCookieJar
from requests.utils import get_encodings_from_content


def session_request(self, method, url,
                    params=None, data=None, headers=None, cookies=None, files=None, auth=None,
                    timeout=conf.timeout if 'timeout' in conf else None,
                    allow_redirects=True, proxies=None, hooks=None, stream=None, verify=False, cert=None, json=None):
    # Create the Request
    merged_cookies = merge_cookies(merge_cookies(RequestsCookieJar(), self.cookies),
                                   cookies or (conf.cookie if 'cookie' in conf else None))

    req = Request(
        method=method.upper(),
        url=url,
        headers=merge_setting(headers, conf.http_headers if 'http_headers' in conf else {}),
        files=files,
        data=data or {},
        json=json,
        params=params or {},
        auth=auth,
        cookies=merged_cookies,
        hooks=hooks,
    )
    prep = self.prepare_request(req)

    proxies = proxies or (conf.proxies if 'proxies' in conf else {})

    settings = self.merge_environment_settings(
        prep.url, proxies, stream, verify, cert
    )

    # Send the request.
    send_kwargs = {
        'timeout': timeout,
        'allow_redirects': allow_redirects,
    }
    send_kwargs.update(settings)
    resp = self.send(prep, **send_kwargs)

    if resp.encoding == 'ISO-8859-1':
        encodings = get_encodings_from_content(resp.text)
        if encodings:
            encoding = encodings[0]
        else:
            encoding = resp.apparent_encoding

        resp.encoding = encoding

    return resp


def patch_session():
Session.request = session_request它重寫了session_request函數的方法,讓其中可以自定義我們自定義的文件頭等信息。上述代碼可能需要你看過requests才會對他有所理解,不過沒關系,我們還是以拿來主義的精神直接用即可。
為了達到此目的以及更好的優化框架結構,我們還需要做一些小調整。
新建lib/requests.py
from lib.data import CONF
from requests.models import Request
from requests.sessions import Session
from requests.sessions import merge_setting, merge_cookies
from requests.cookies import RequestsCookieJar
from requests.utils import get_encodings_from_content


def session_request(self, method, url,
                    params=None, data=None, headers=None, cookies=None, files=None, auth=None,
                    timeout=None,
                    allow_redirects=True, proxies=None, hooks=None, stream=None, verify=False, cert=None, json=None):
    # Create the Request.
    conf = CONF.get("requests", {})
    if timeout is None and "timeout" in conf:
        timeout = conf["timeout"]
    merged_cookies = merge_cookies(merge_cookies(RequestsCookieJar(), self.cookies),
                                   cookies or (conf.cookie if 'cookie' in conf else None))

    req = Request(
        method=method.upper(),
        url=url,
        headers=merge_setting(headers, conf["headers"] if 'headers' in conf else {}),
        files=files,
        data=data or {},
        json=json,
        params=params or {},
        auth=auth,
        cookies=merged_cookies,
        hooks=hooks,
    )
    prep = self.prepare_request(req)

    proxies = proxies or (conf["proxies"] if 'proxies' in conf else {})

    settings = self.merge_environment_settings(
        prep.url, proxies, stream, verify, cert
    )

    # Send the request.
    send_kwargs = {
        'timeout': timeout,
        'allow_redirects': allow_redirects,
    }
    send_kwargs.update(settings)
    resp = self.send(prep, **send_kwargs)

    if resp.encoding == 'ISO-8859-1':
        encodings = get_encodings_from_content(resp.text)
        if encodings:
            encoding = encodings[0]
        else:
            encoding = resp.apparent_encoding

        resp.encoding = encoding

    return resp


def patch_session():
    Session.request = session_request
同時在config中預留requests的接口
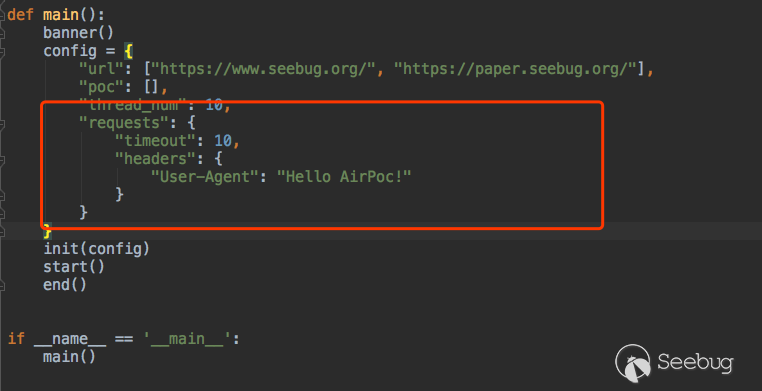
以及init的時候執行我們的hook。
我們新編寫一個PoC,用這個網站測試一下 最后的效果 http://www.httpbin.org/get
pocs/poc.py
import requests


def verify(arg, **kwargs):
    r = requests.get(arg)
    if r.status_code == 200:
        return {"url": arg, "text": r.text}
效果很好,但是如果加上https的網站,就有一個警告信息。

同樣參考Pocsuite的方法禁用掉warning信息
from urllib3 import disable_warnings
disable_warnings()最后有儀式感的將版本號變更為0.1,AirPoc的框架部分大體完成了。
最后
AirPoc的很多結構思想都來源于Pocsuite,如果直接閱讀Pocsuite,也許能收獲很多東西。目前AirPoc v0.1基礎框架已經差不多完成了,已經可以從本地加載一個或多個PoC,進行批量測試。后面我們再嘗試些更好玩的,如何驗證無回顯的情況,如何生成shellcode,以及如何操作回連的shell,敬請期待下節《功能篇》~。
AirPoc下載:https://images.seebug.org/archive/airpoc.zip
 本文由 Seebug Paper 發布,如需轉載請注明來源。本文地址:http://www.bjnorthway.com/913/